
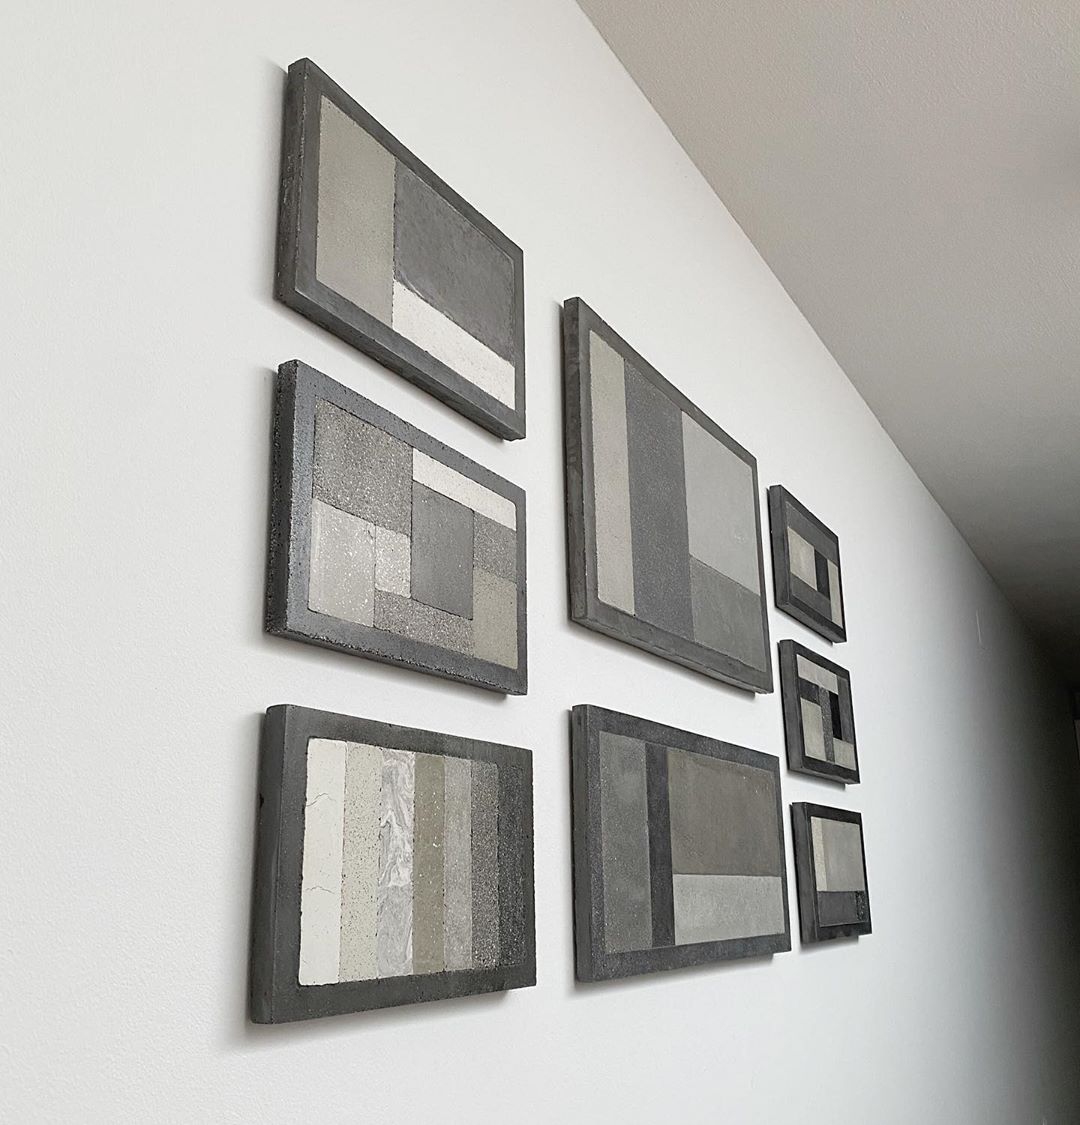
Concrete Paintings
Concrete painting is something you don’t hear about a lot. It’s a term I invented for describing the unique art pieces that I create.
In this post I portray the creative process behind them, from idea to finish.

These paintings are composed of concrete tiles in various rectangular shapes, assembled together in a way that resembles the elements of an abstract painting.
Frame and design
I always start by creating the painting’s frame. I draw the outline on a melamine board. Melamine is shredded wood laminated with plastic, which is usually used for furniture. It’s suitable because it doesn’t absorb water (and because of that, doesn’t bend).
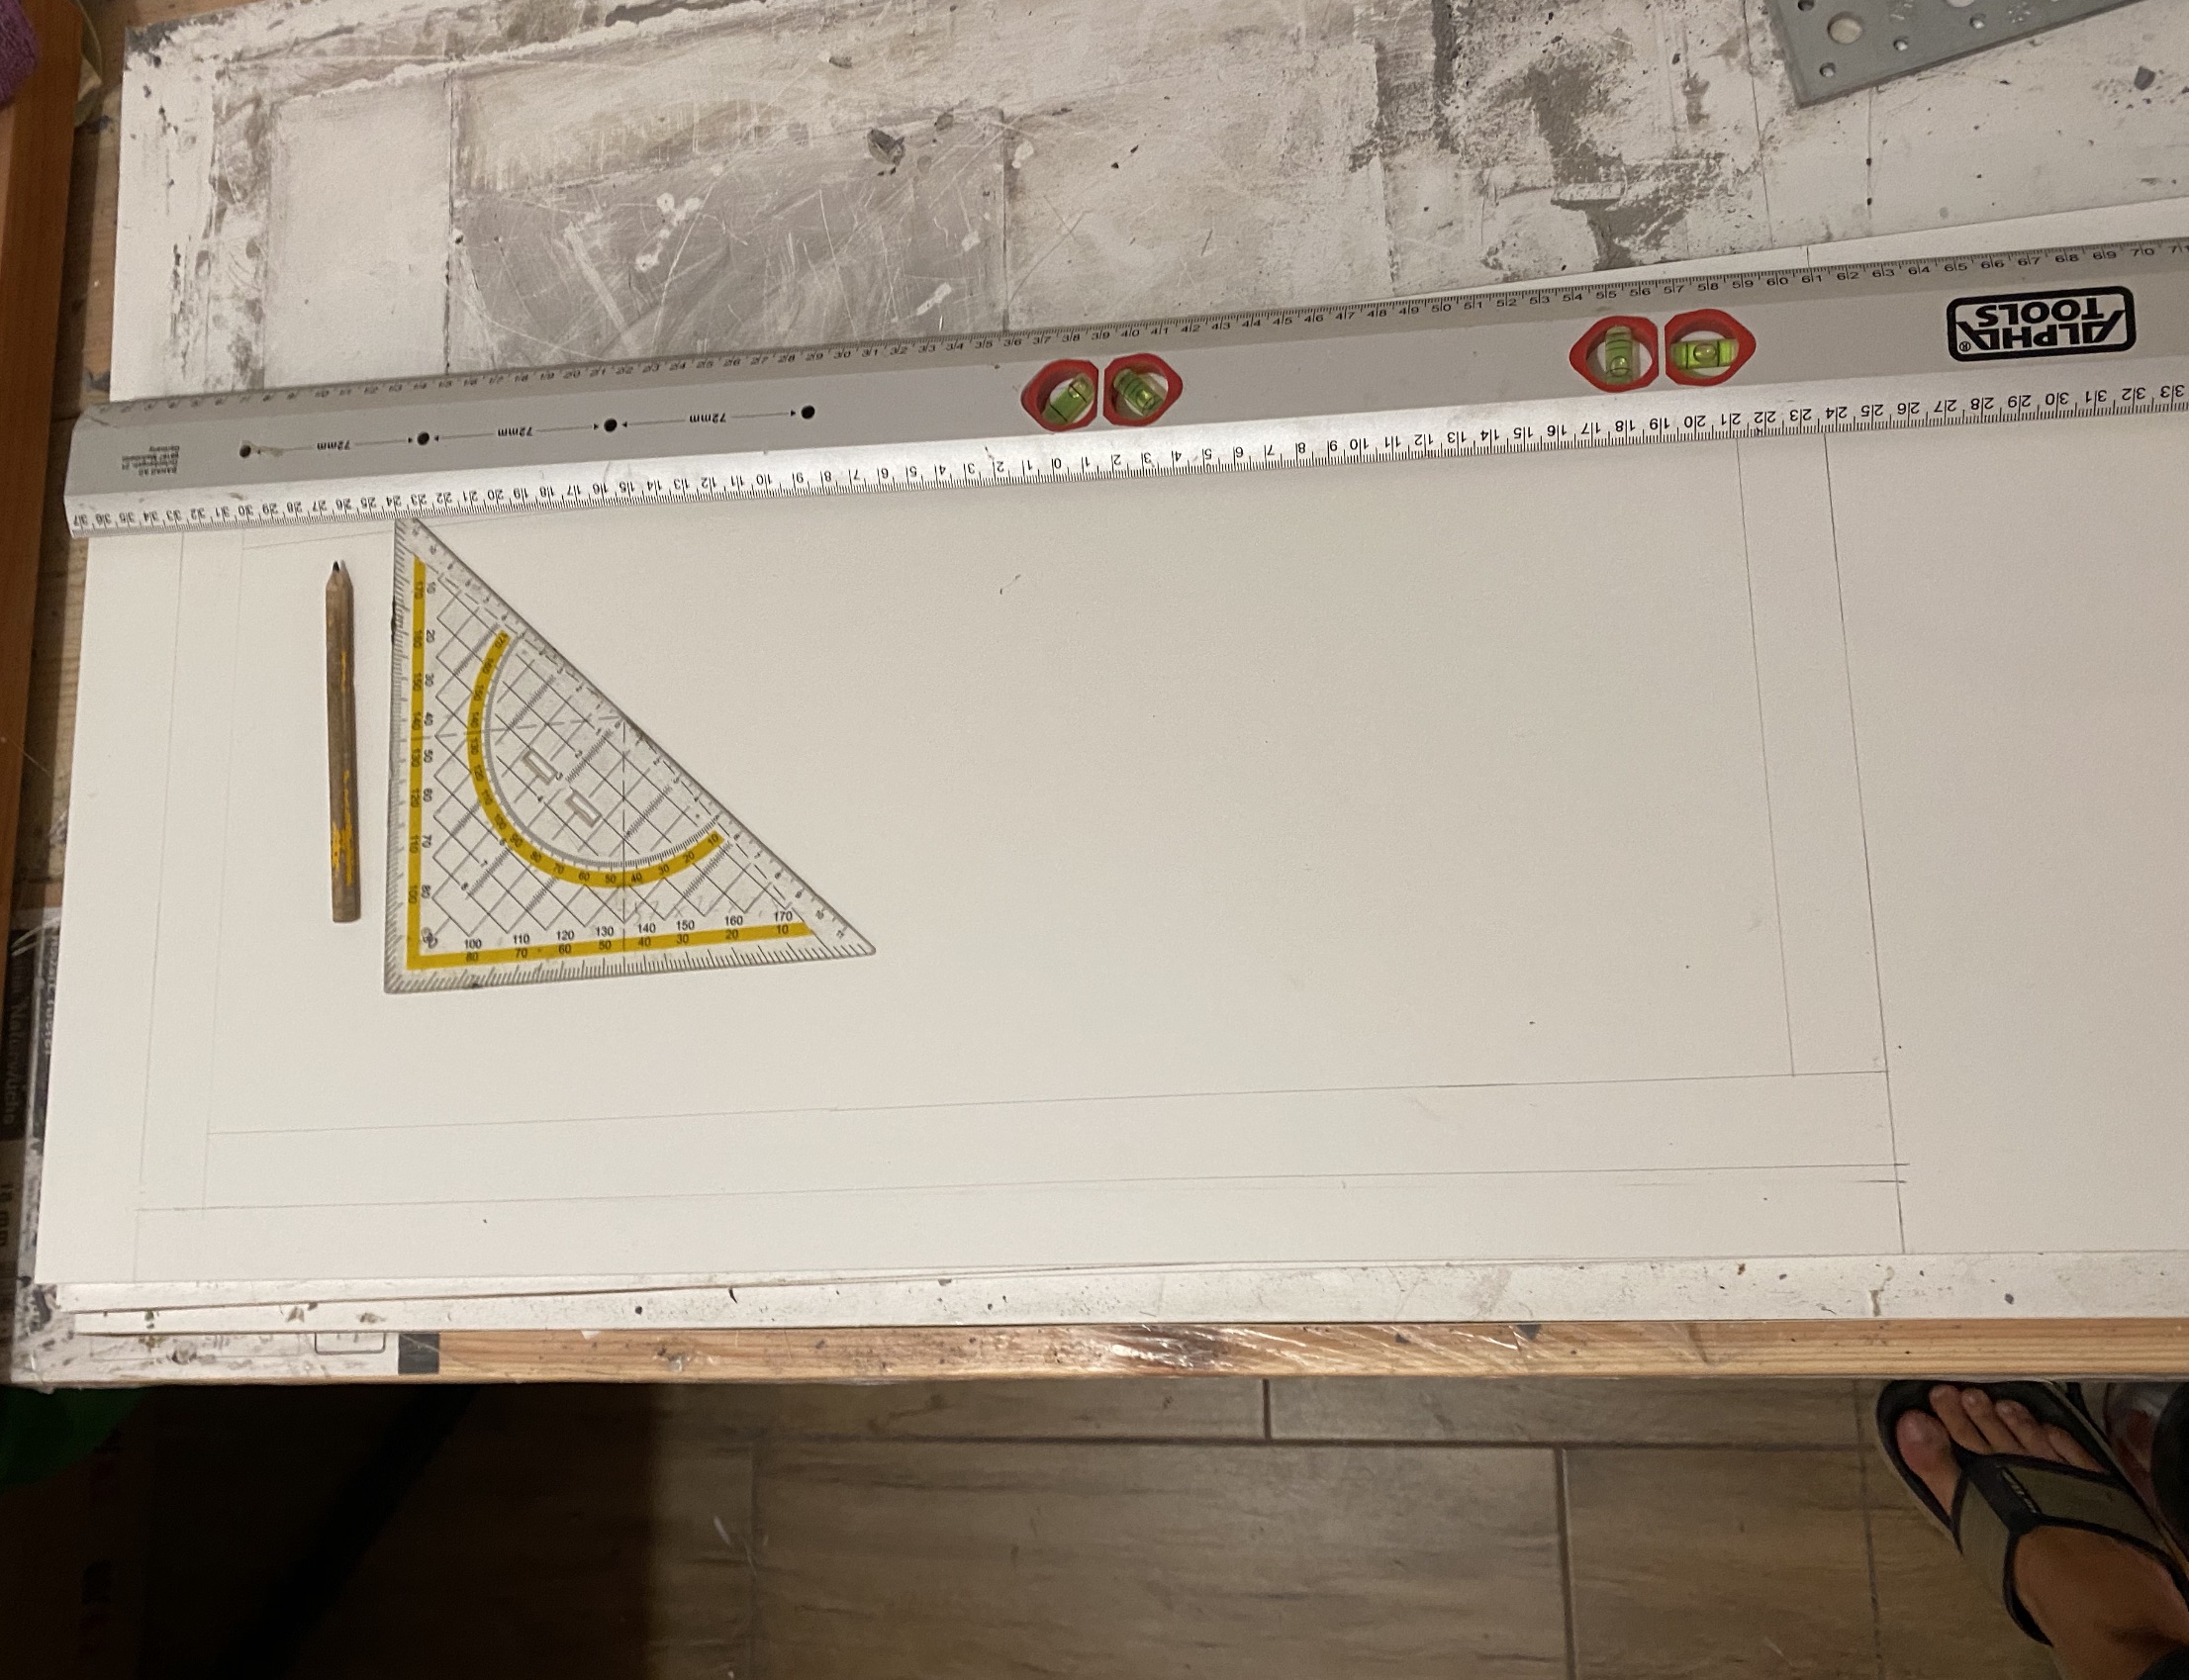
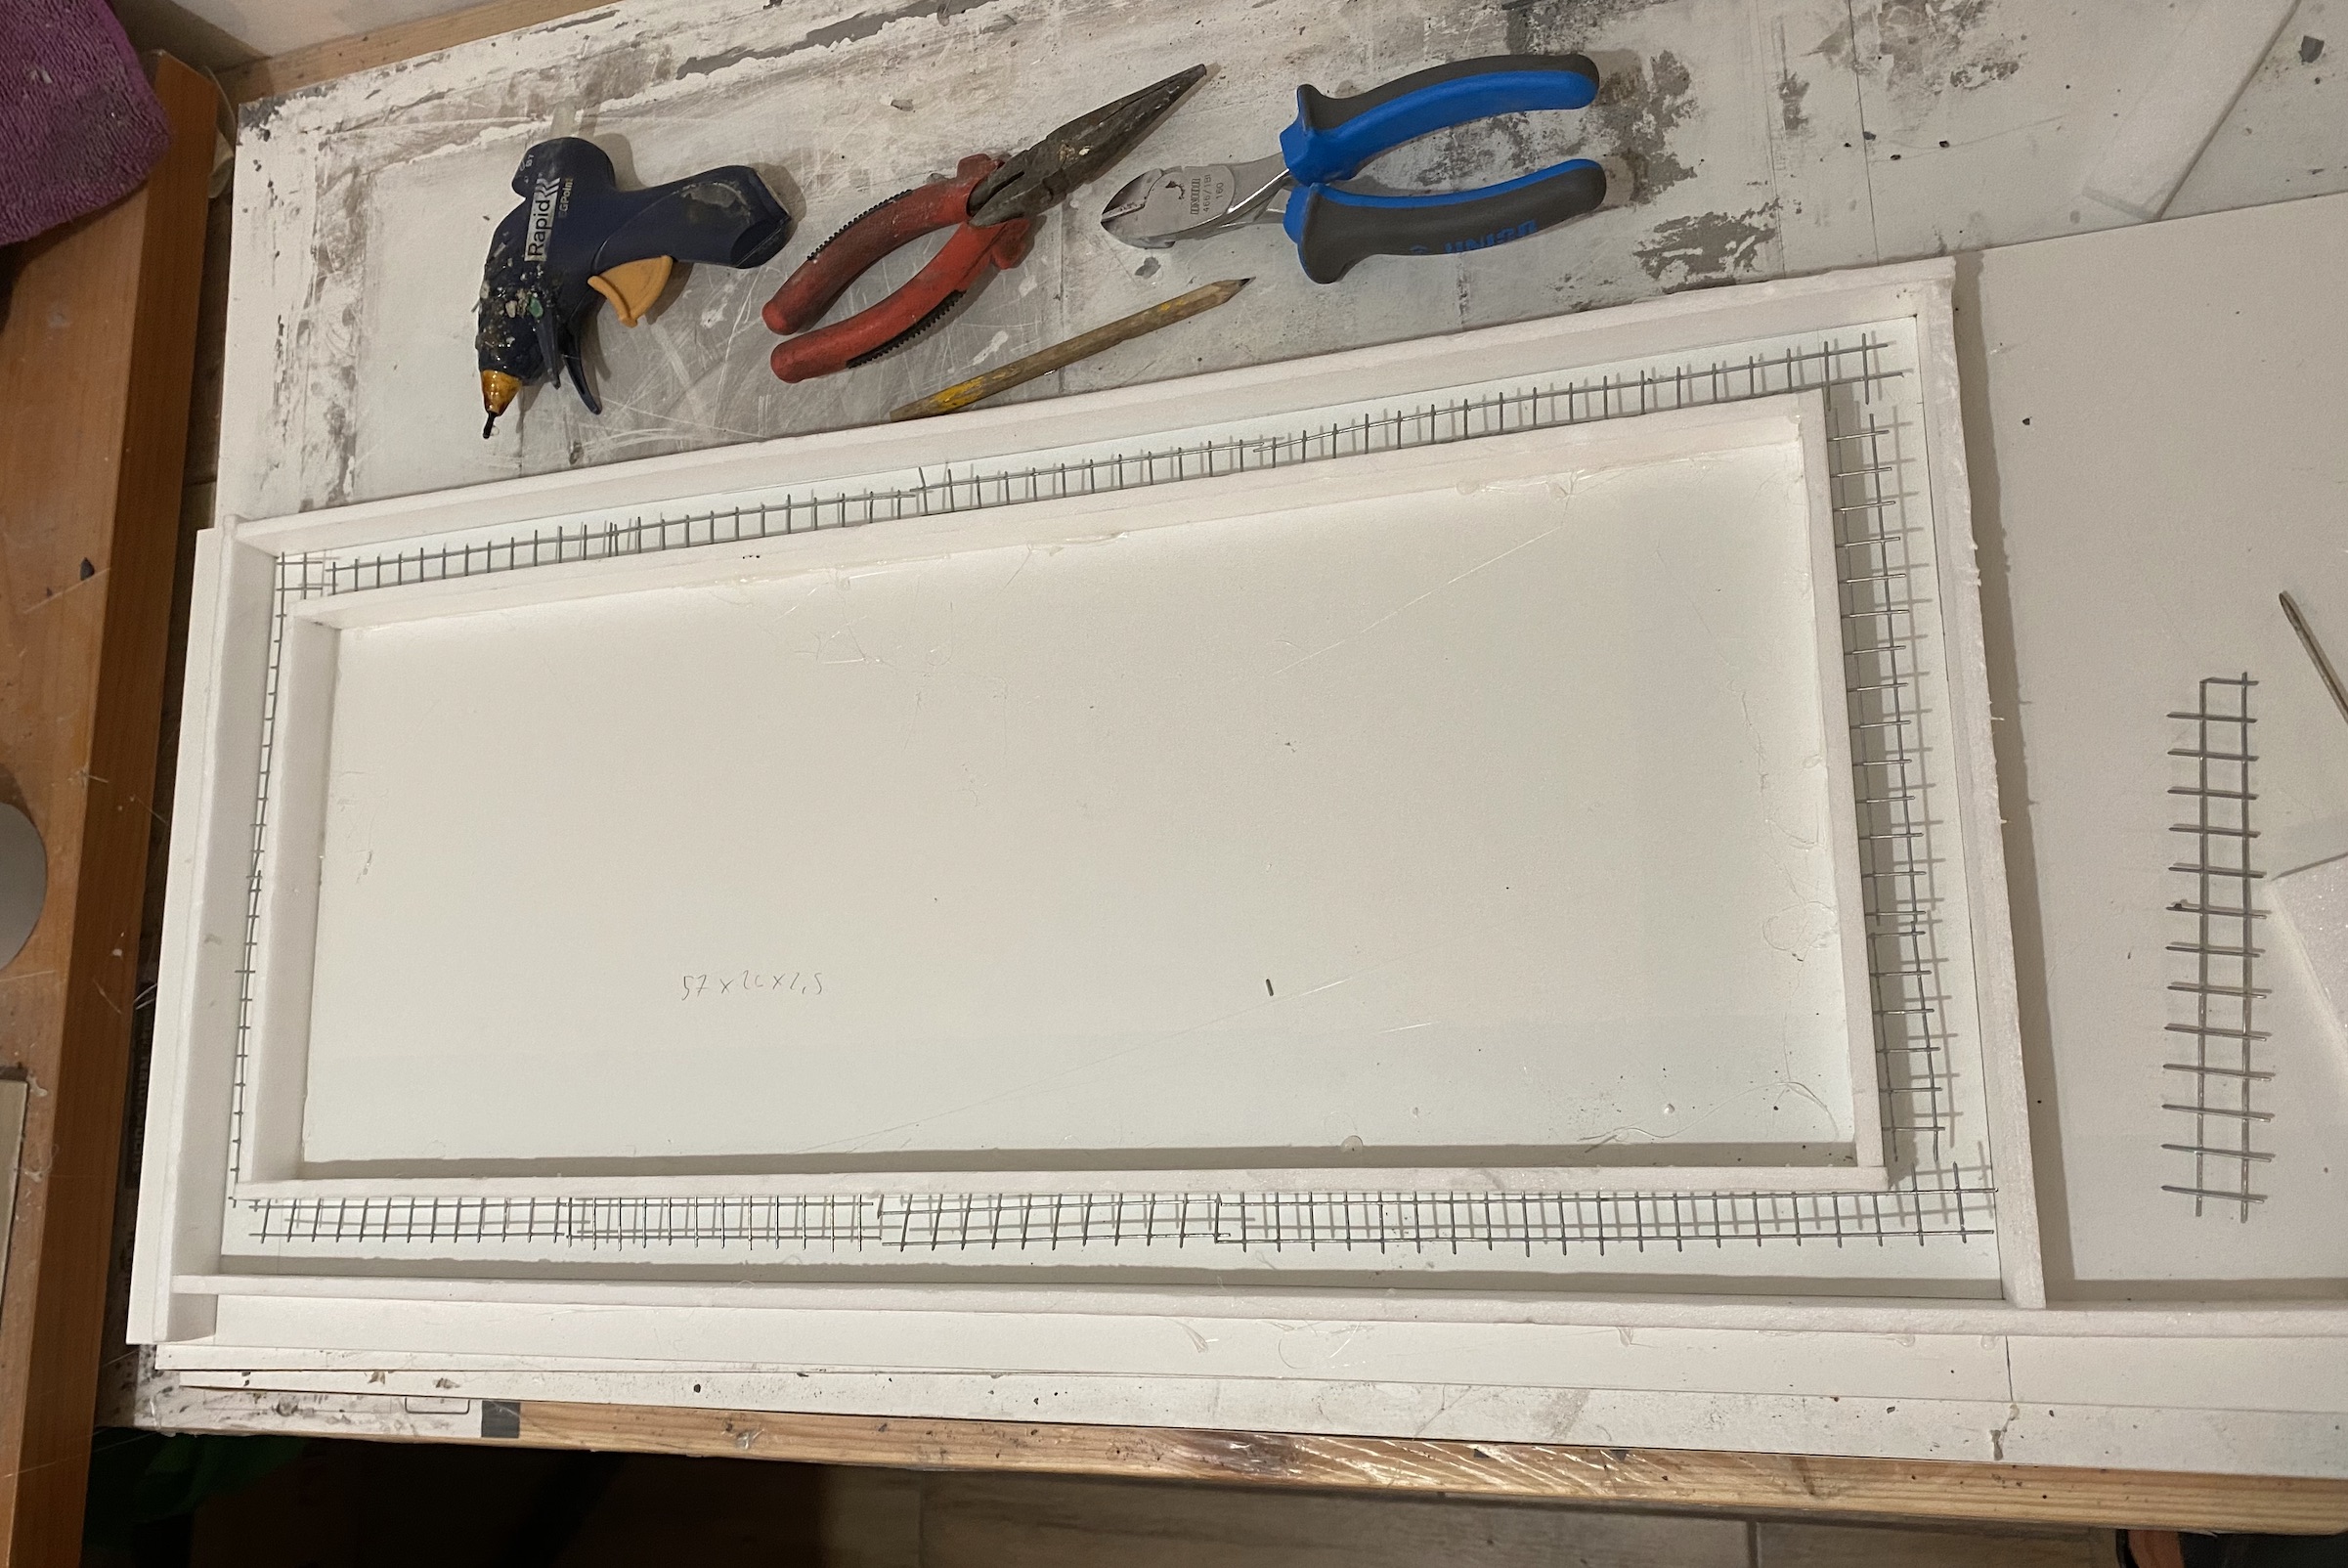
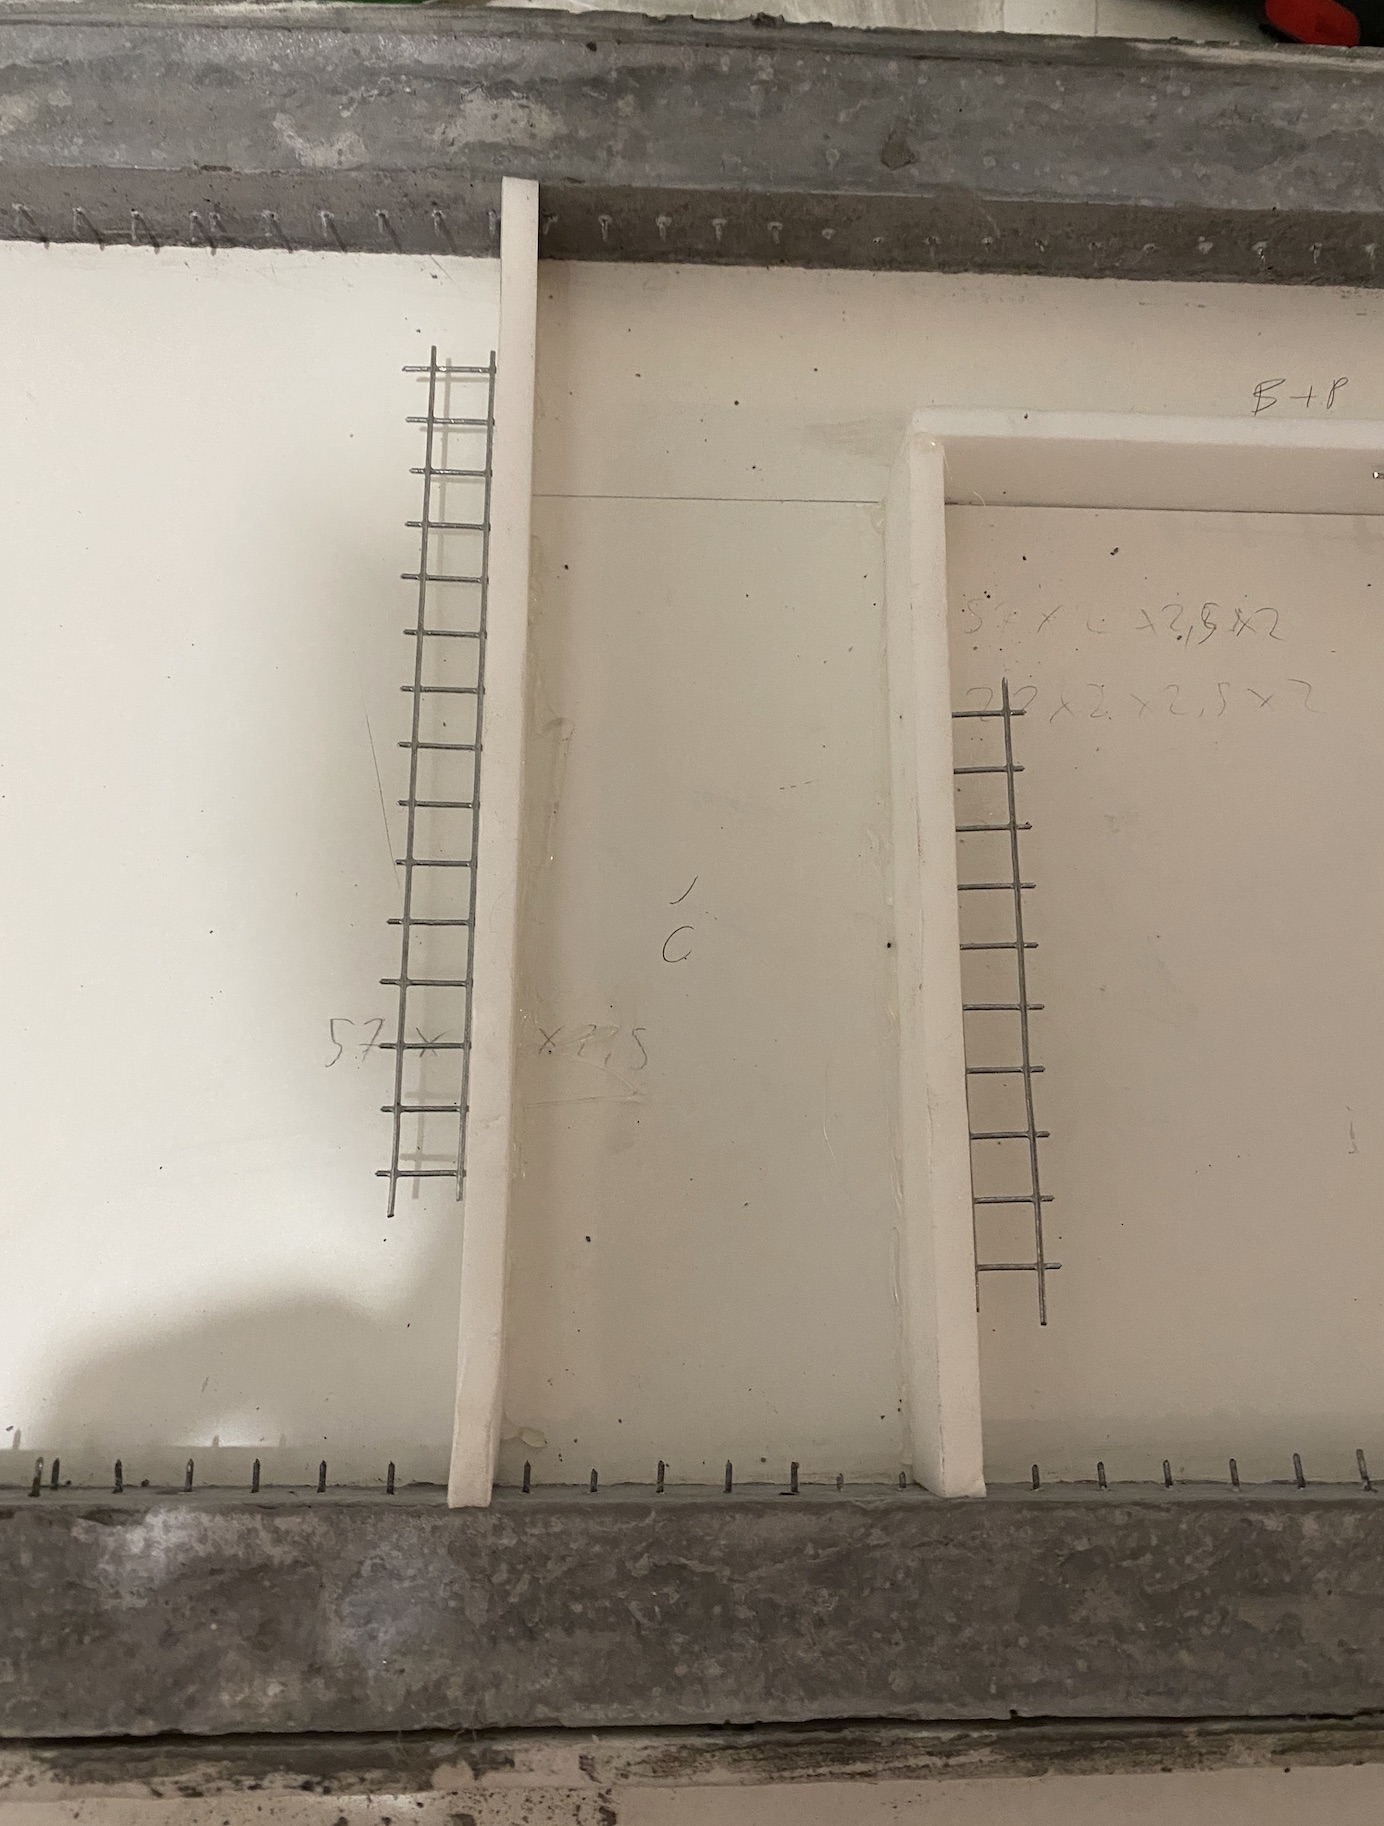
Next, I cut a couple of divider strips for formwork using a sharp knife. These will help to keep form for the pouring of the painting frame. The white foamy material is called depron, which is a type of XPS (extruded polystyrene foam) and is used as insulation material in construction.
Additionally, I cut long pieces of steel mesh which will serve as rebar. Rebar is a term for reinforcement steel which makes the concrete less likely to crack or break.
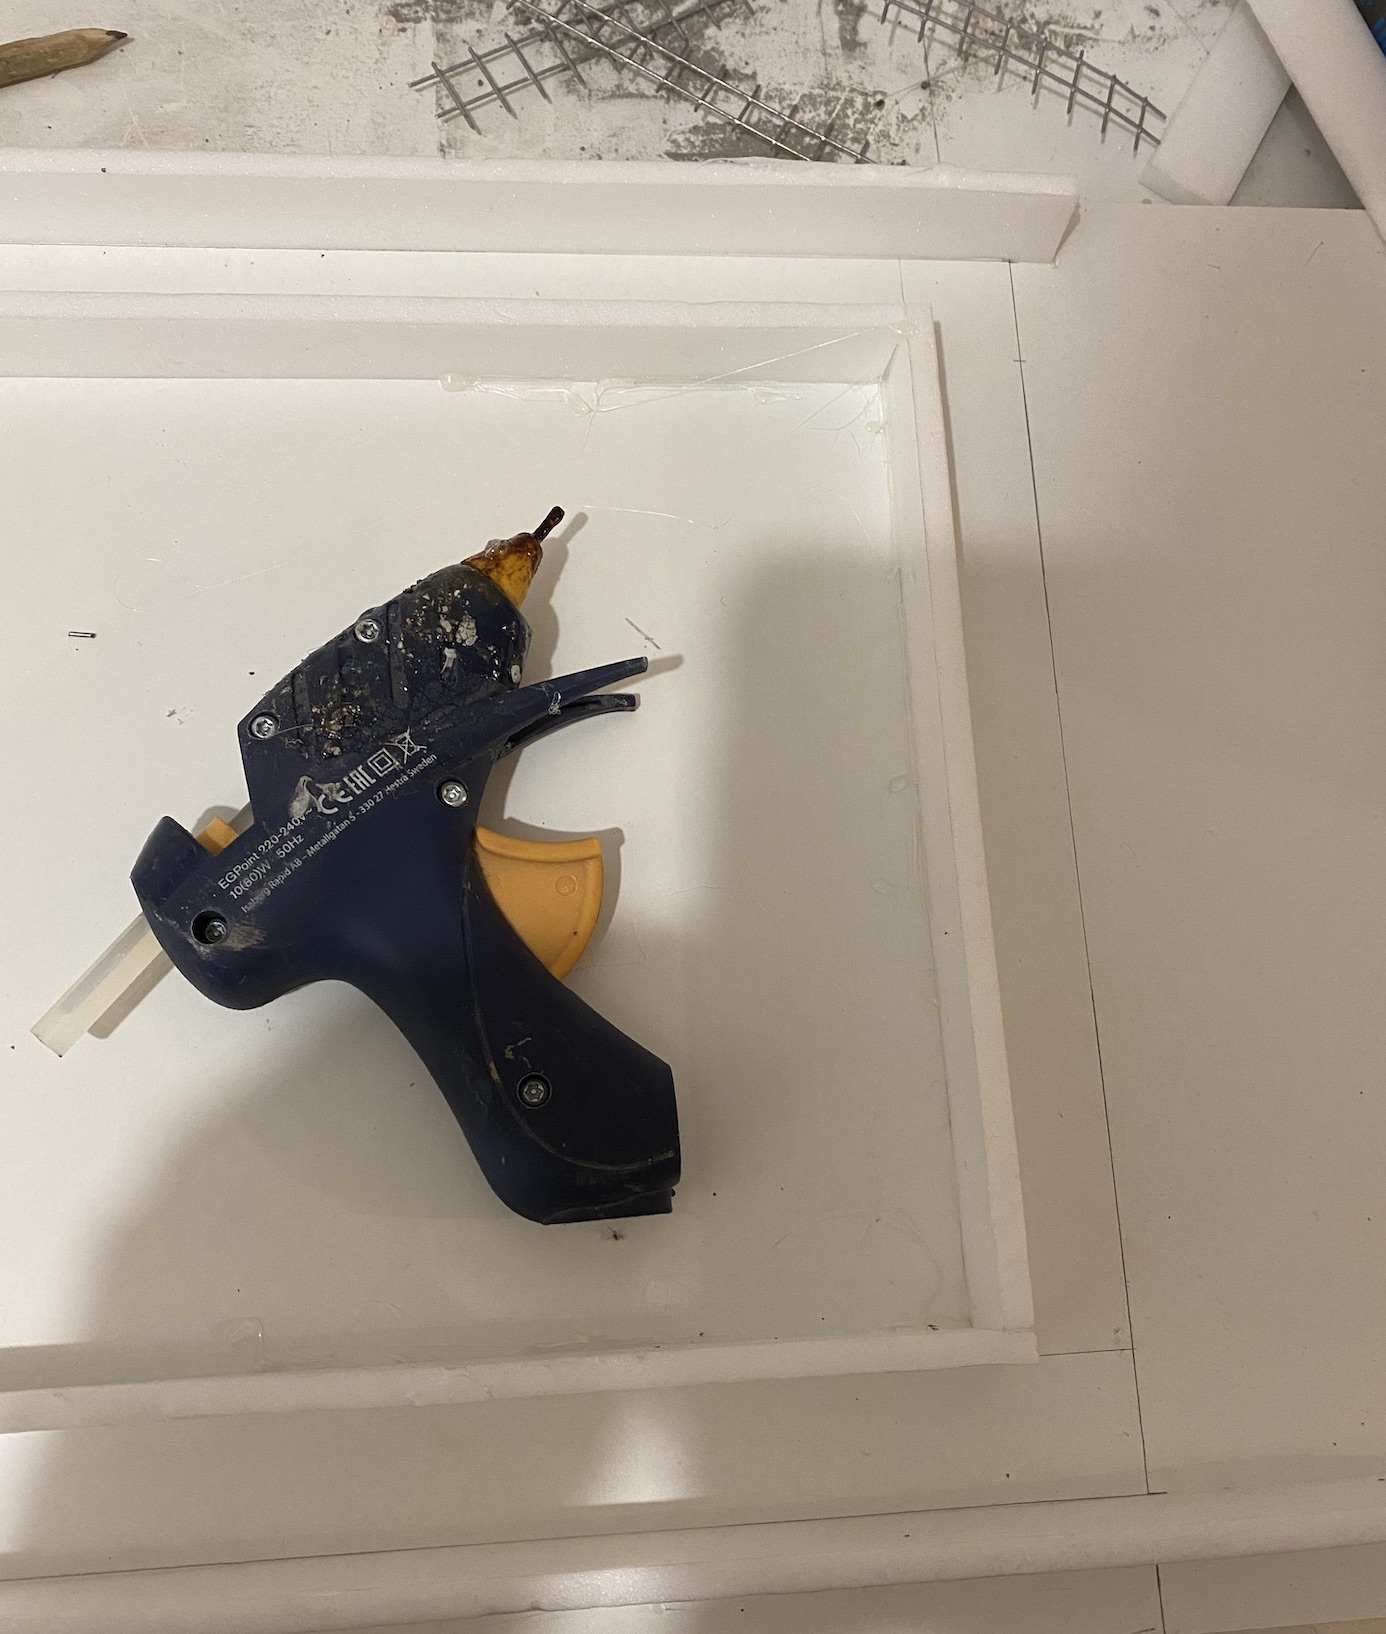
The walls are now glued to the melamine surface using hot glue gun.
The form is ready for pouring the black pigmented concrete which will become the frame of the painting.
Pouring concrete for the frame
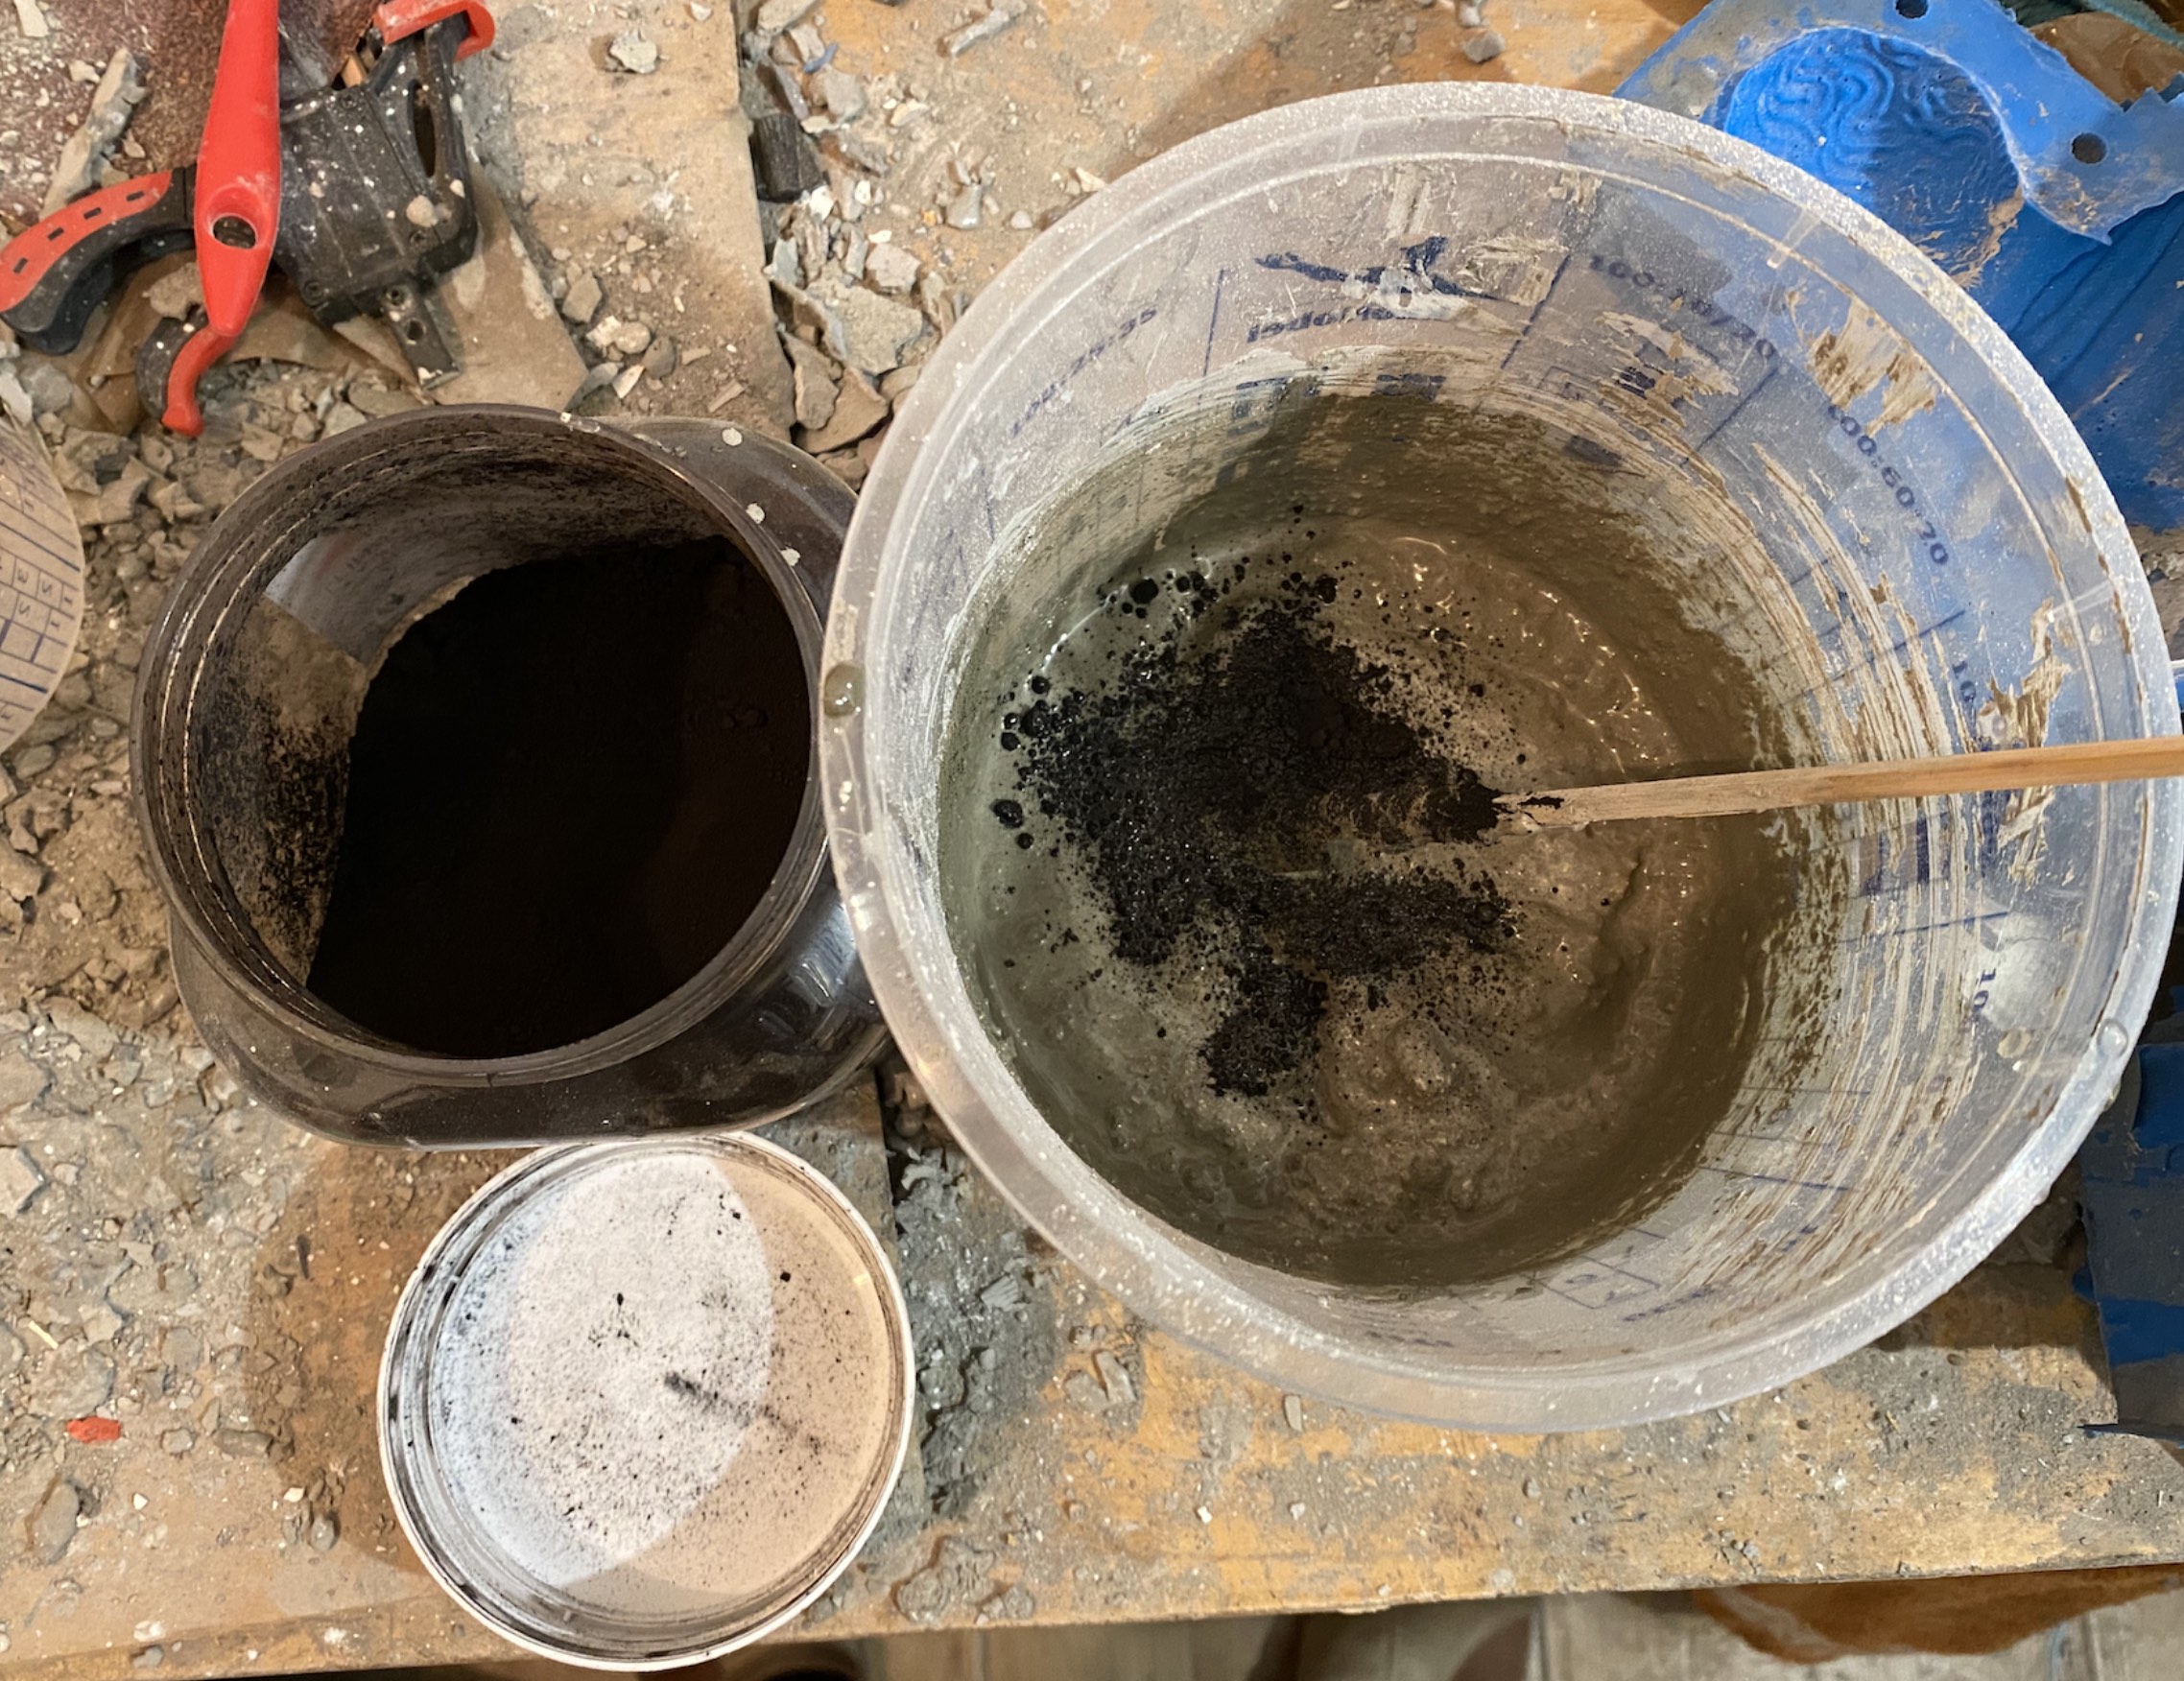
What follows next is mixing a batch of concrete and pouring it into the formwork. I use:
- 45% white cement
- 40% gray cement
- 15% aggregate (4 - 5mm sand)
- Black pigment (iron oxide)
- Water
- Superplasticiser (a chemical for better strength)
These numbers are very approximate. I usually just eyeball it. 🤷♂️
I want the frame to be really dark. To achieve that, I use around 3 large spoons of black pigment.
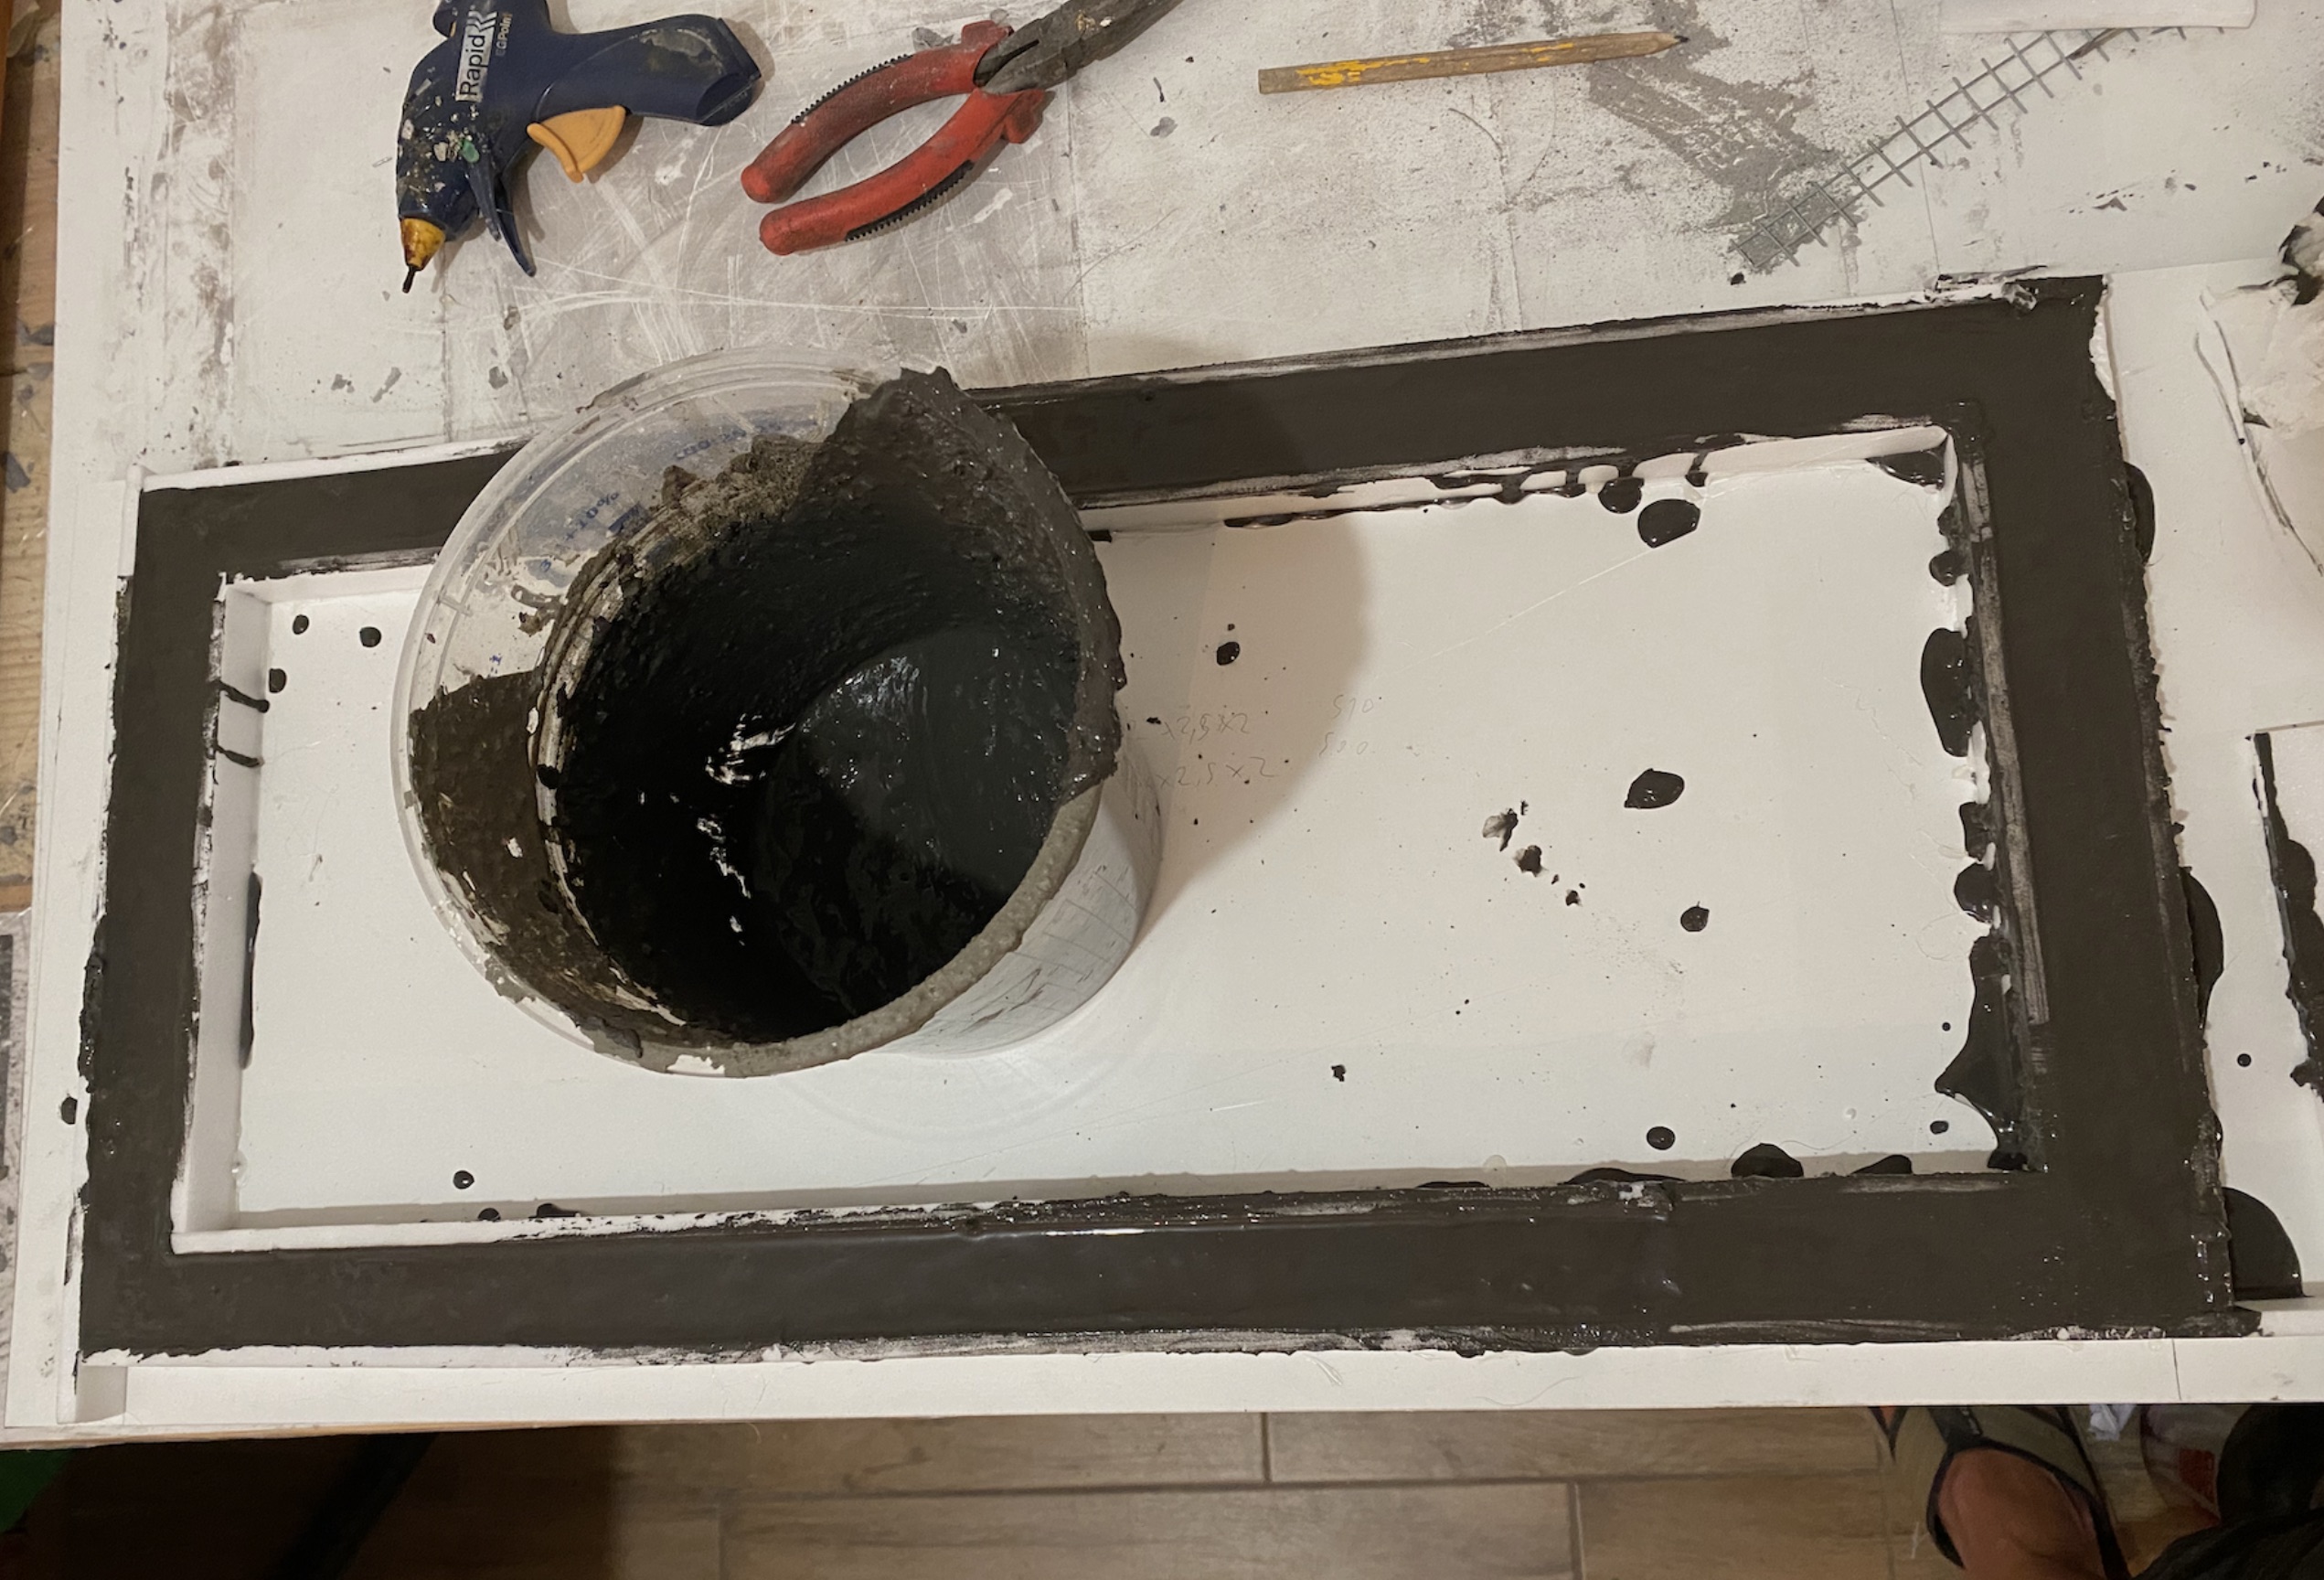
After a day or two once the concrete sets (hardens), I remove the inner part of the frame formwork. This enables me to create dividers for the inner segments.

Notice how the tiny parts of the steel rebar are sticking out of the concrete frame? They will serve as anchor for the rest of the pieces that will go inside the painting.
Inner segments
At this point, I start designing the inner pieces. Sometimes I prepare the design some time prior to this phase, but what I usually do is to just go and draw some rectangles on the fly… improvise a little bit. Note the lines — they will serve for placing the depron dividers, similarly as I did with the frame formwork.
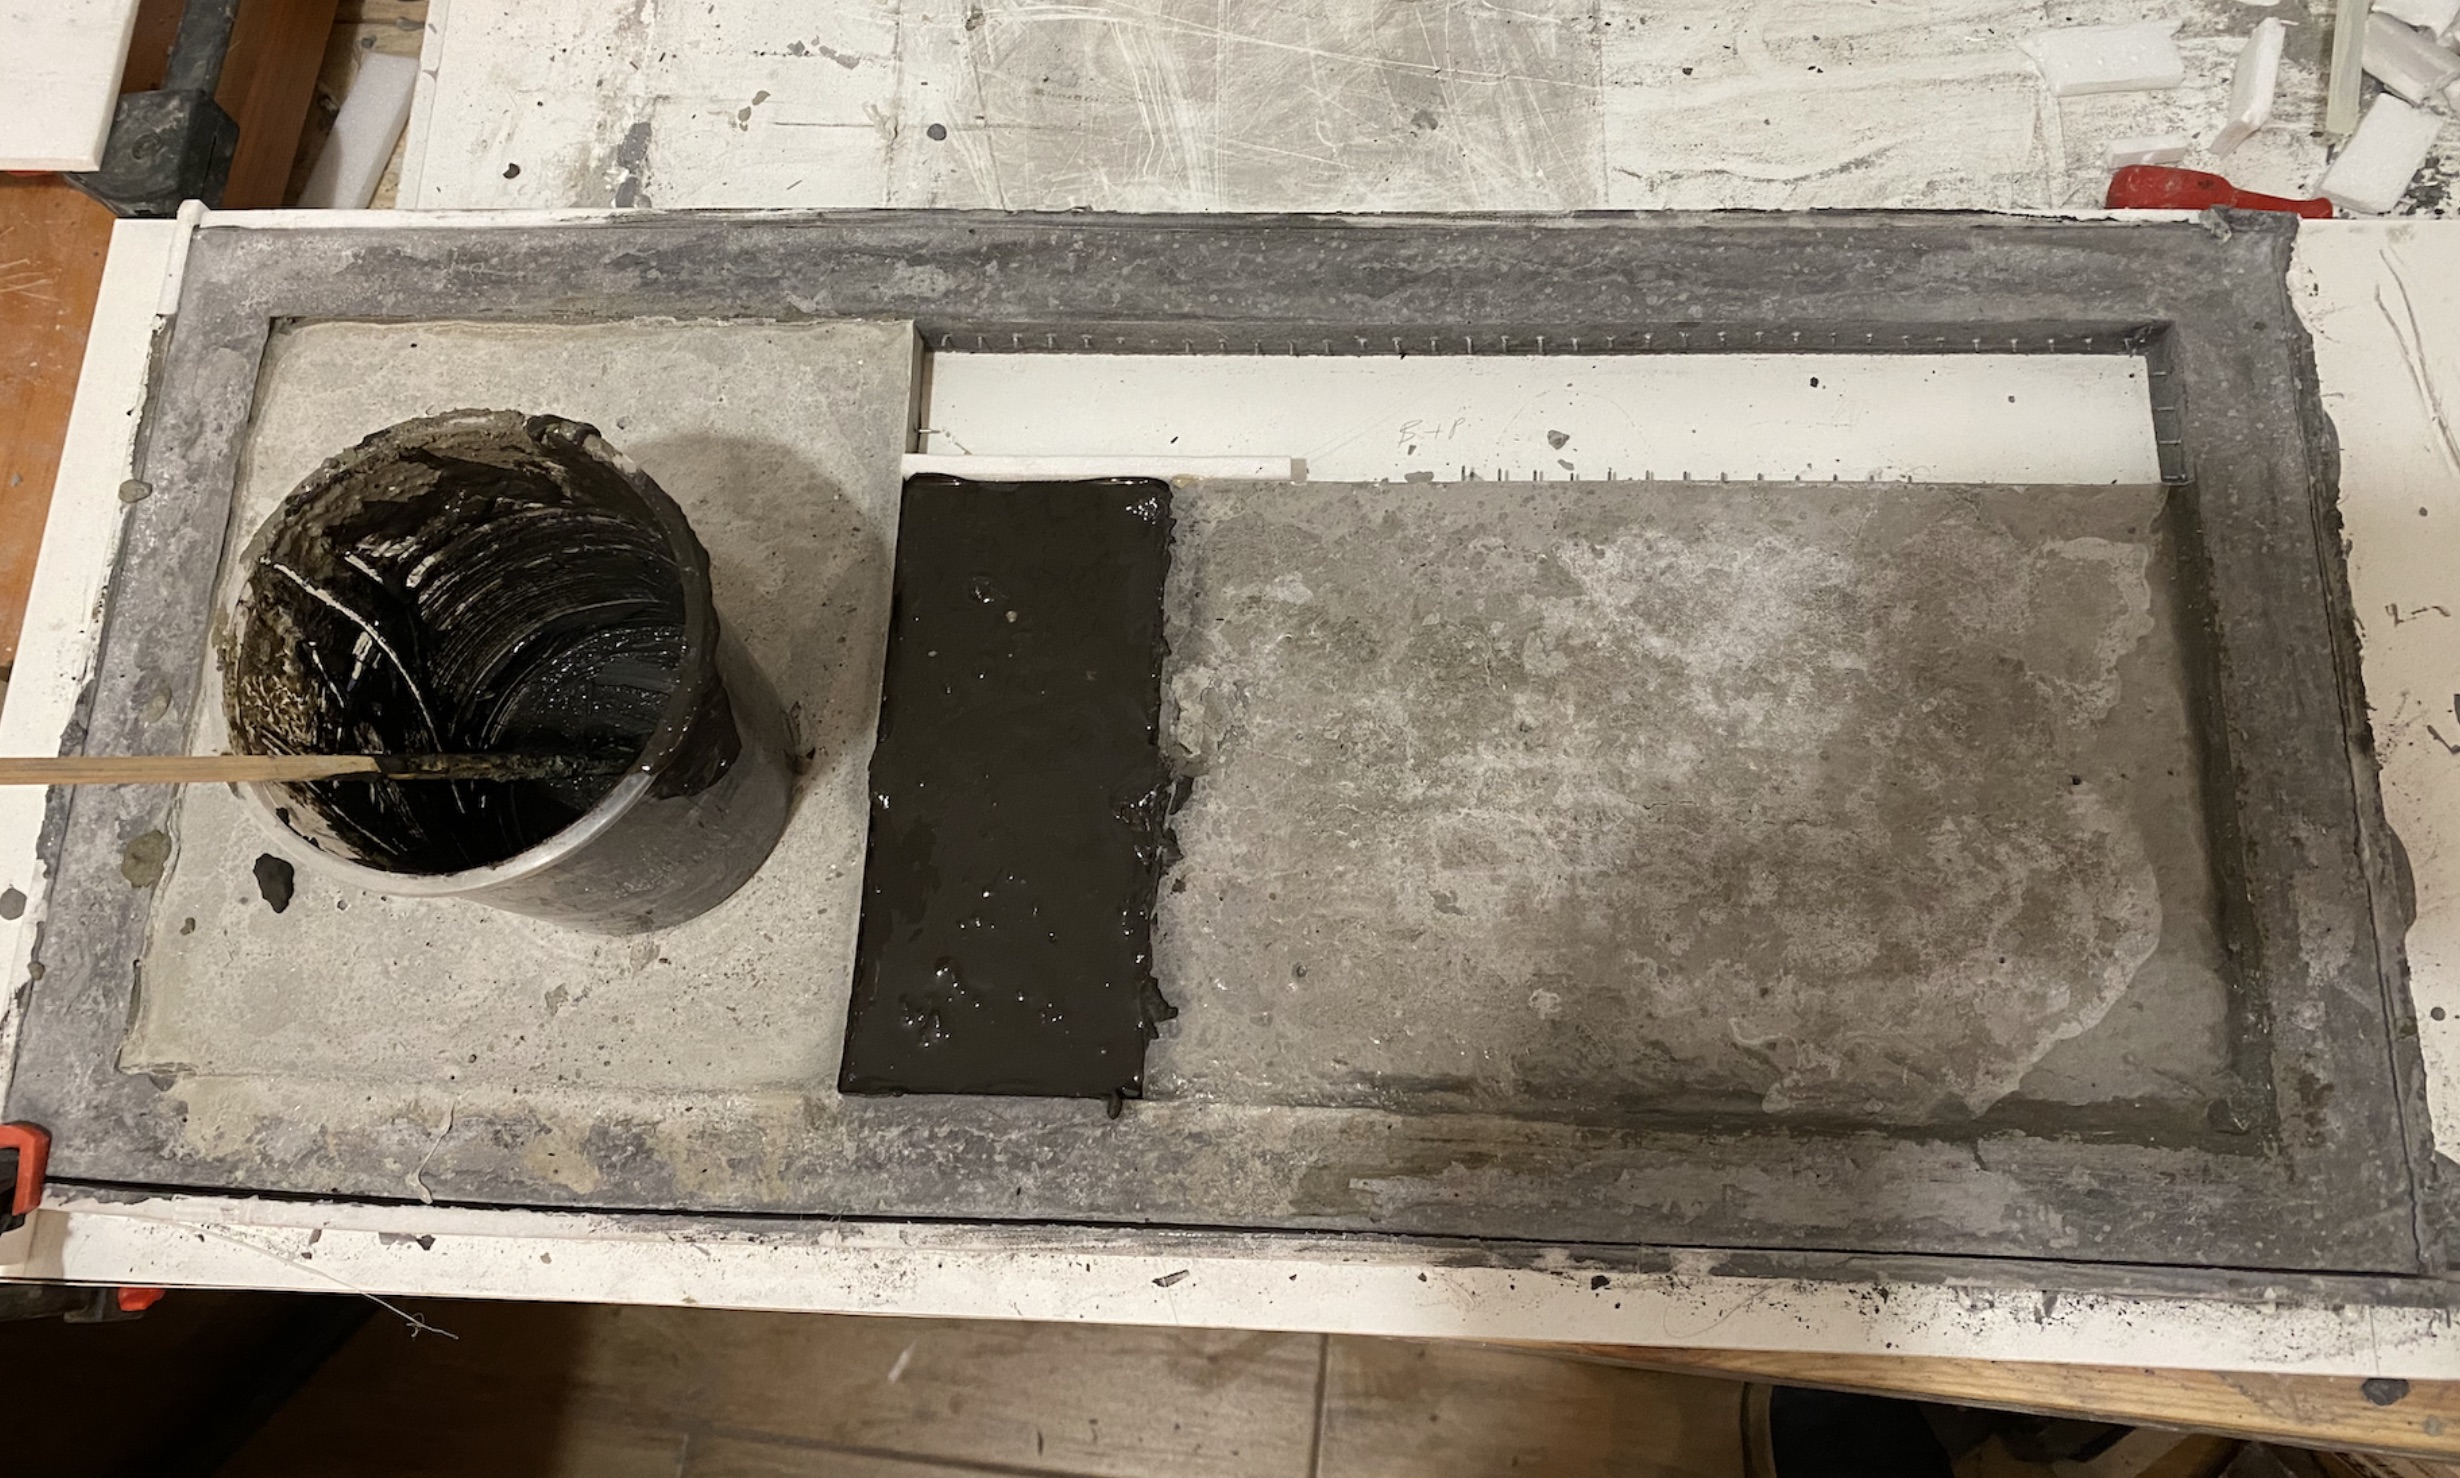
Time to start pouring in the segments using differently pigmented concrete. Once the concrete sets, its color becomes much milder than seen on the below photo, so I have to account for that during the design process where I decide which shades of gray I want to use.

Not all of the pieces can be poured at once. Wherever two or more segments join, I need to wait for the other one to harden. For example here, I’m pouring the left and the right segment first (and wait for them to harden), and when those harden, I can pour the center one, and after that, the top one.
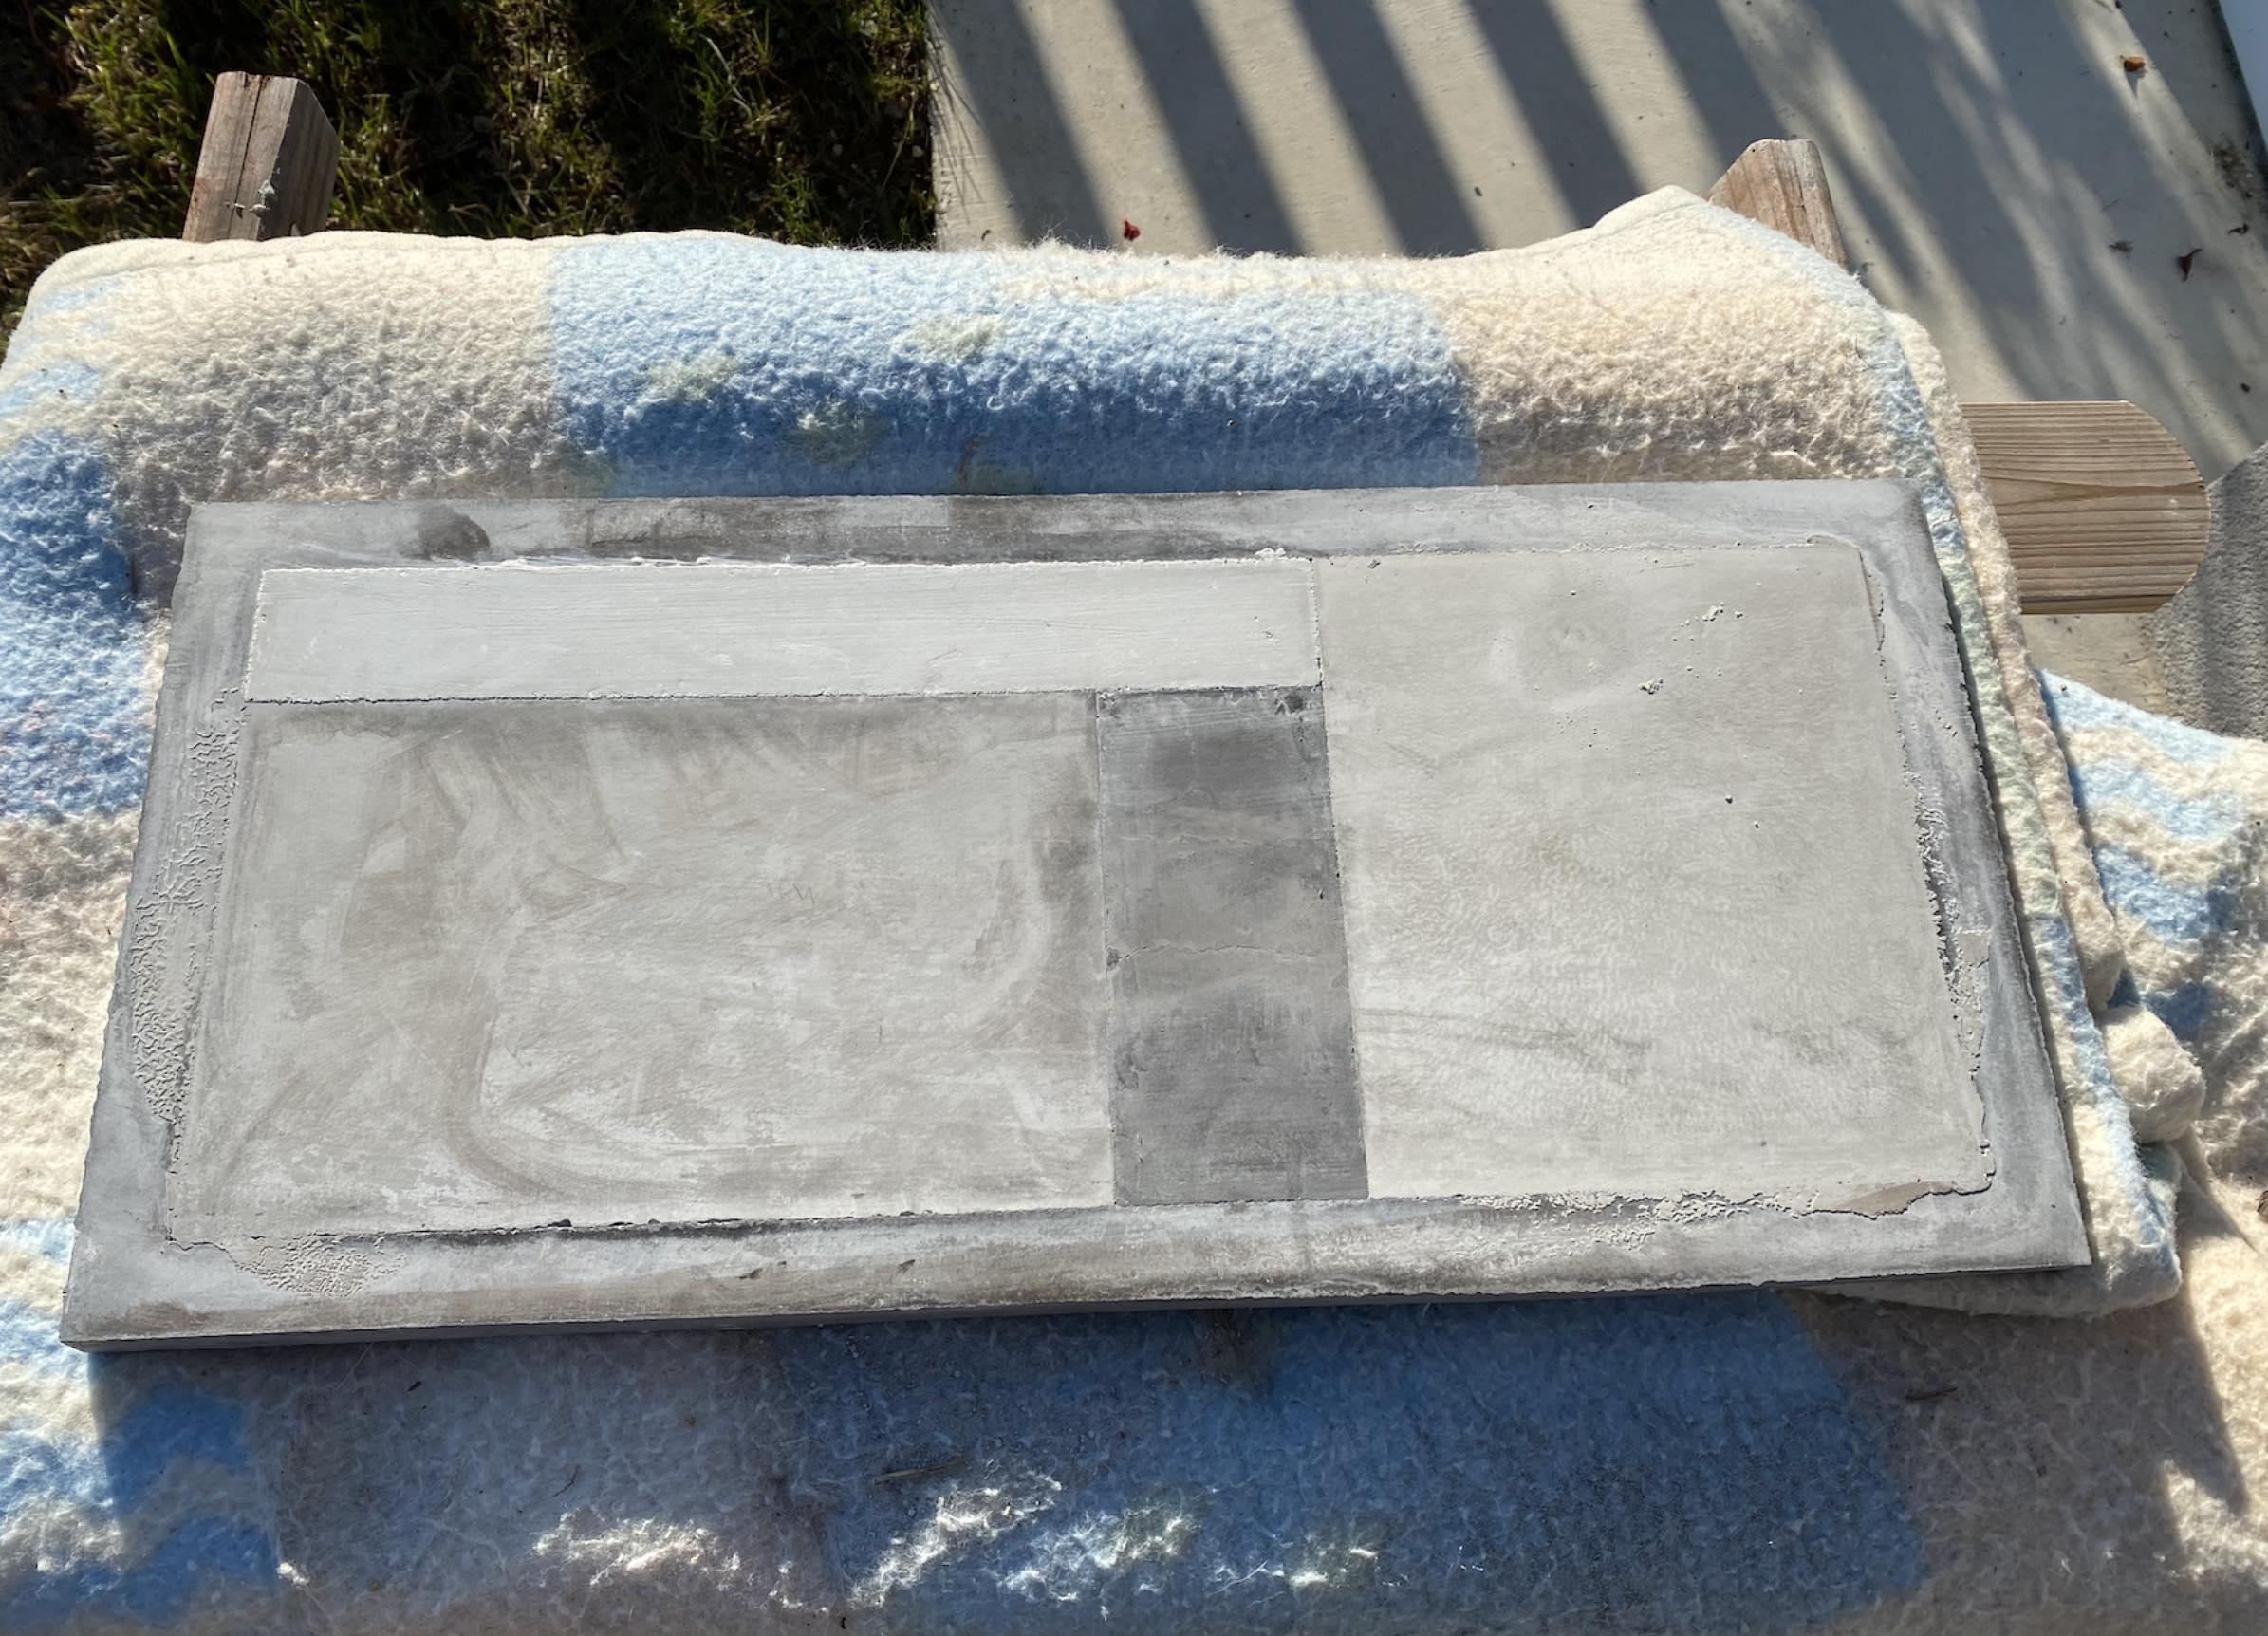
At this point all the segments are poured. In the photo below, the top right segment is still fresh. After it will harden enough, I’ll finally be able to flip it over and see the face of the painting I’ve been creating all this time!
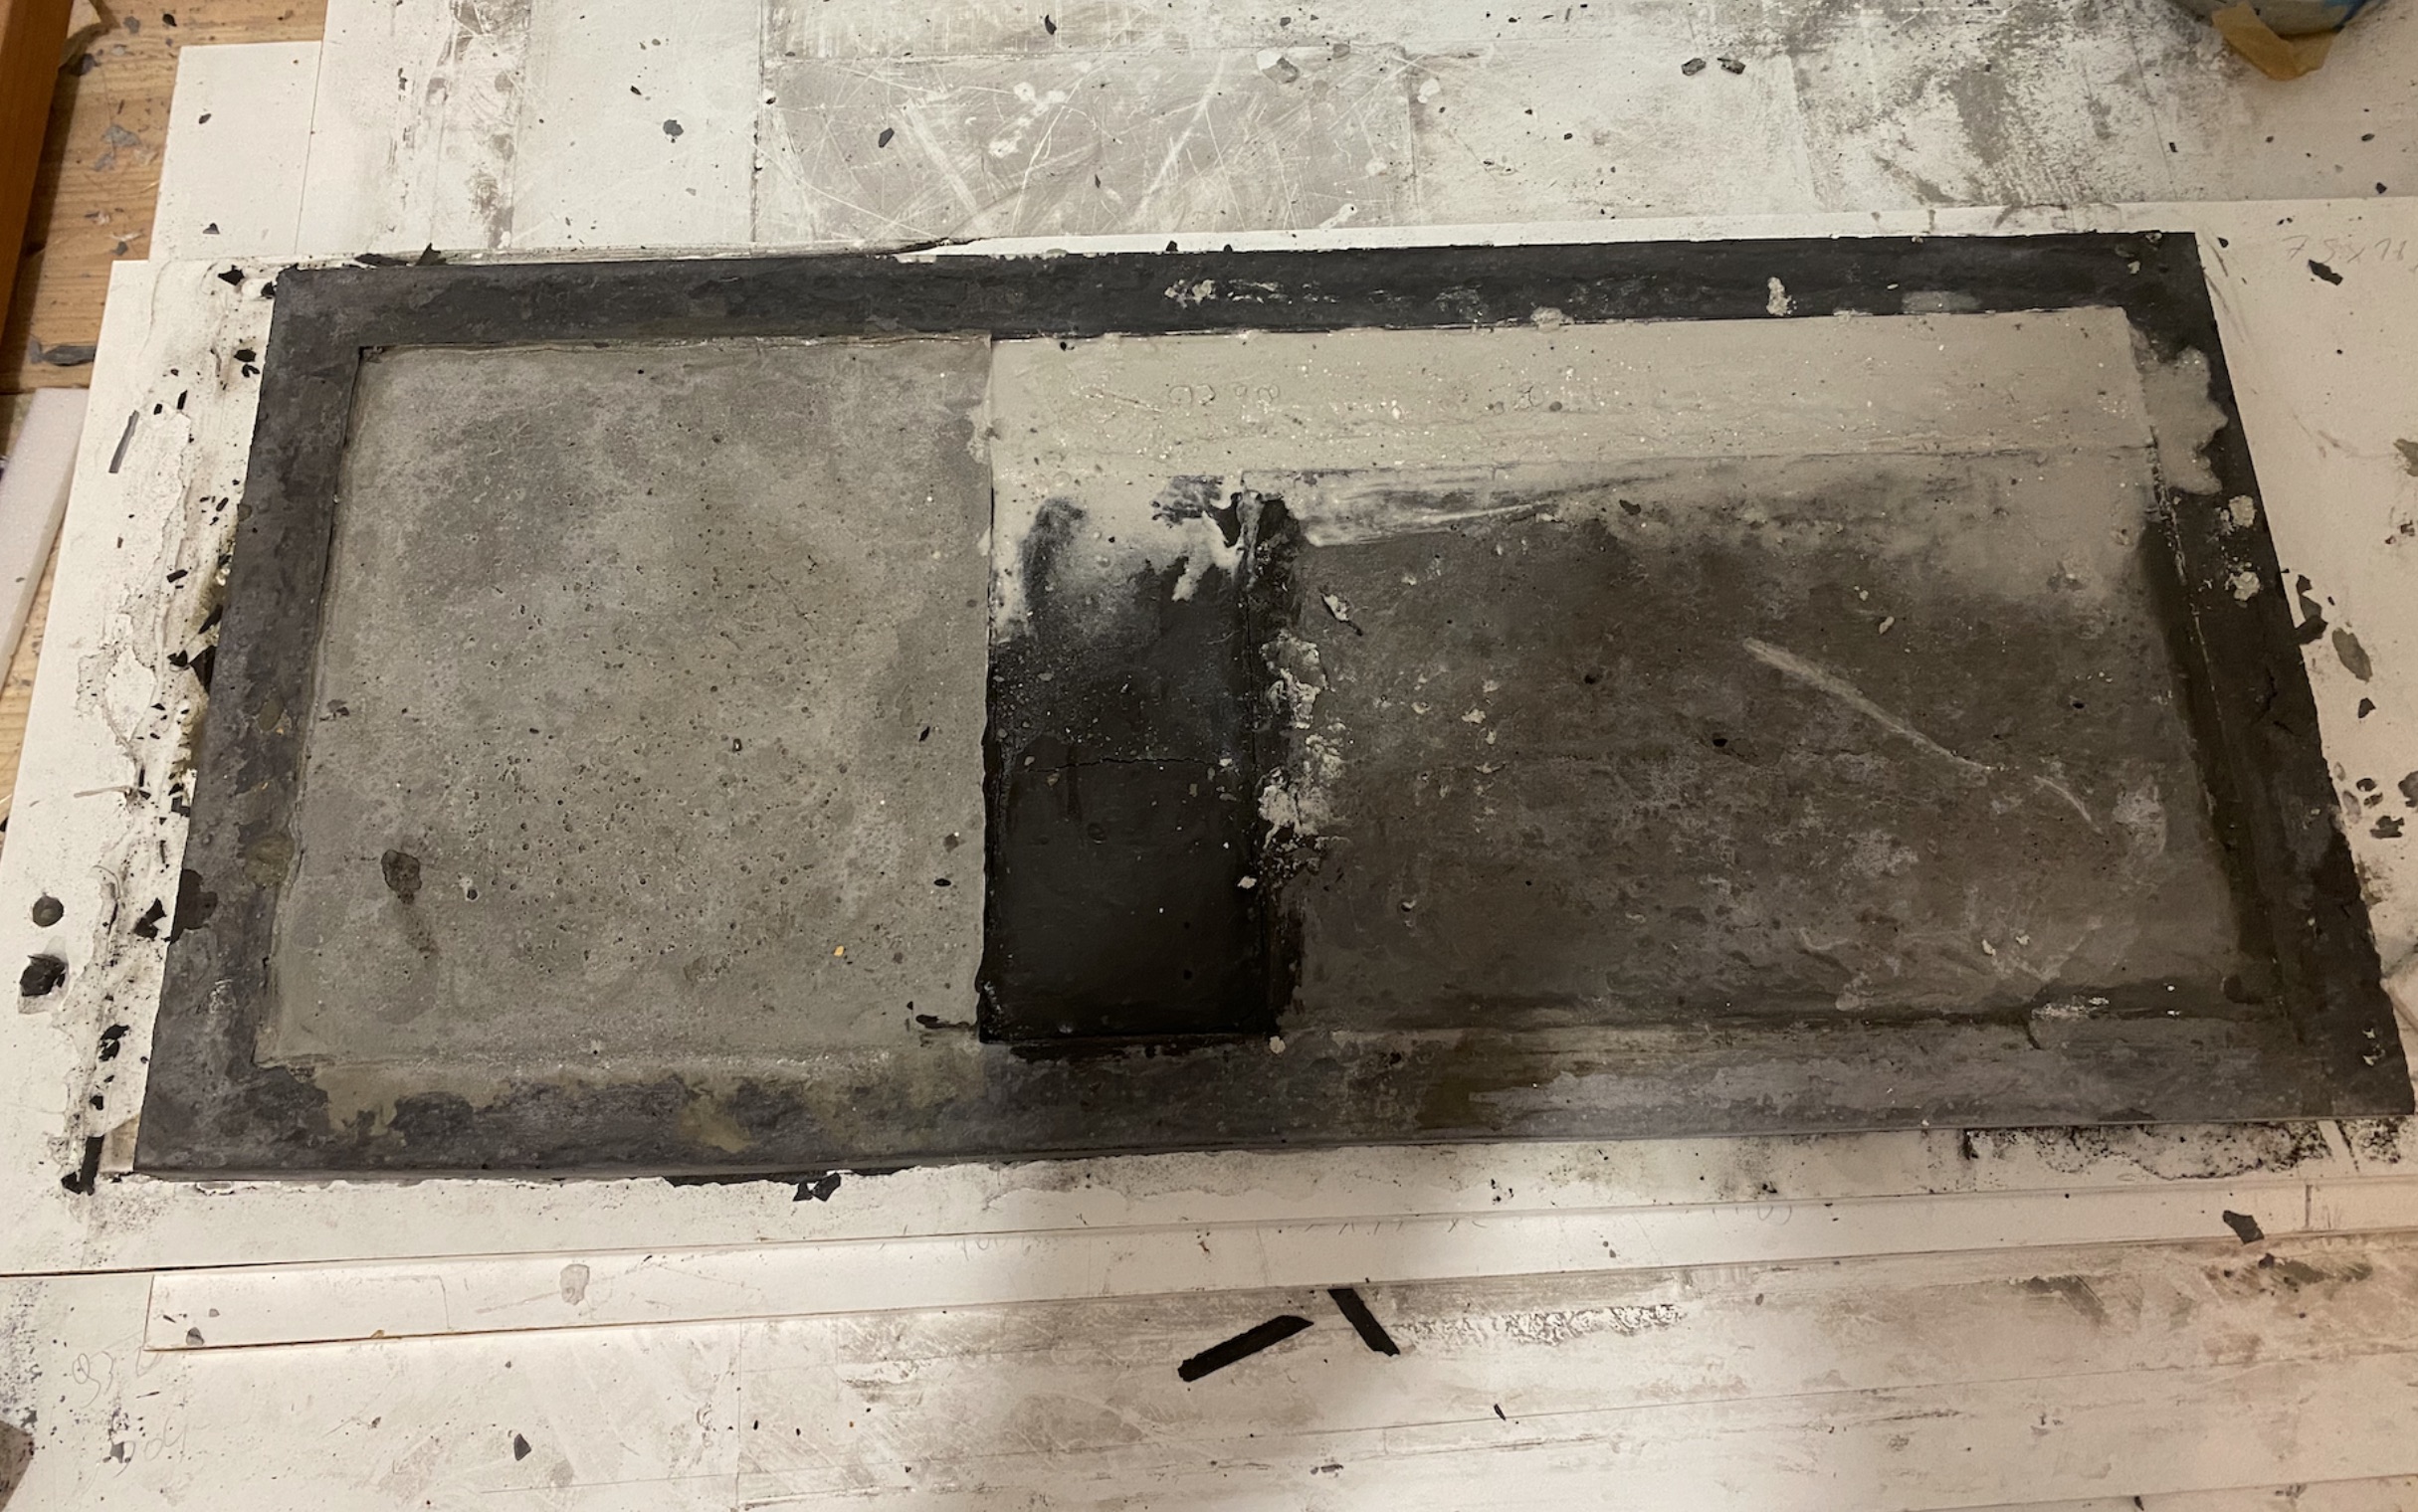
After all the concrete segments pictured above fully harden, it’s time to carefully flip the painting over and see how the face of the painting look like.
This is a VERY exciting moment for me because reveals what I’ve been working on all this time but wasn’t able to see!
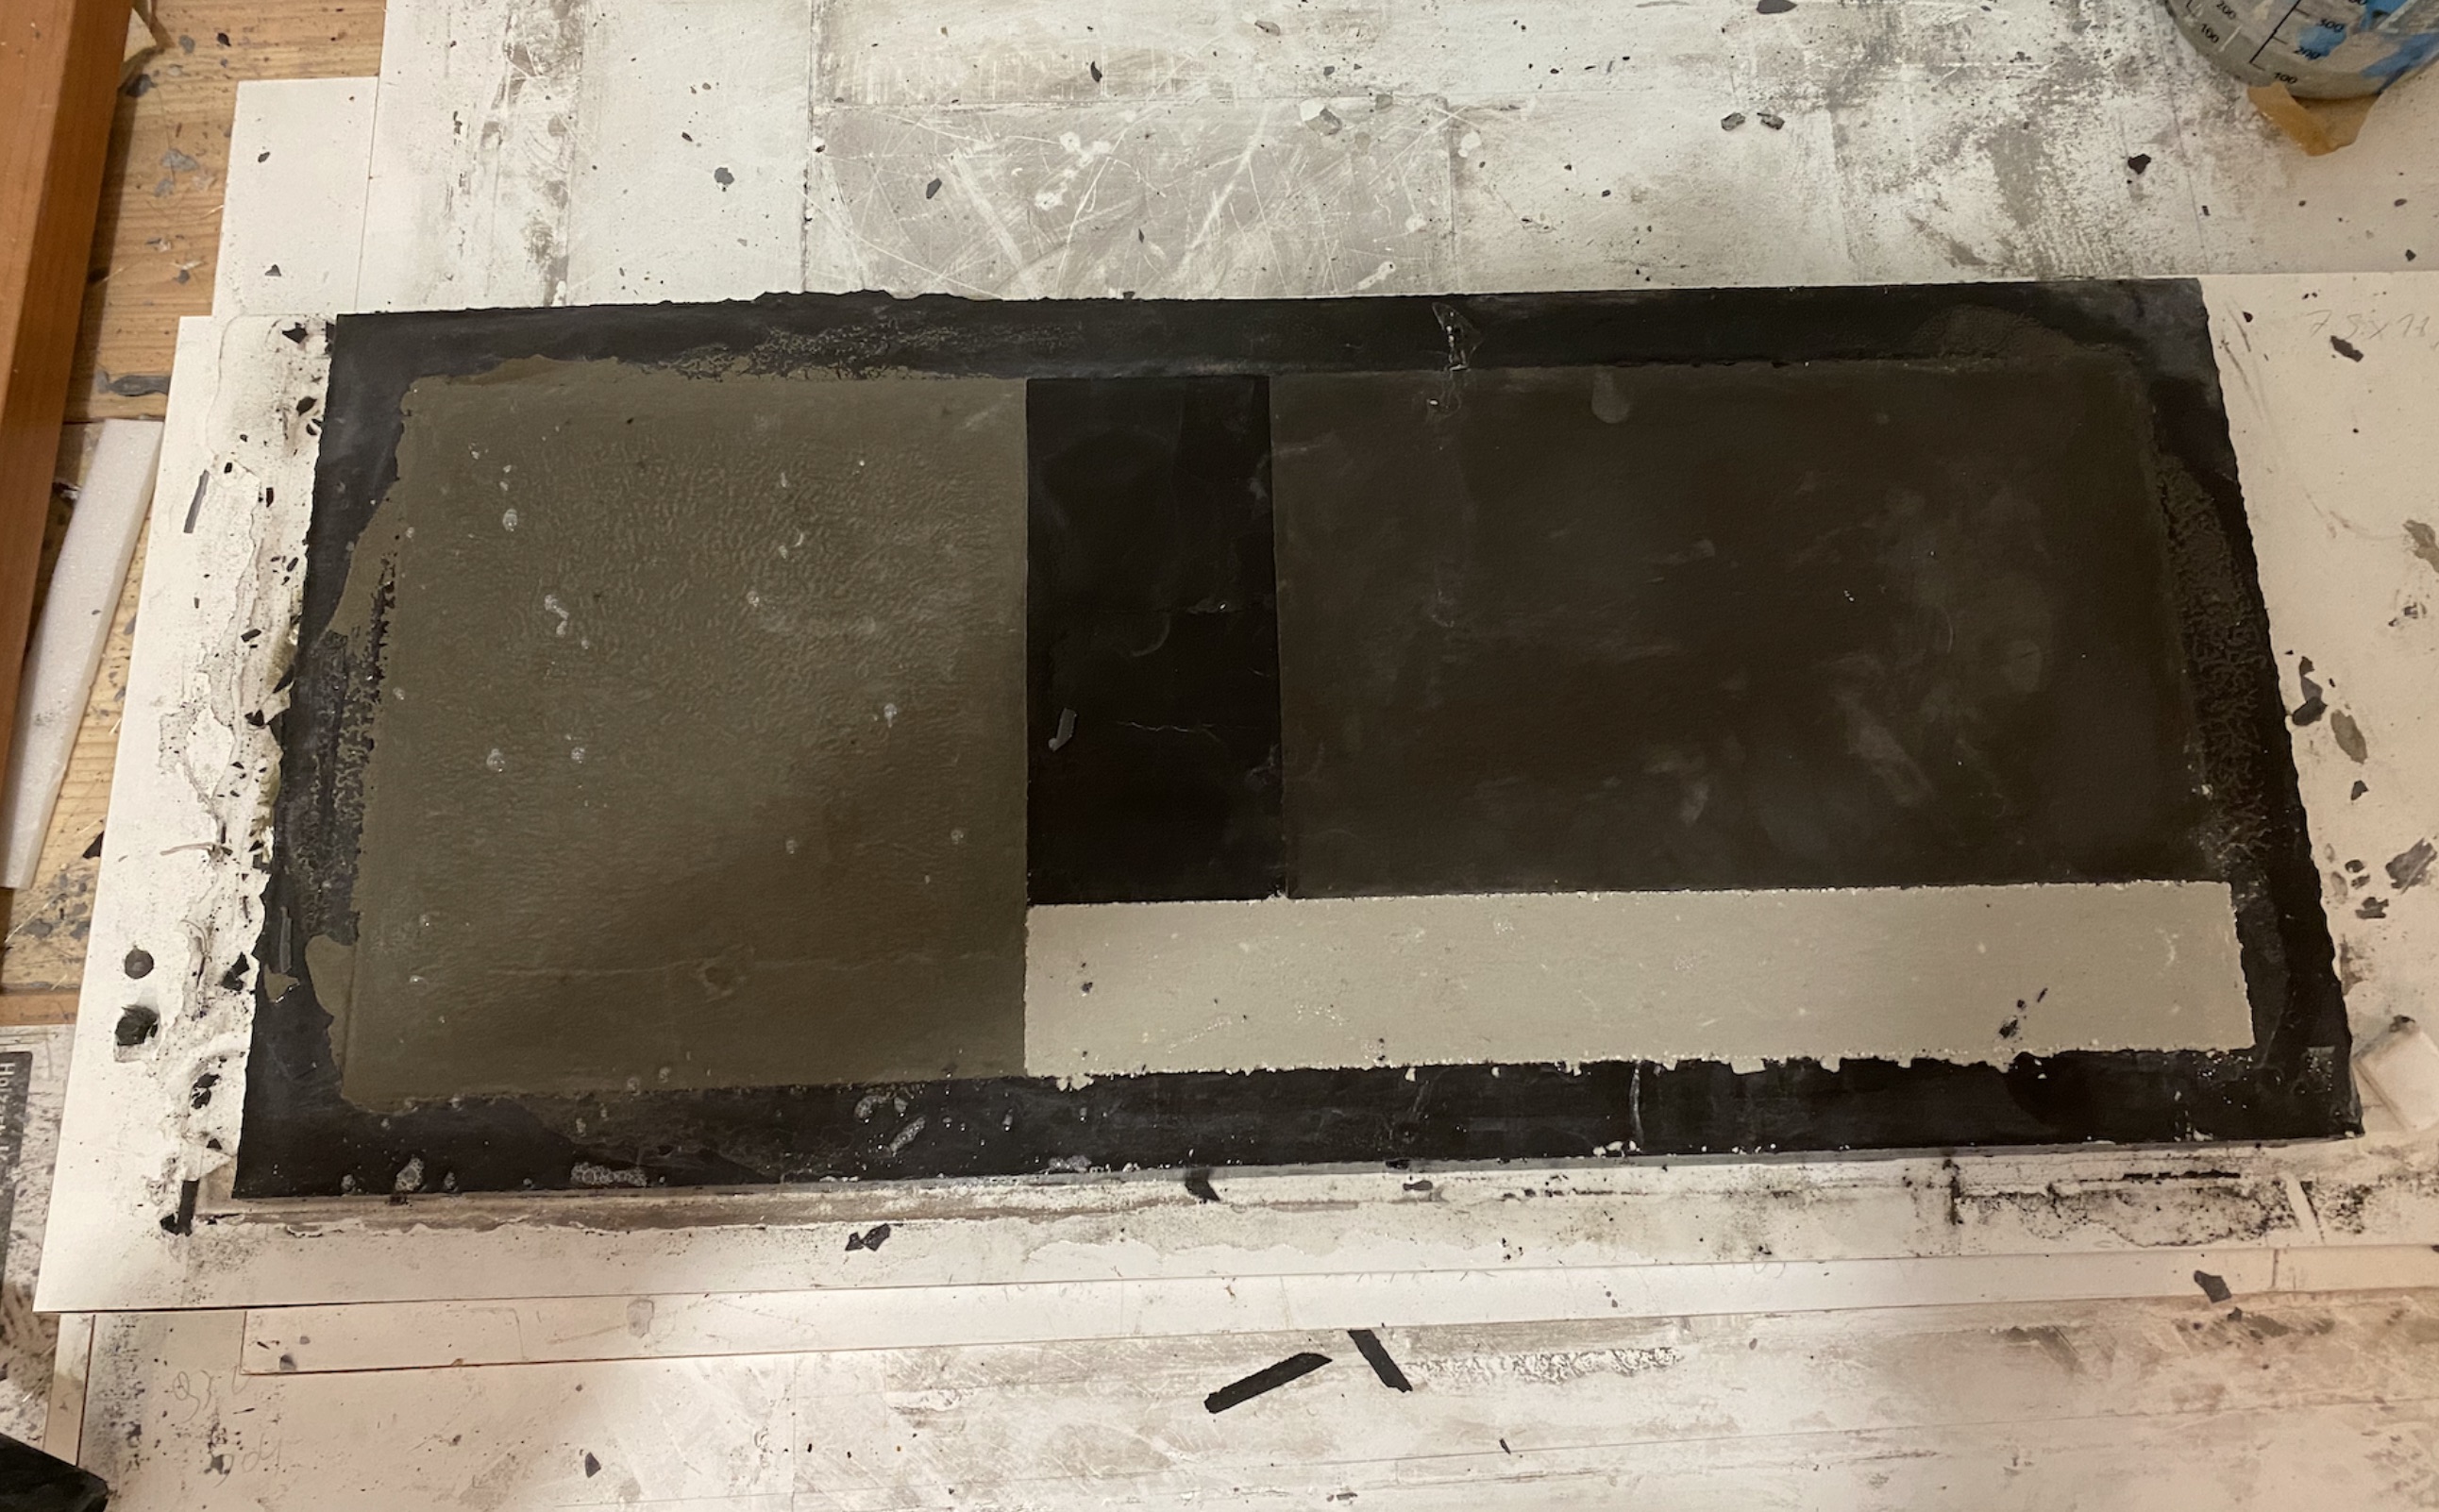
Looks great! After I inspect the face of the painting, it’s time to flip it over again to its back side and do some structural hardening work.
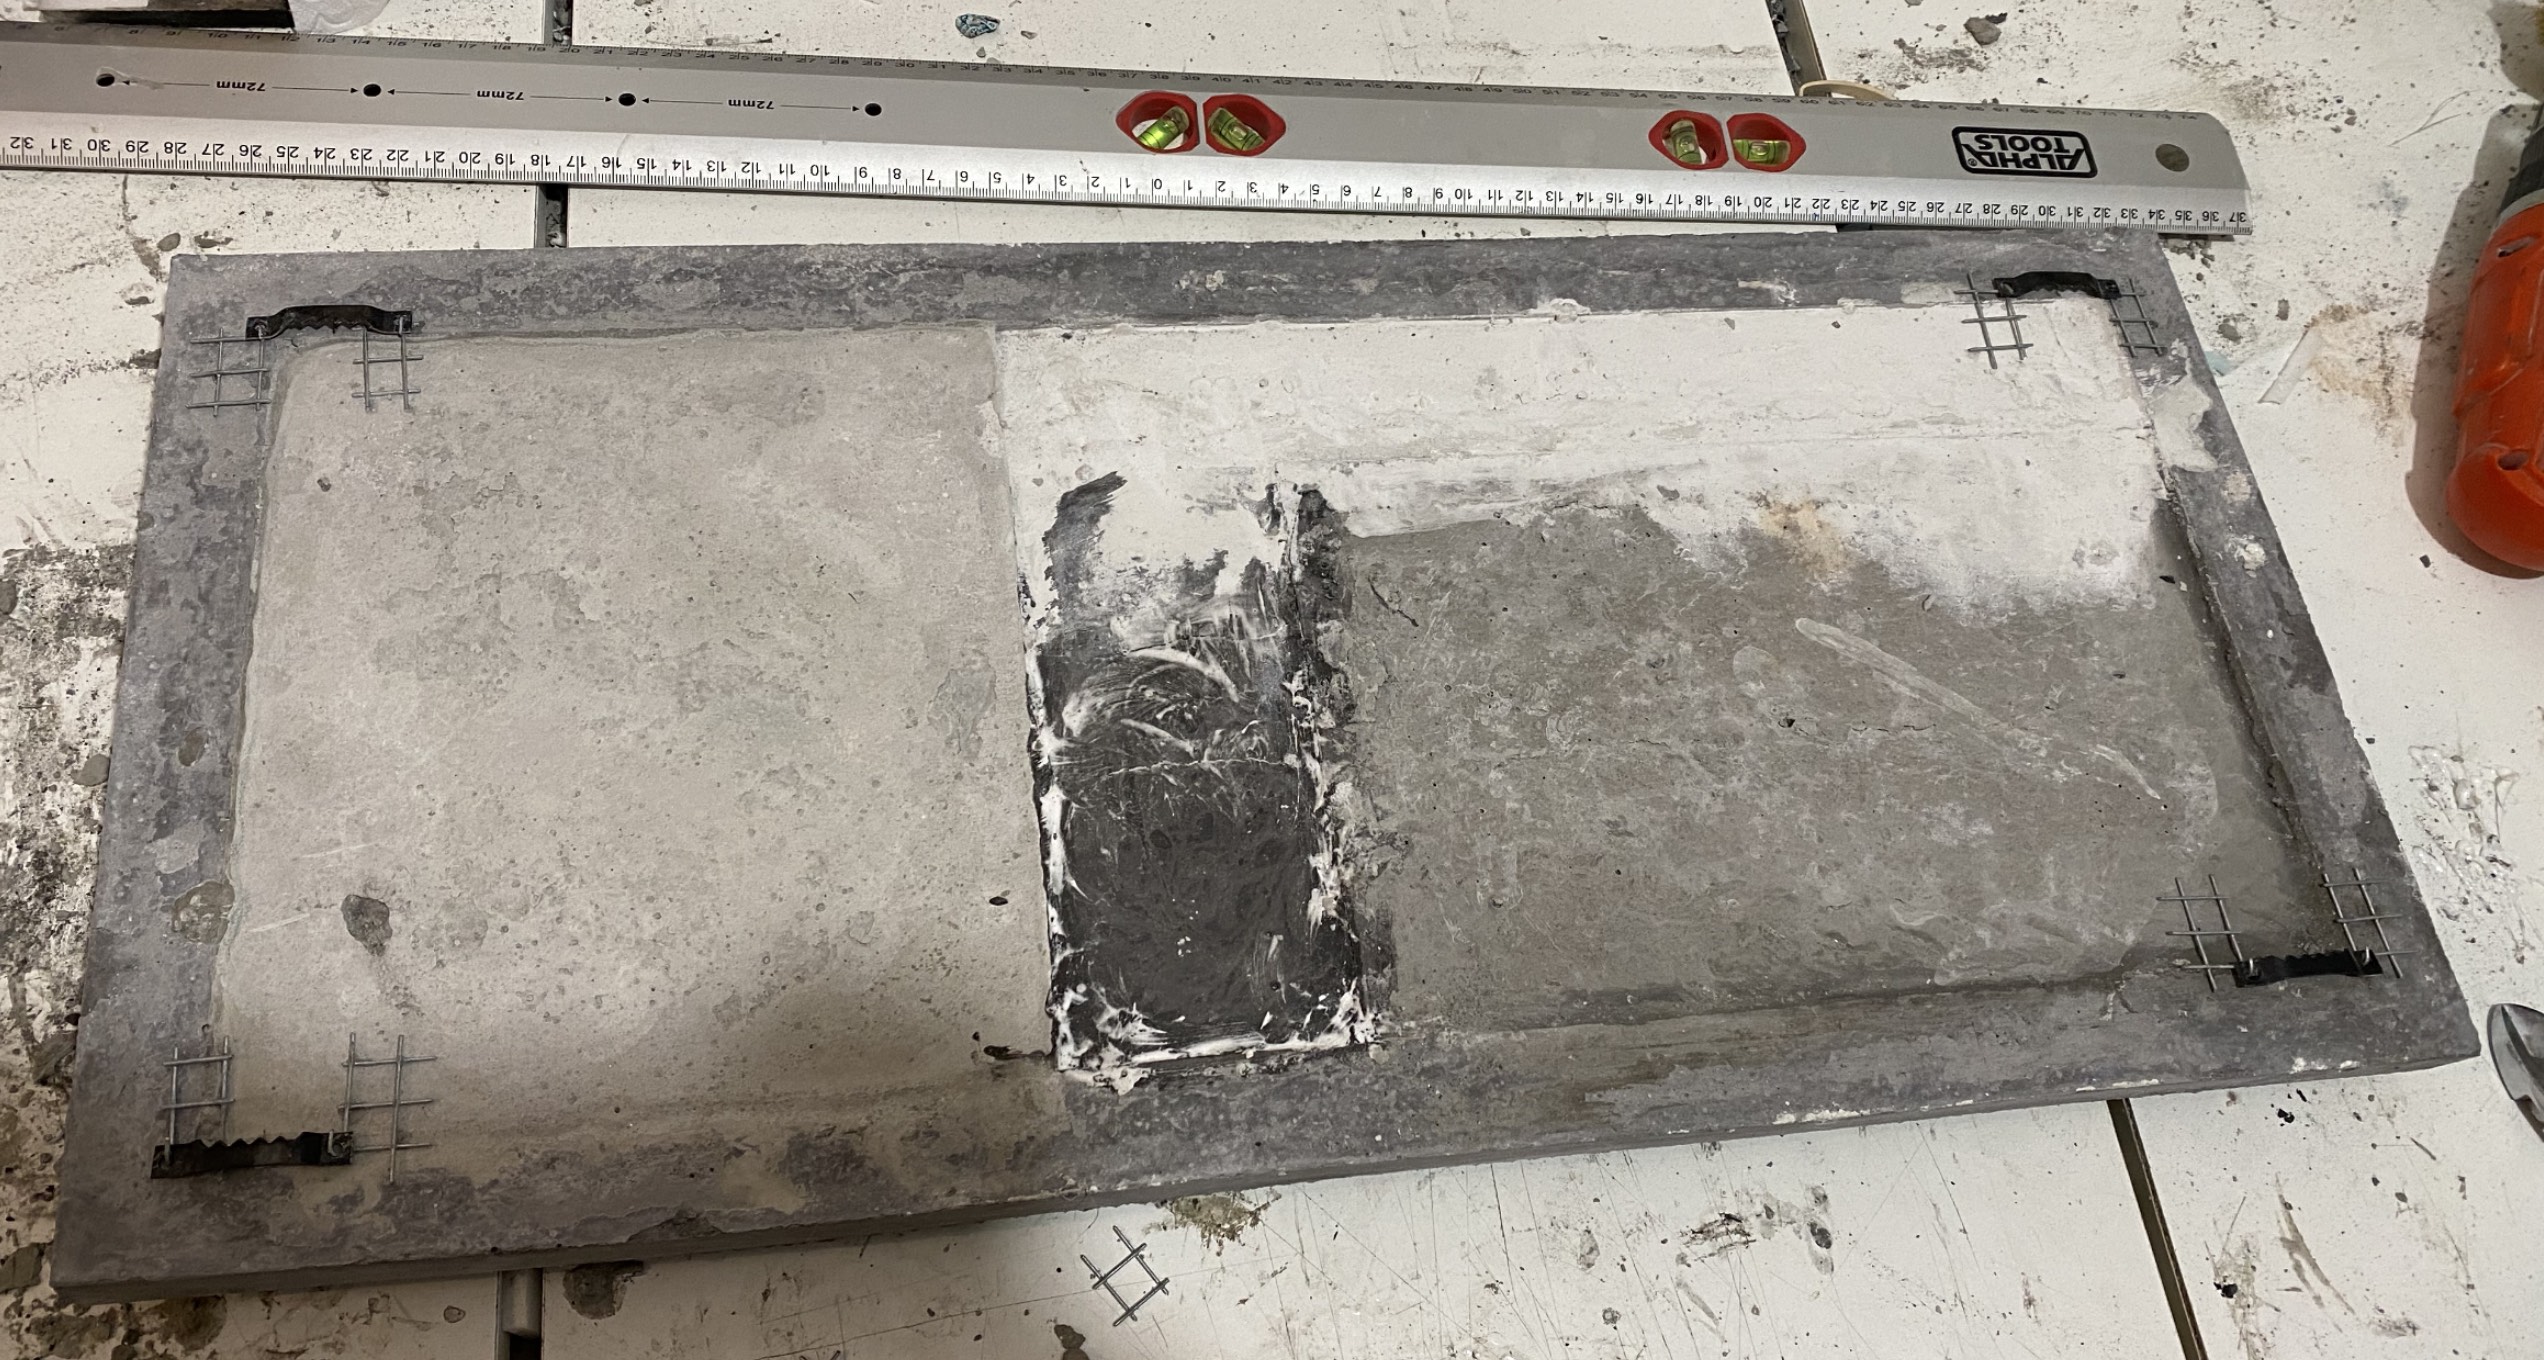
Hooks
It’s time to install the mounting hooks. This is a very important part because the heavy painting hangs on this with all of its crushing weight.
Note the hooks in the angles of the back side of the painting:
A close-up (later there will be fiberglass over this, securing the hook firmly in place):
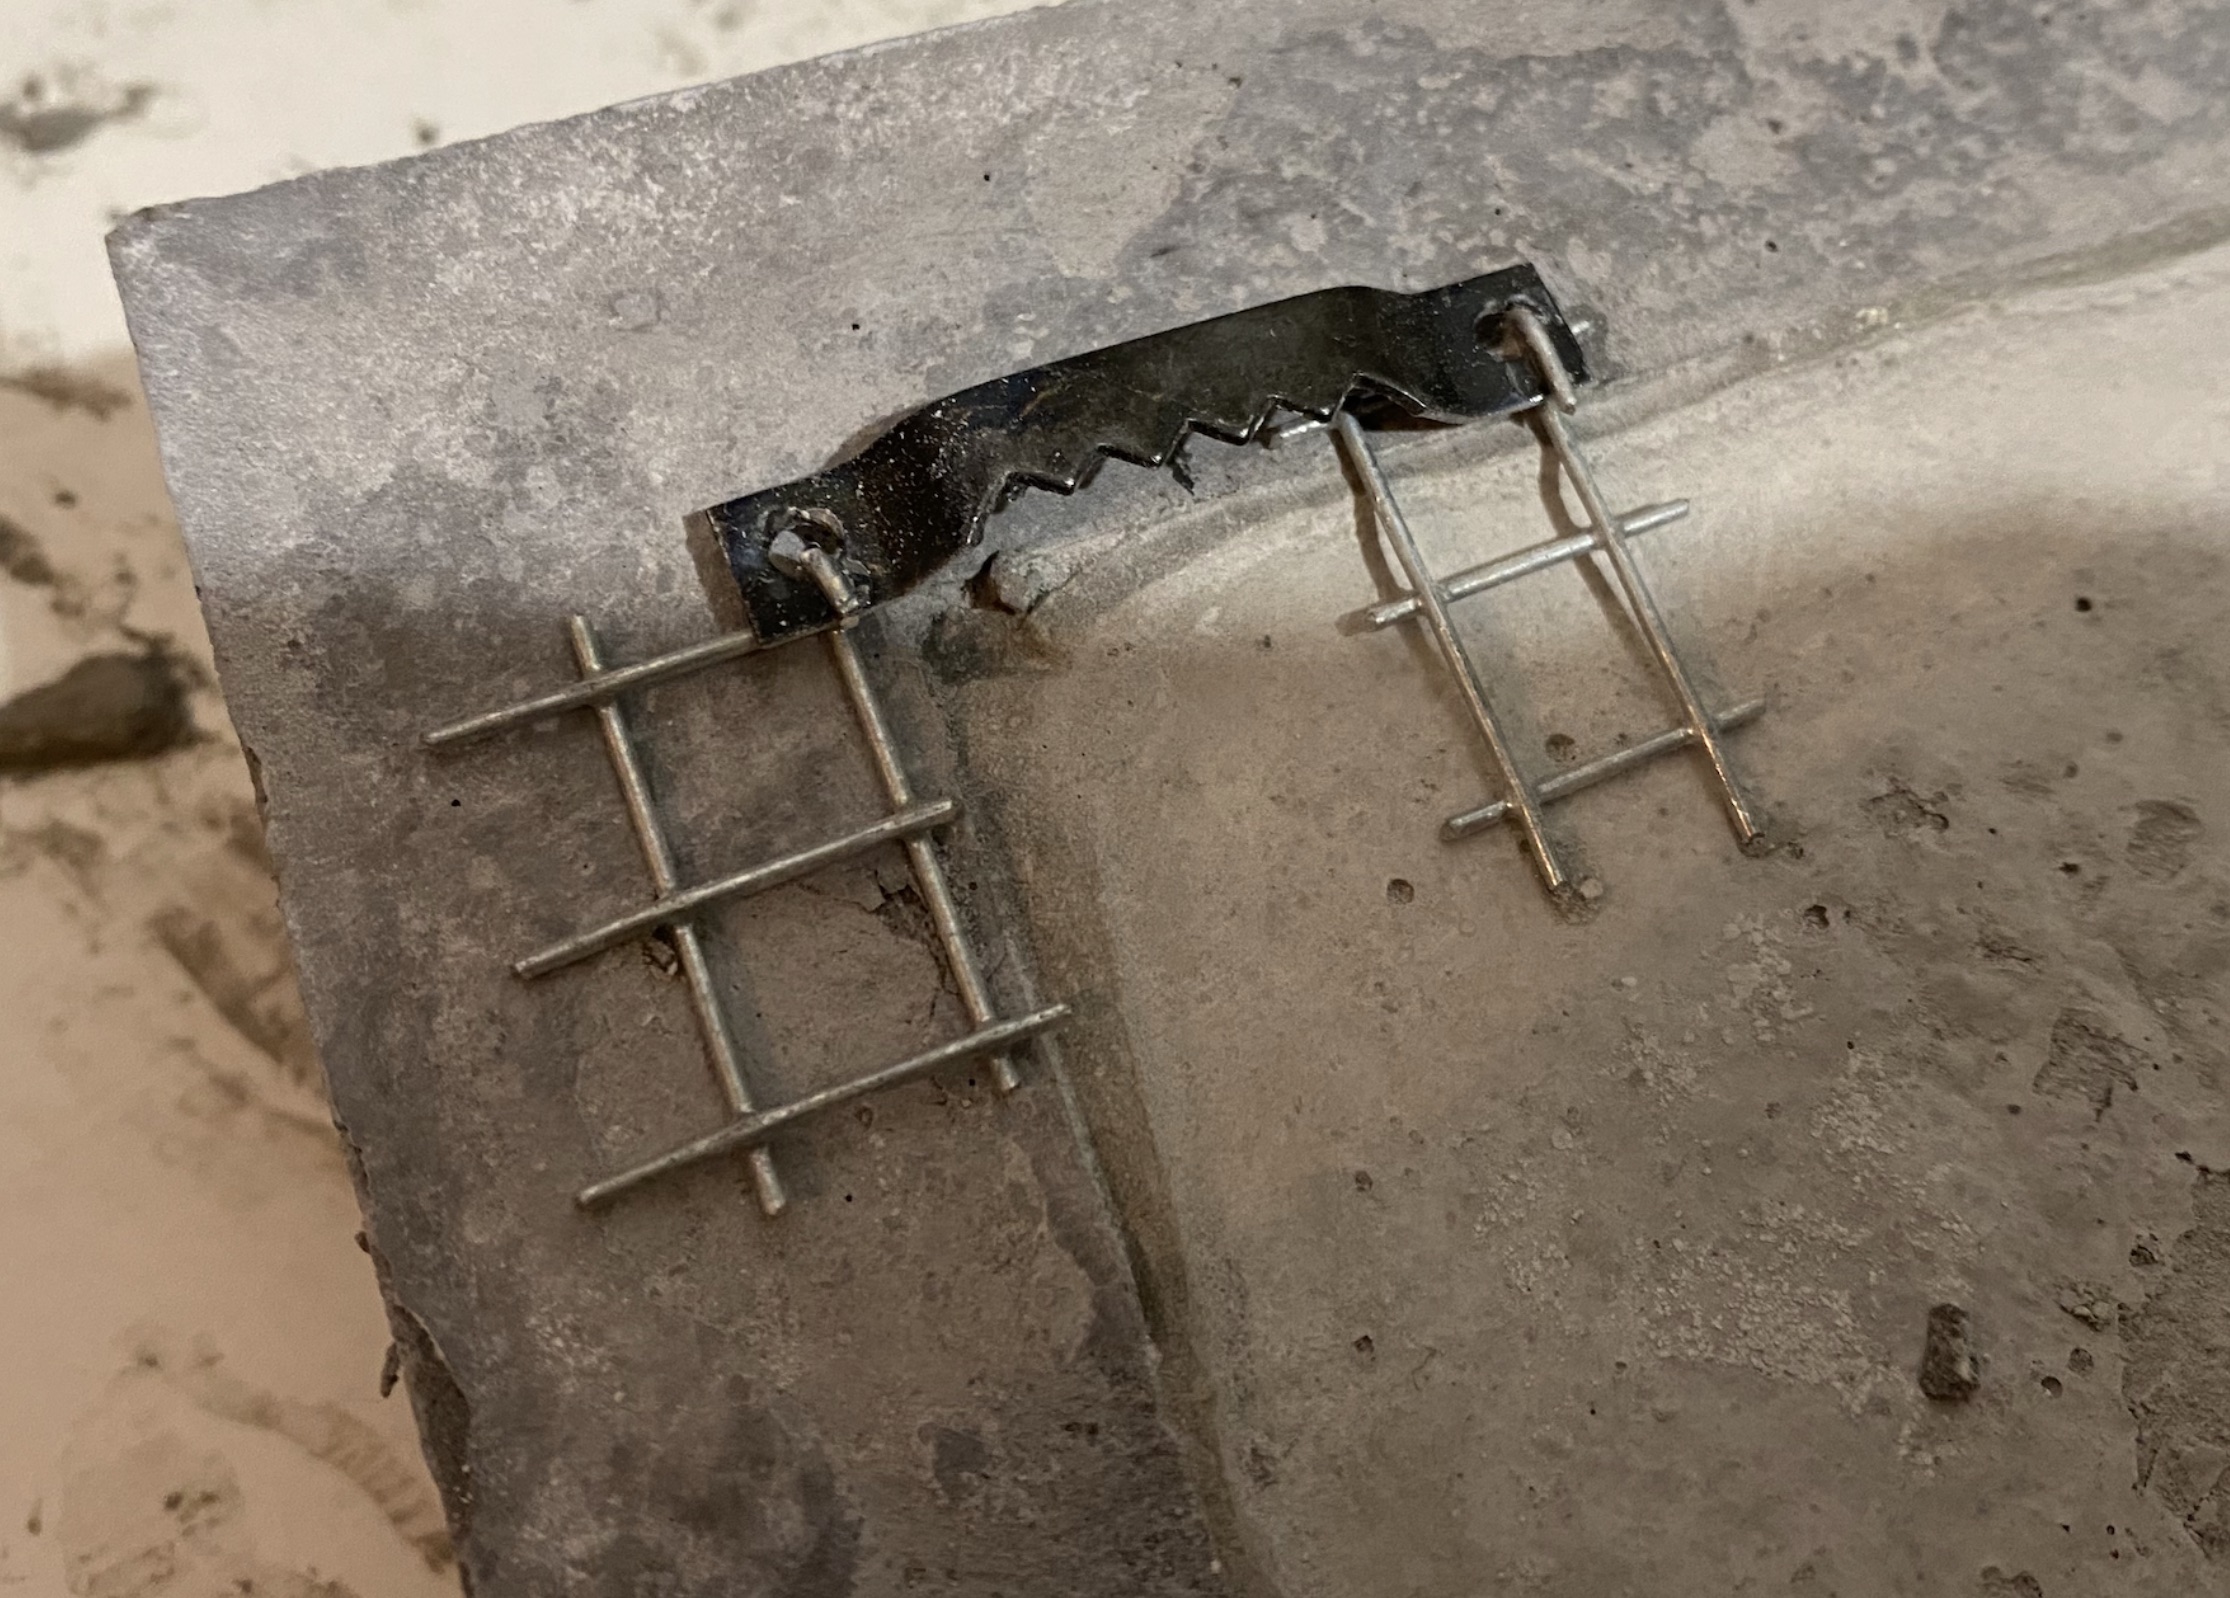
The hooks are temporarily locked into their place using superglue, but later a couple of layers of fiberglass and epoxy will be put over the back side, securing the hook tightly into its place.
Because the paintings are heavy, this is very important to get it right. If any of the hooks gave in, the painting would fall, break and wreak havoc (it happened to me!).
The concrete as shown above after I flipped it for the first time is quite fragile and lacks structural integrity. It would easily break if held or moved around improperly.
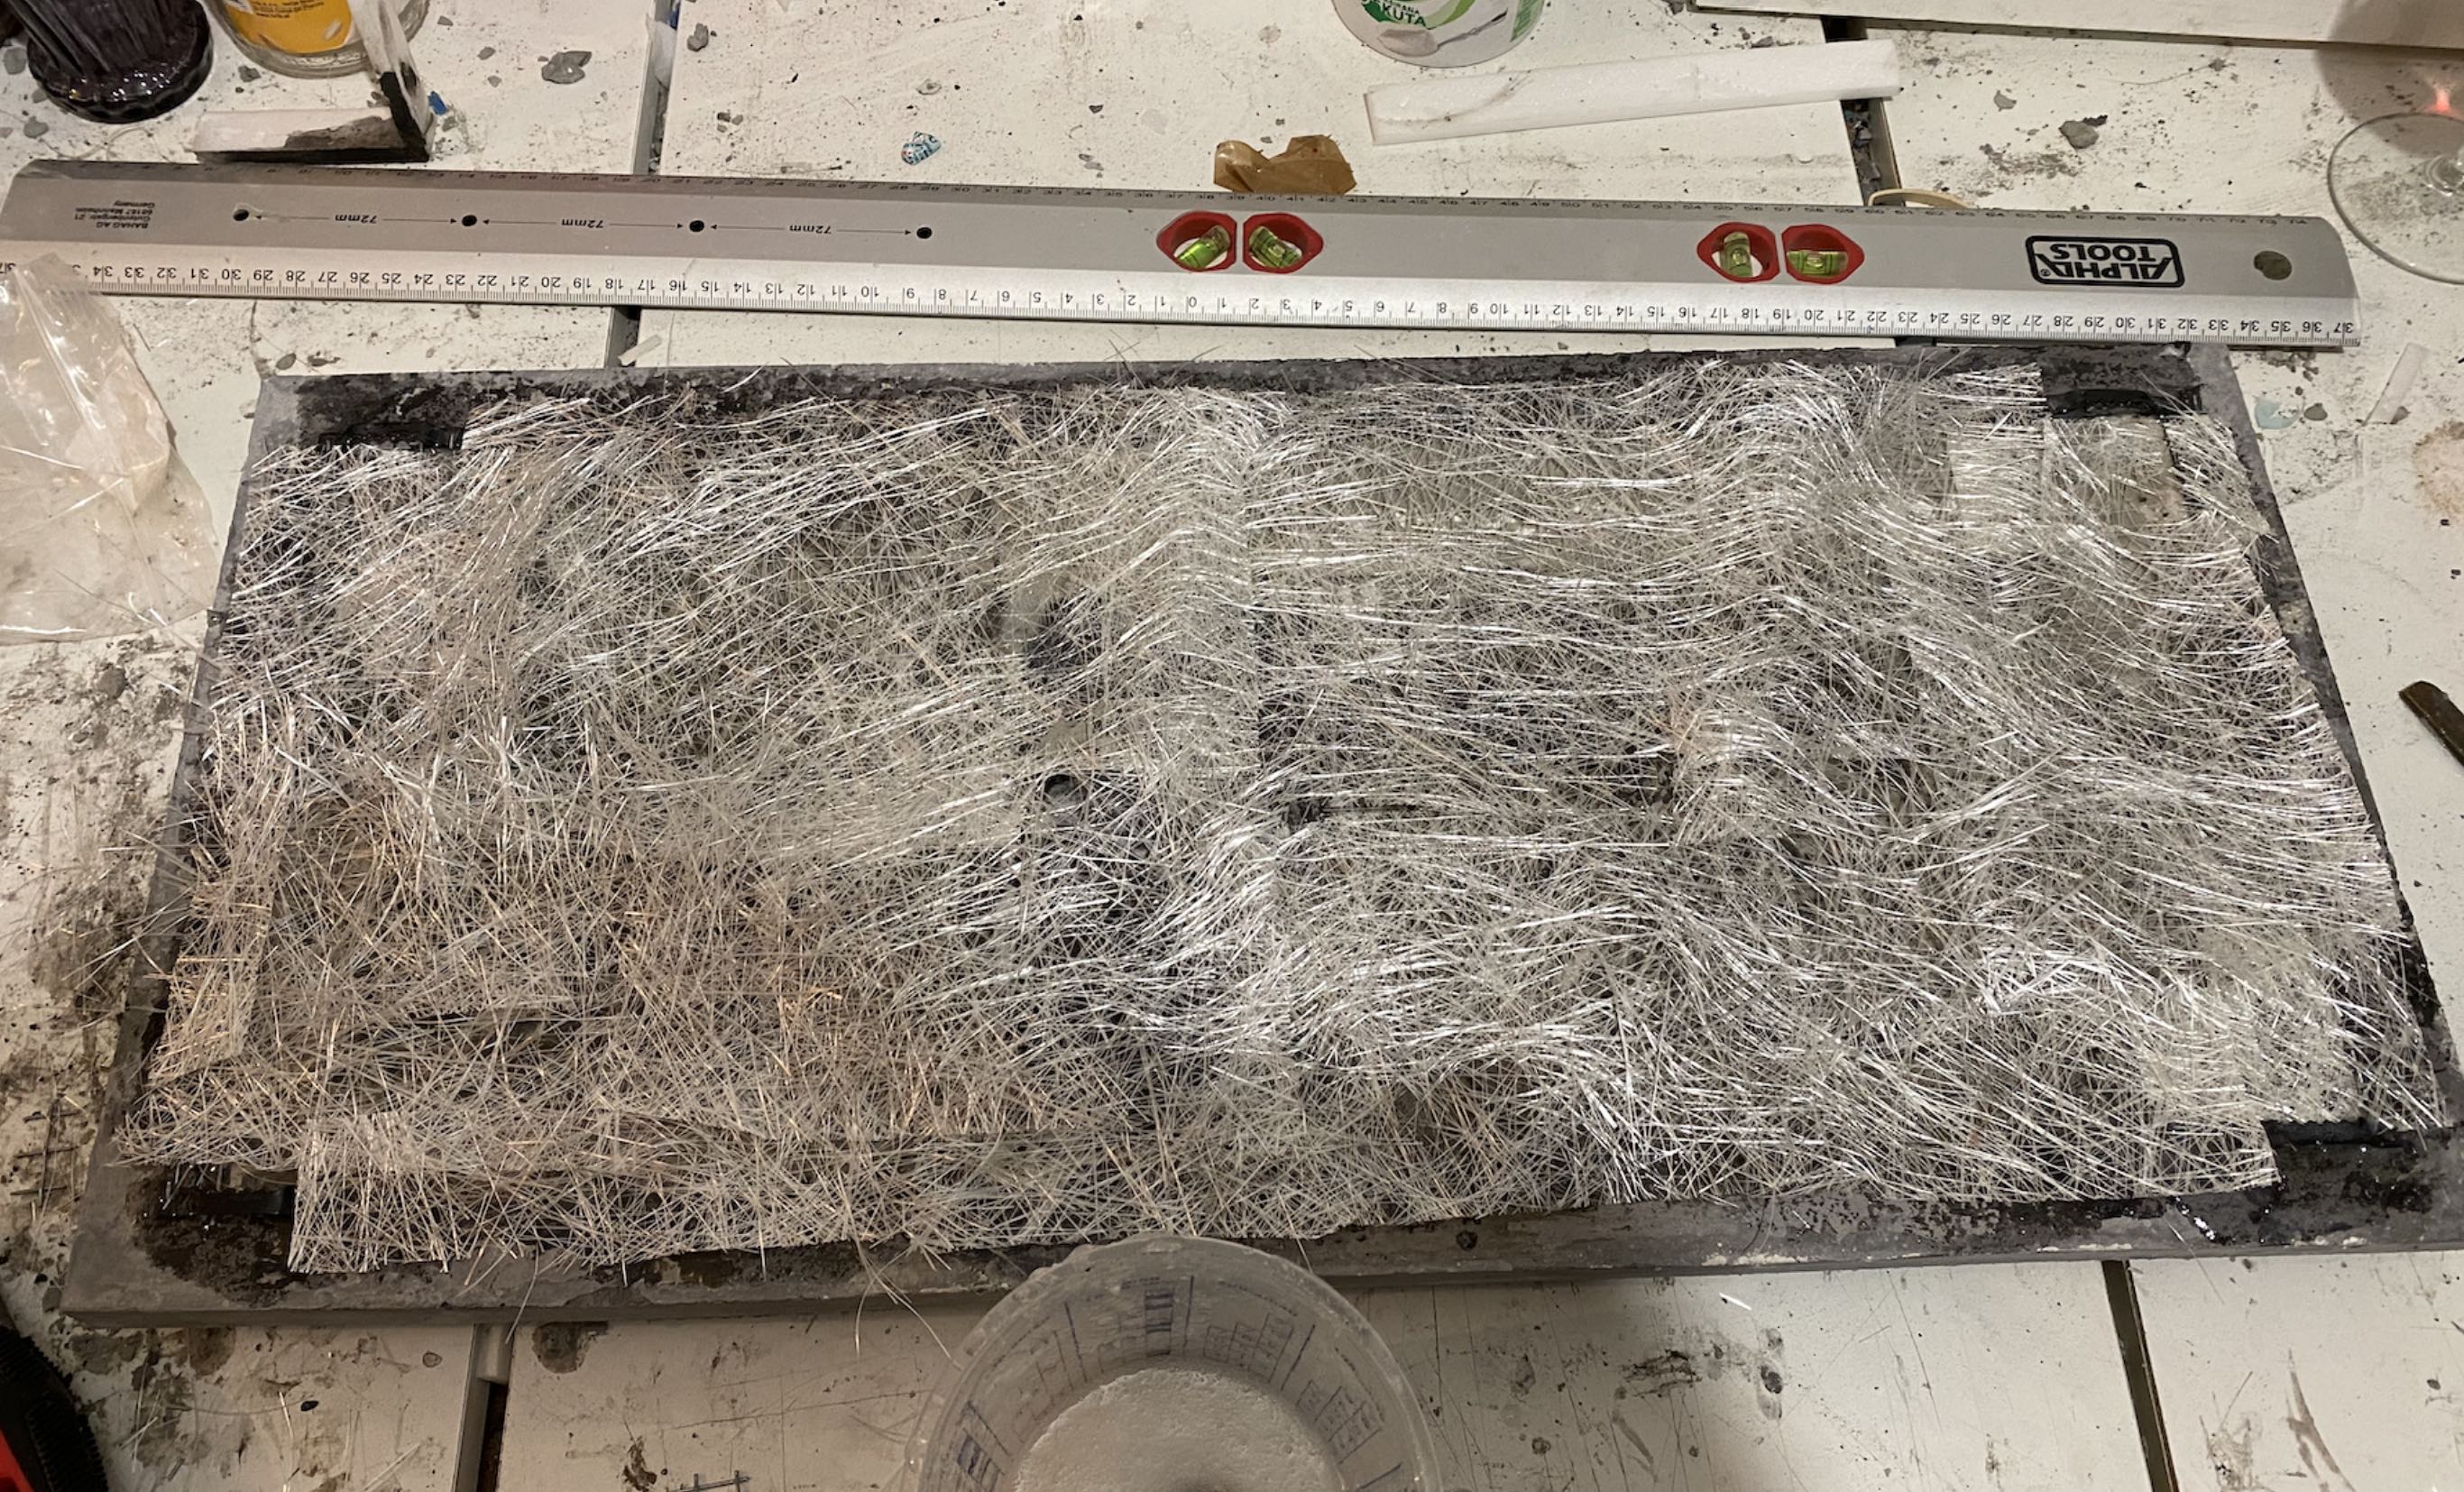
Fiberglass back
To make this sculpture stronger and more rigid, I add a layer of glass fibers and epoxy resin to the back of the painting.
Epoxy resin comes in two components that need to be mixed.
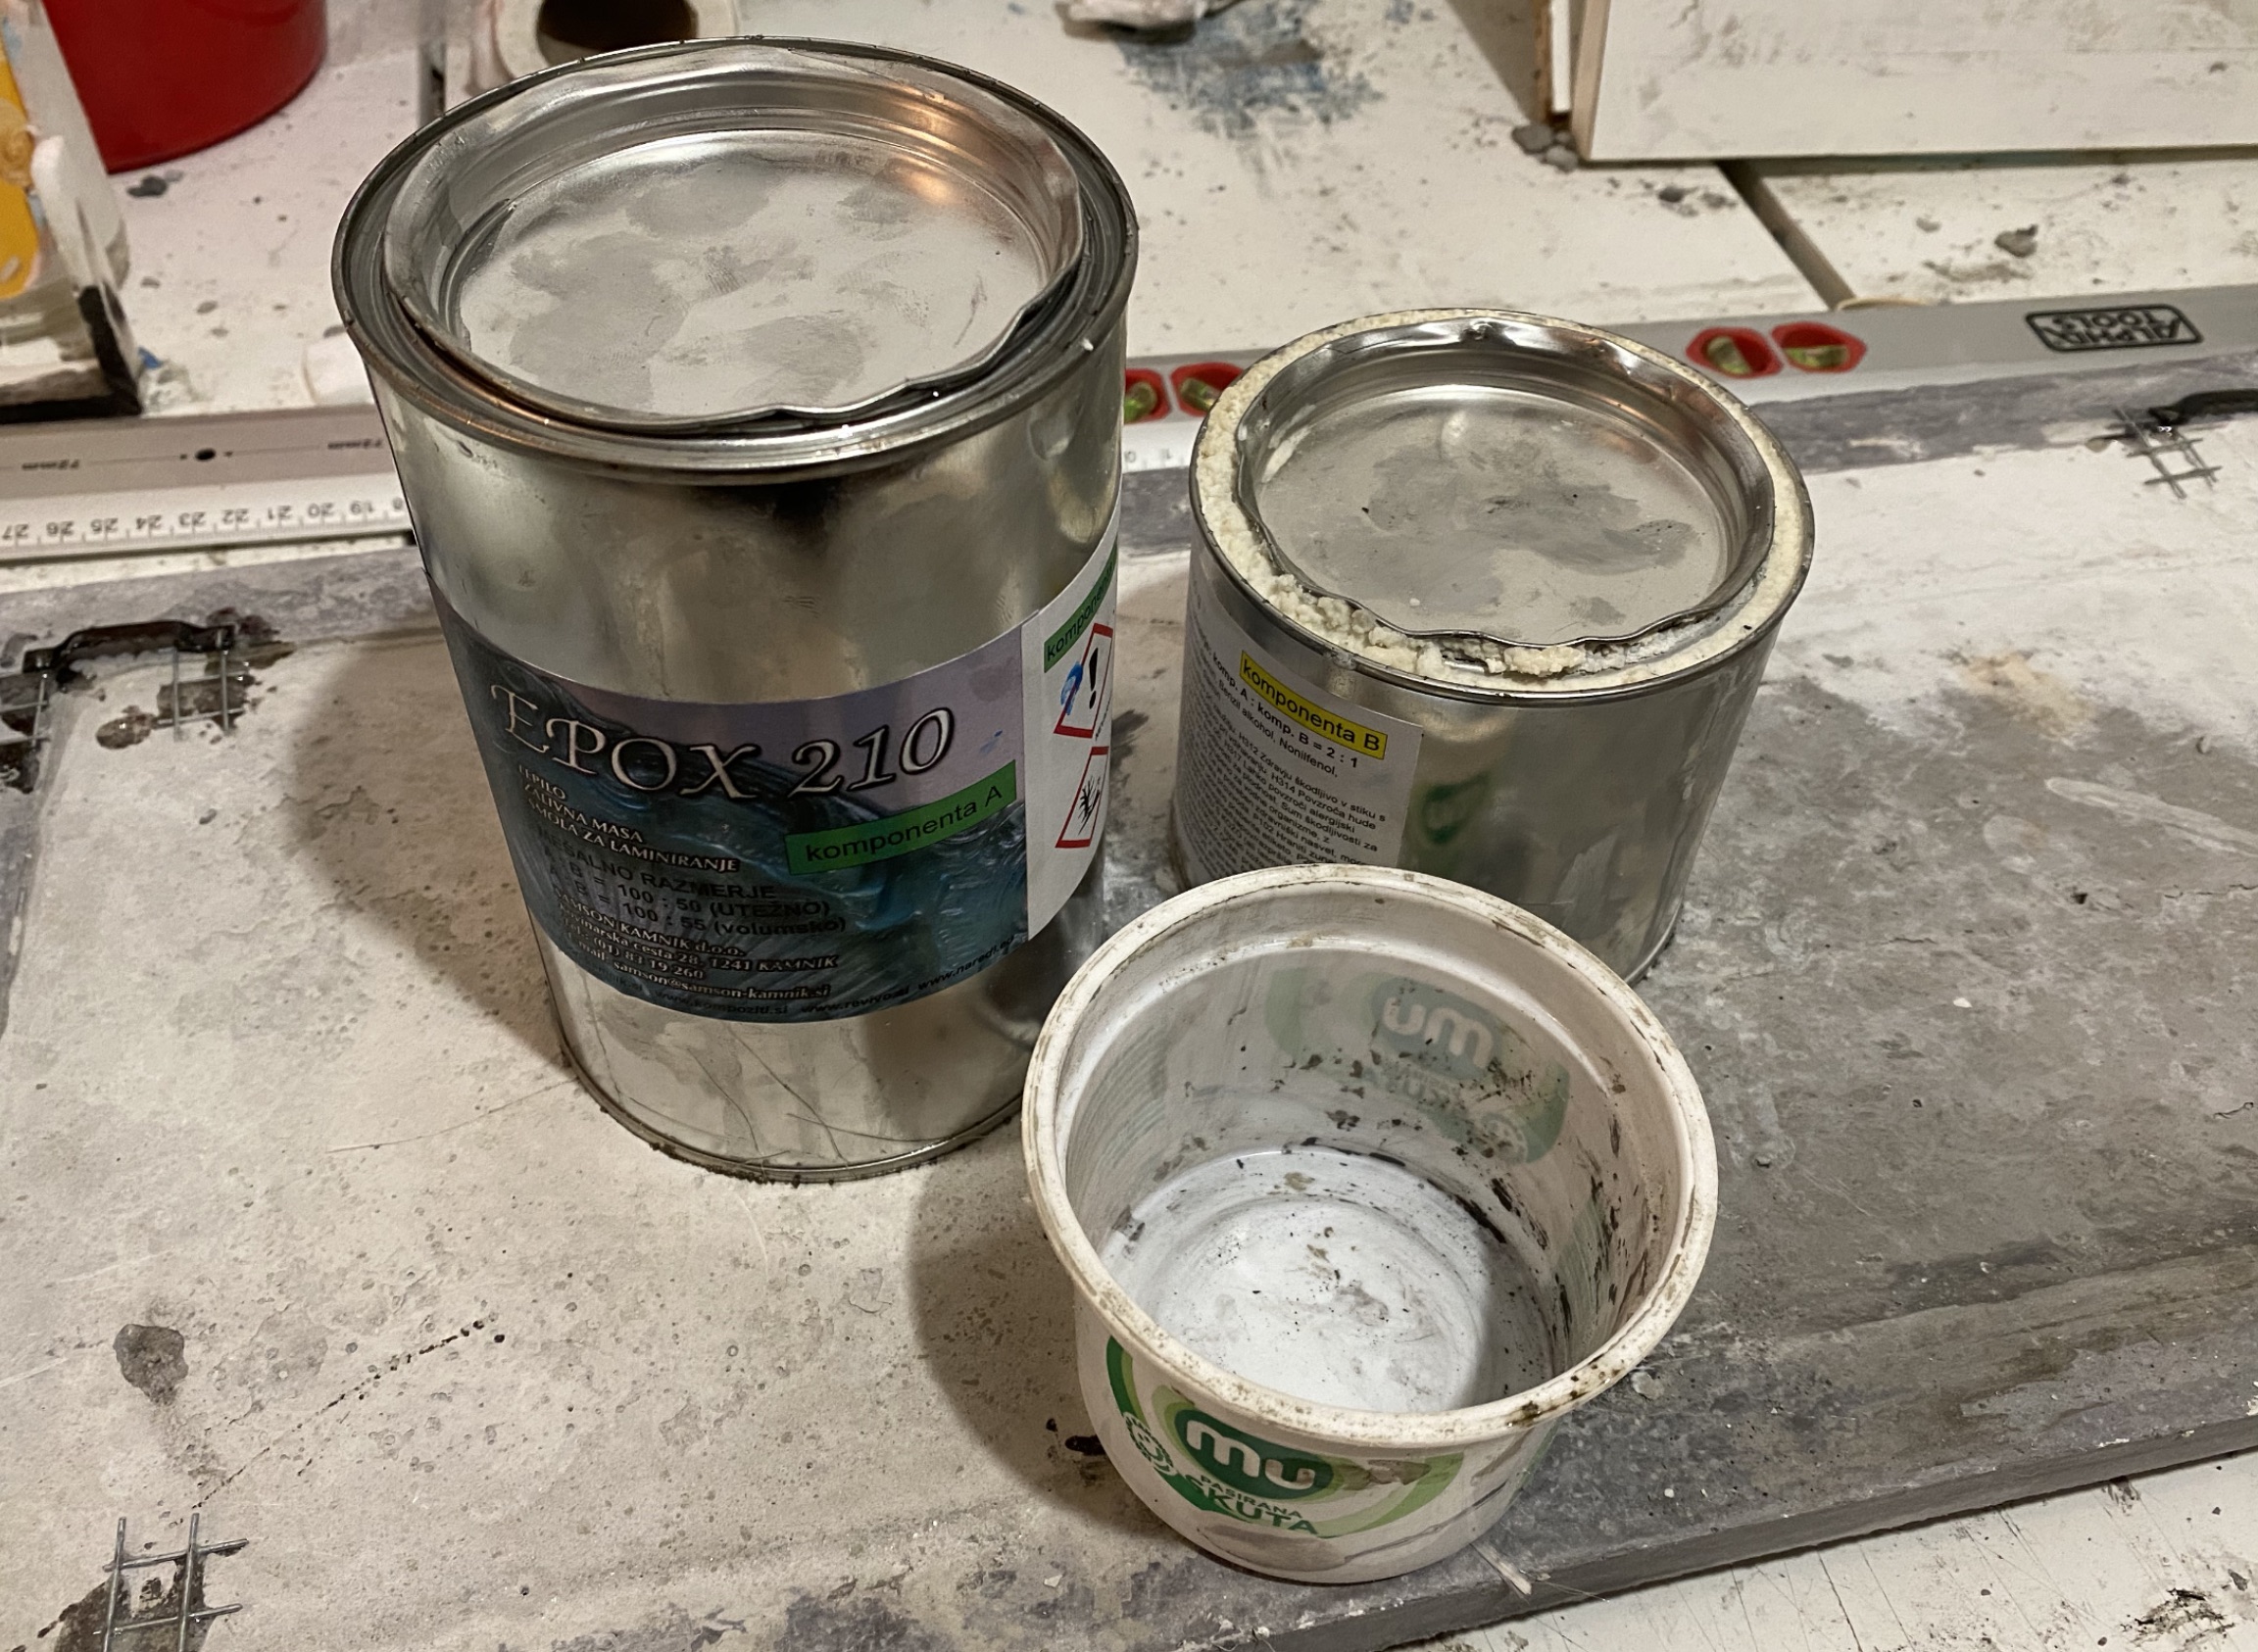

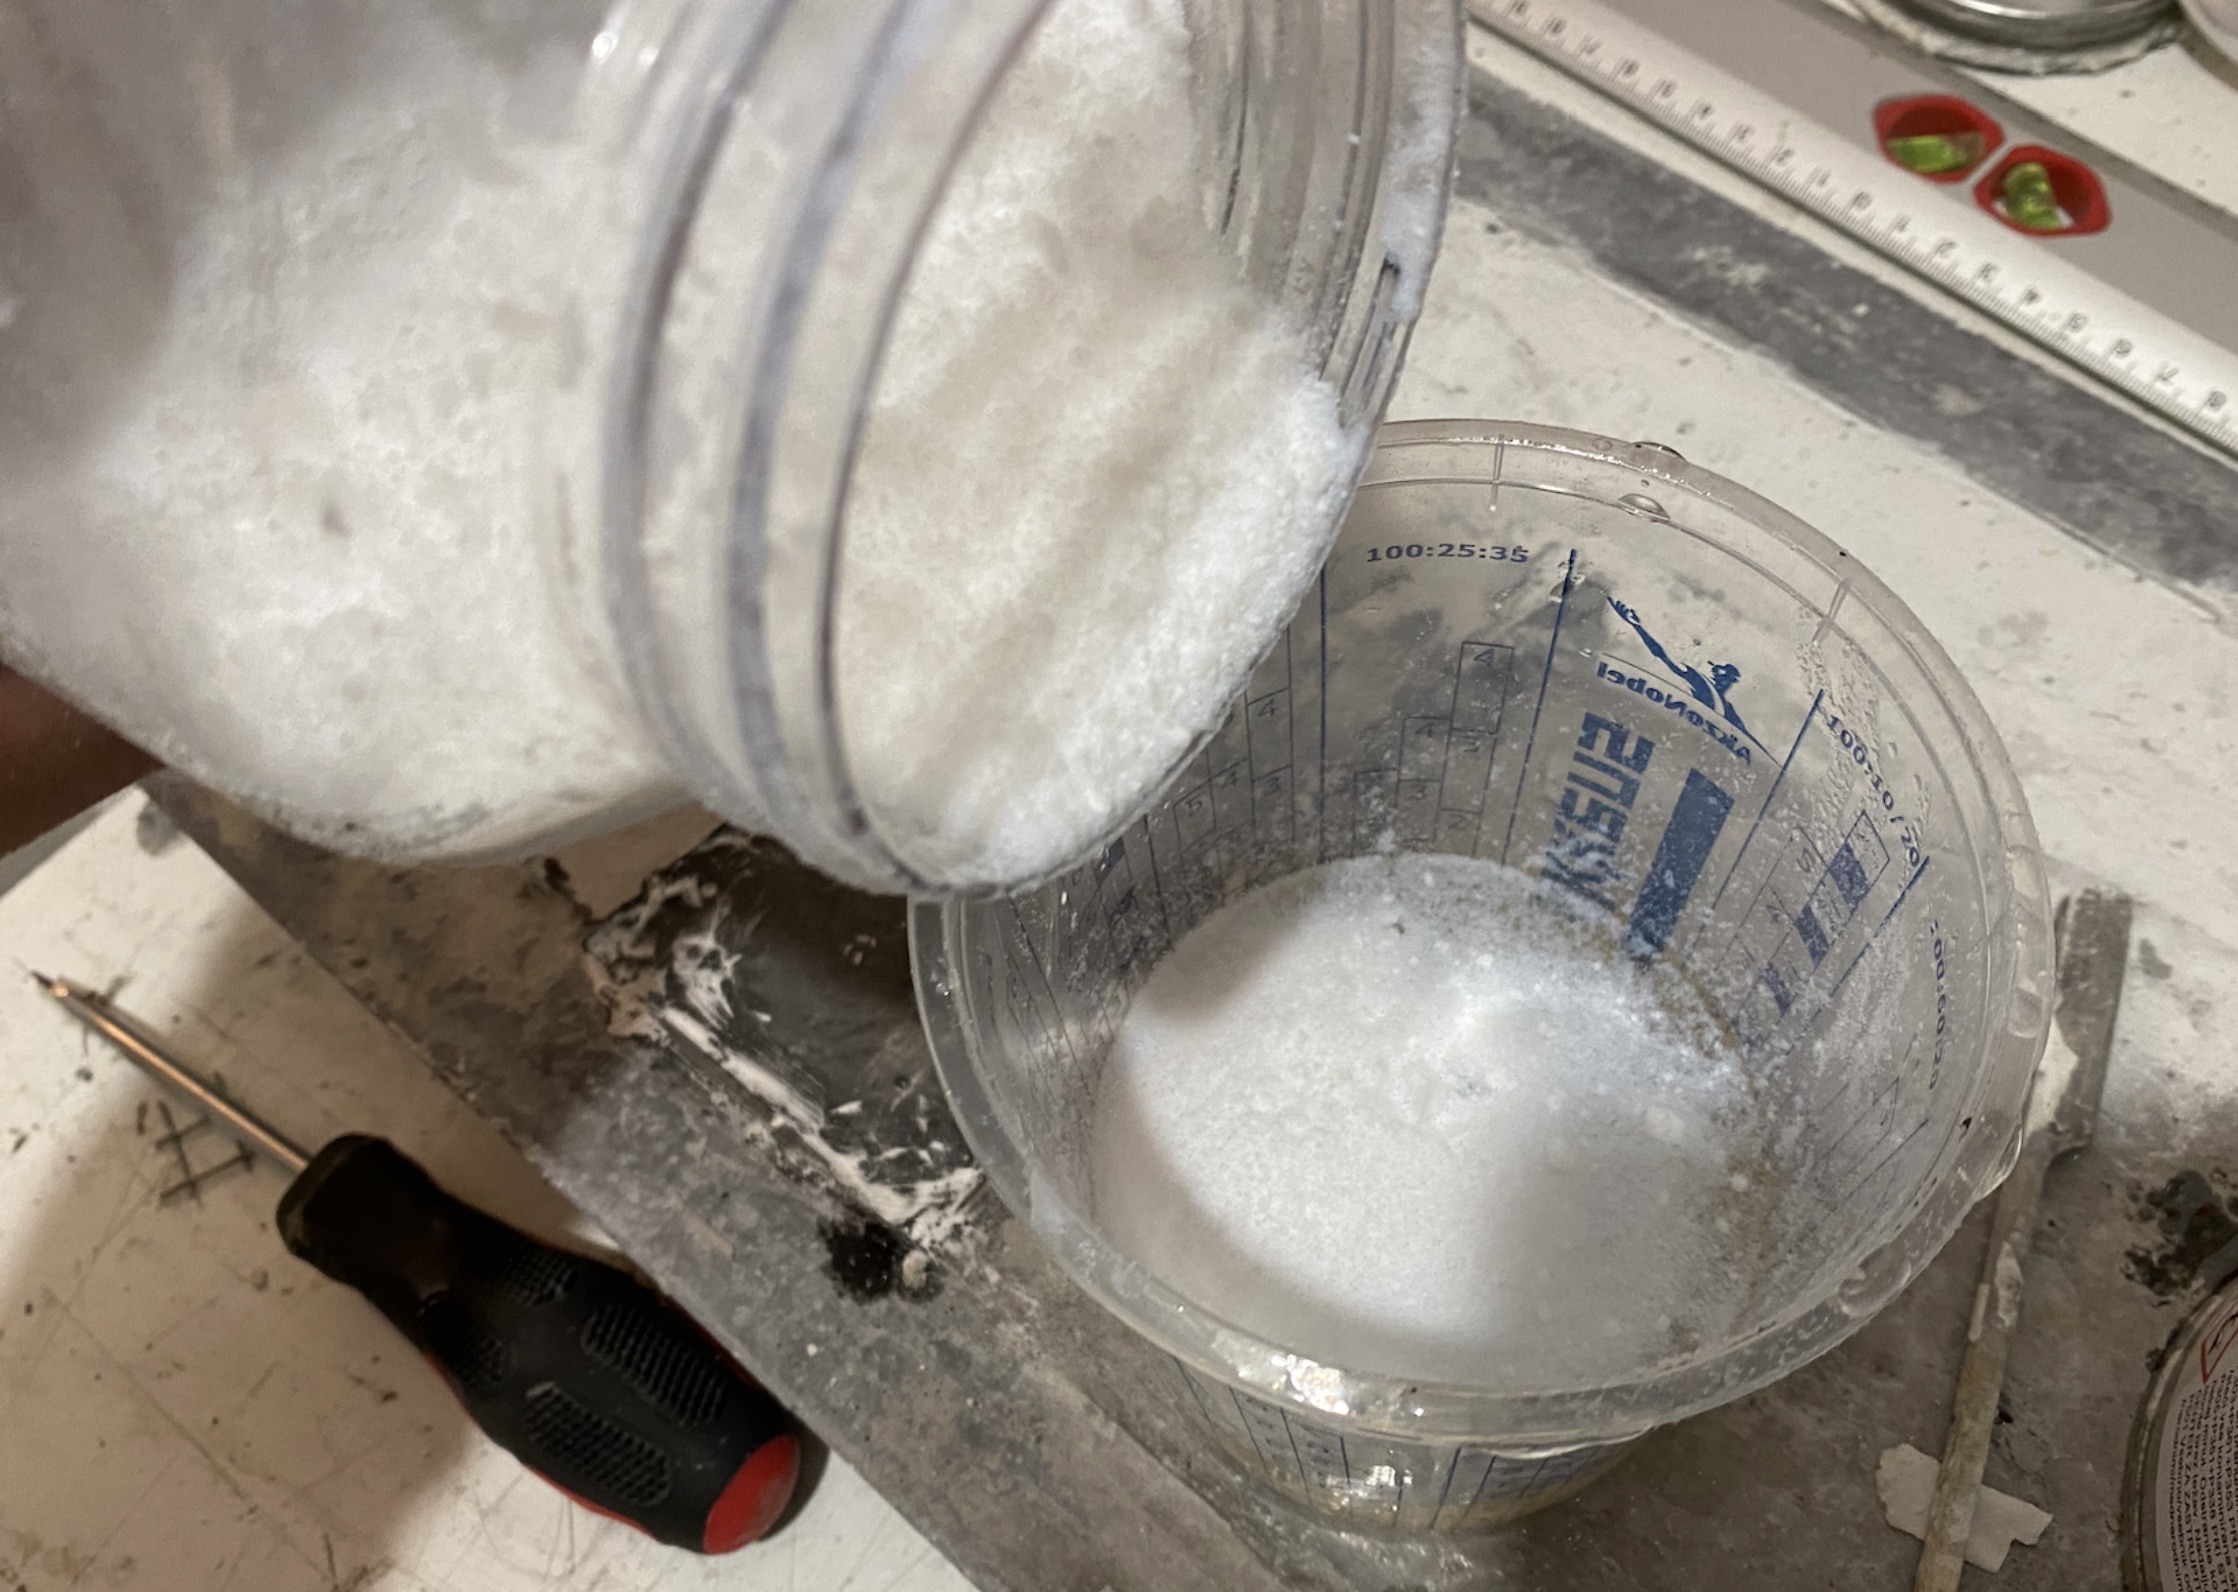
After both components of the epoxy resin are well mixed together, I add some thickening agent. This makes the resin less runny and easier to work with. When resin is too runny, it can go through concrete’s pores and come out on the face of the painting, which is ruins the painting with stains (learned this the hard way!).
The back of the painting, layered with glass fibers.
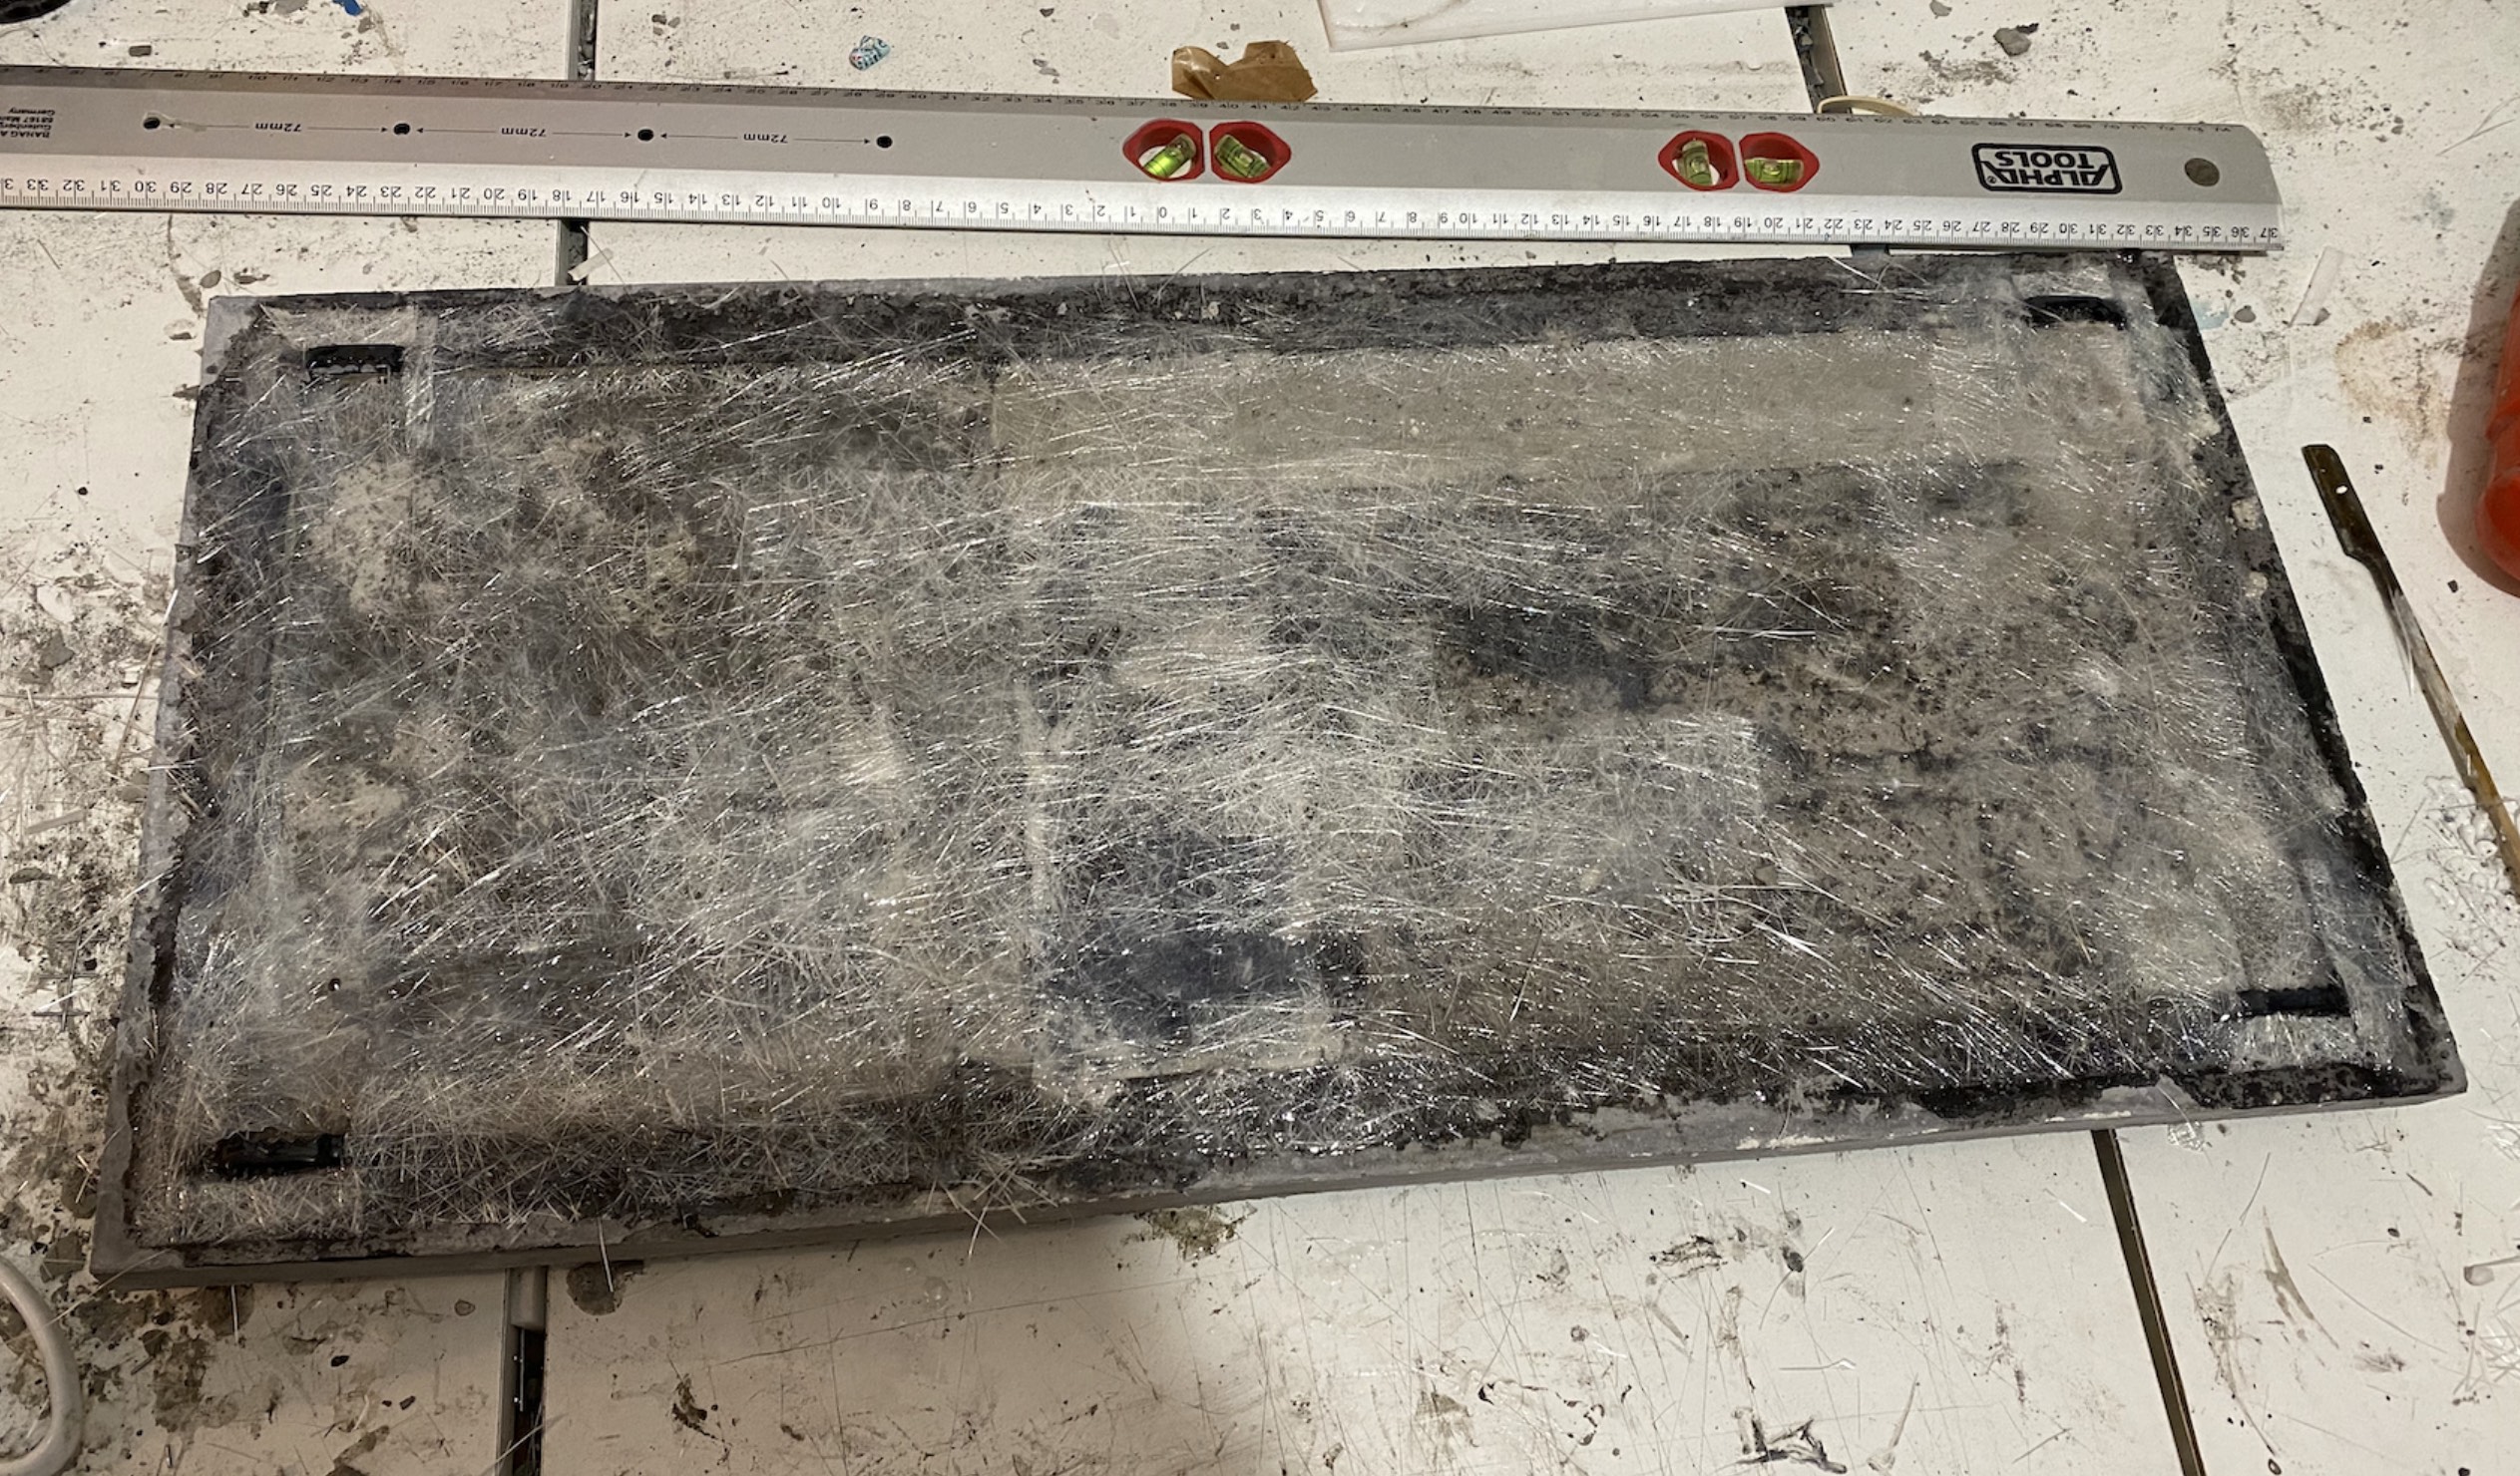
Using a brush I spread the resin all over the fiber. It needs a day to fully harden and then it becomes the backbone of the painting, making it structurally much stronger.
Note the hooks which are now integrated into the fiberglass layer, securing them tightly into place.
Once the resin fully hardens, I can start making the final touches to the face of the painting: polishing, coating.
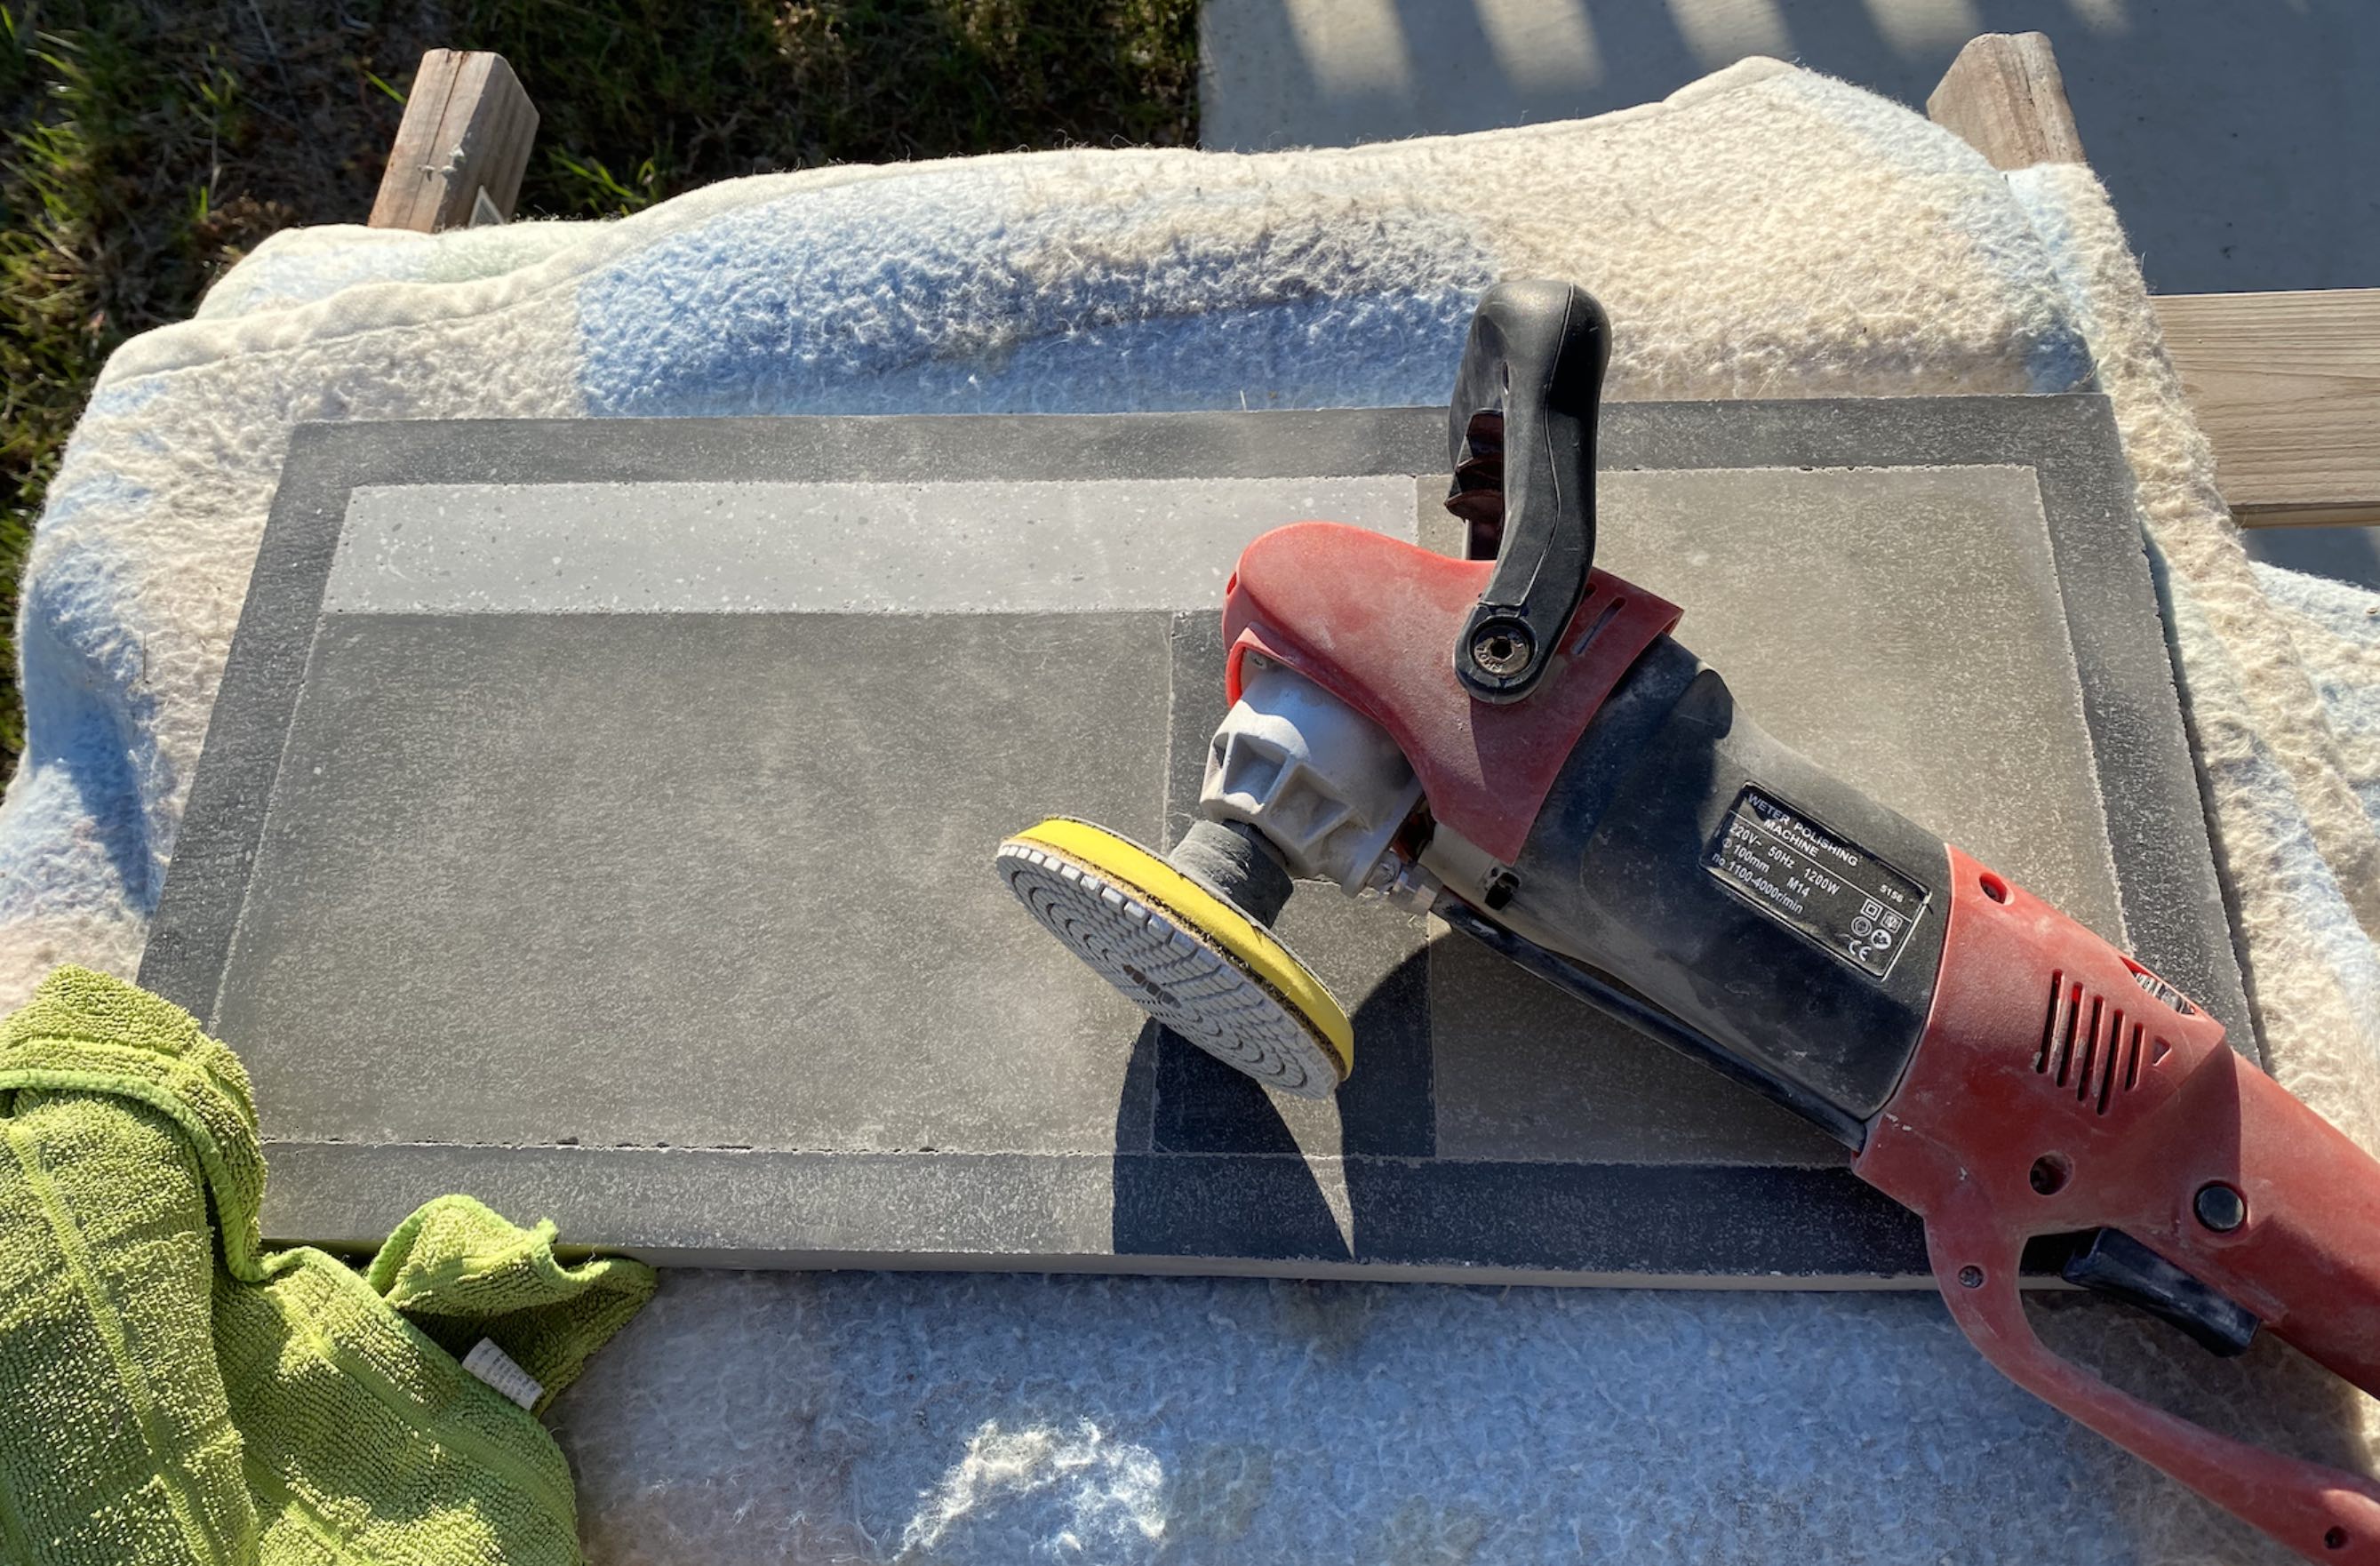
Polishing
I place the painting outside, put it on a blanket, which helps to absorb shocks and prevent structural damage from the vibrations of the polishing machine.
What comes next is polishing with a rotational tool similar to an angle grinder, using diamond pads. In the past I tried many different sanding tools, but the diamond pads polisher works best. These pads have different amounts of tiny little hard rocks spread out in plastic.
I start with the pad number 50, then 150, then move to 500 and finally, 2000. Lower grit (number) means rougher grinding, while higher number means a more polished finish.
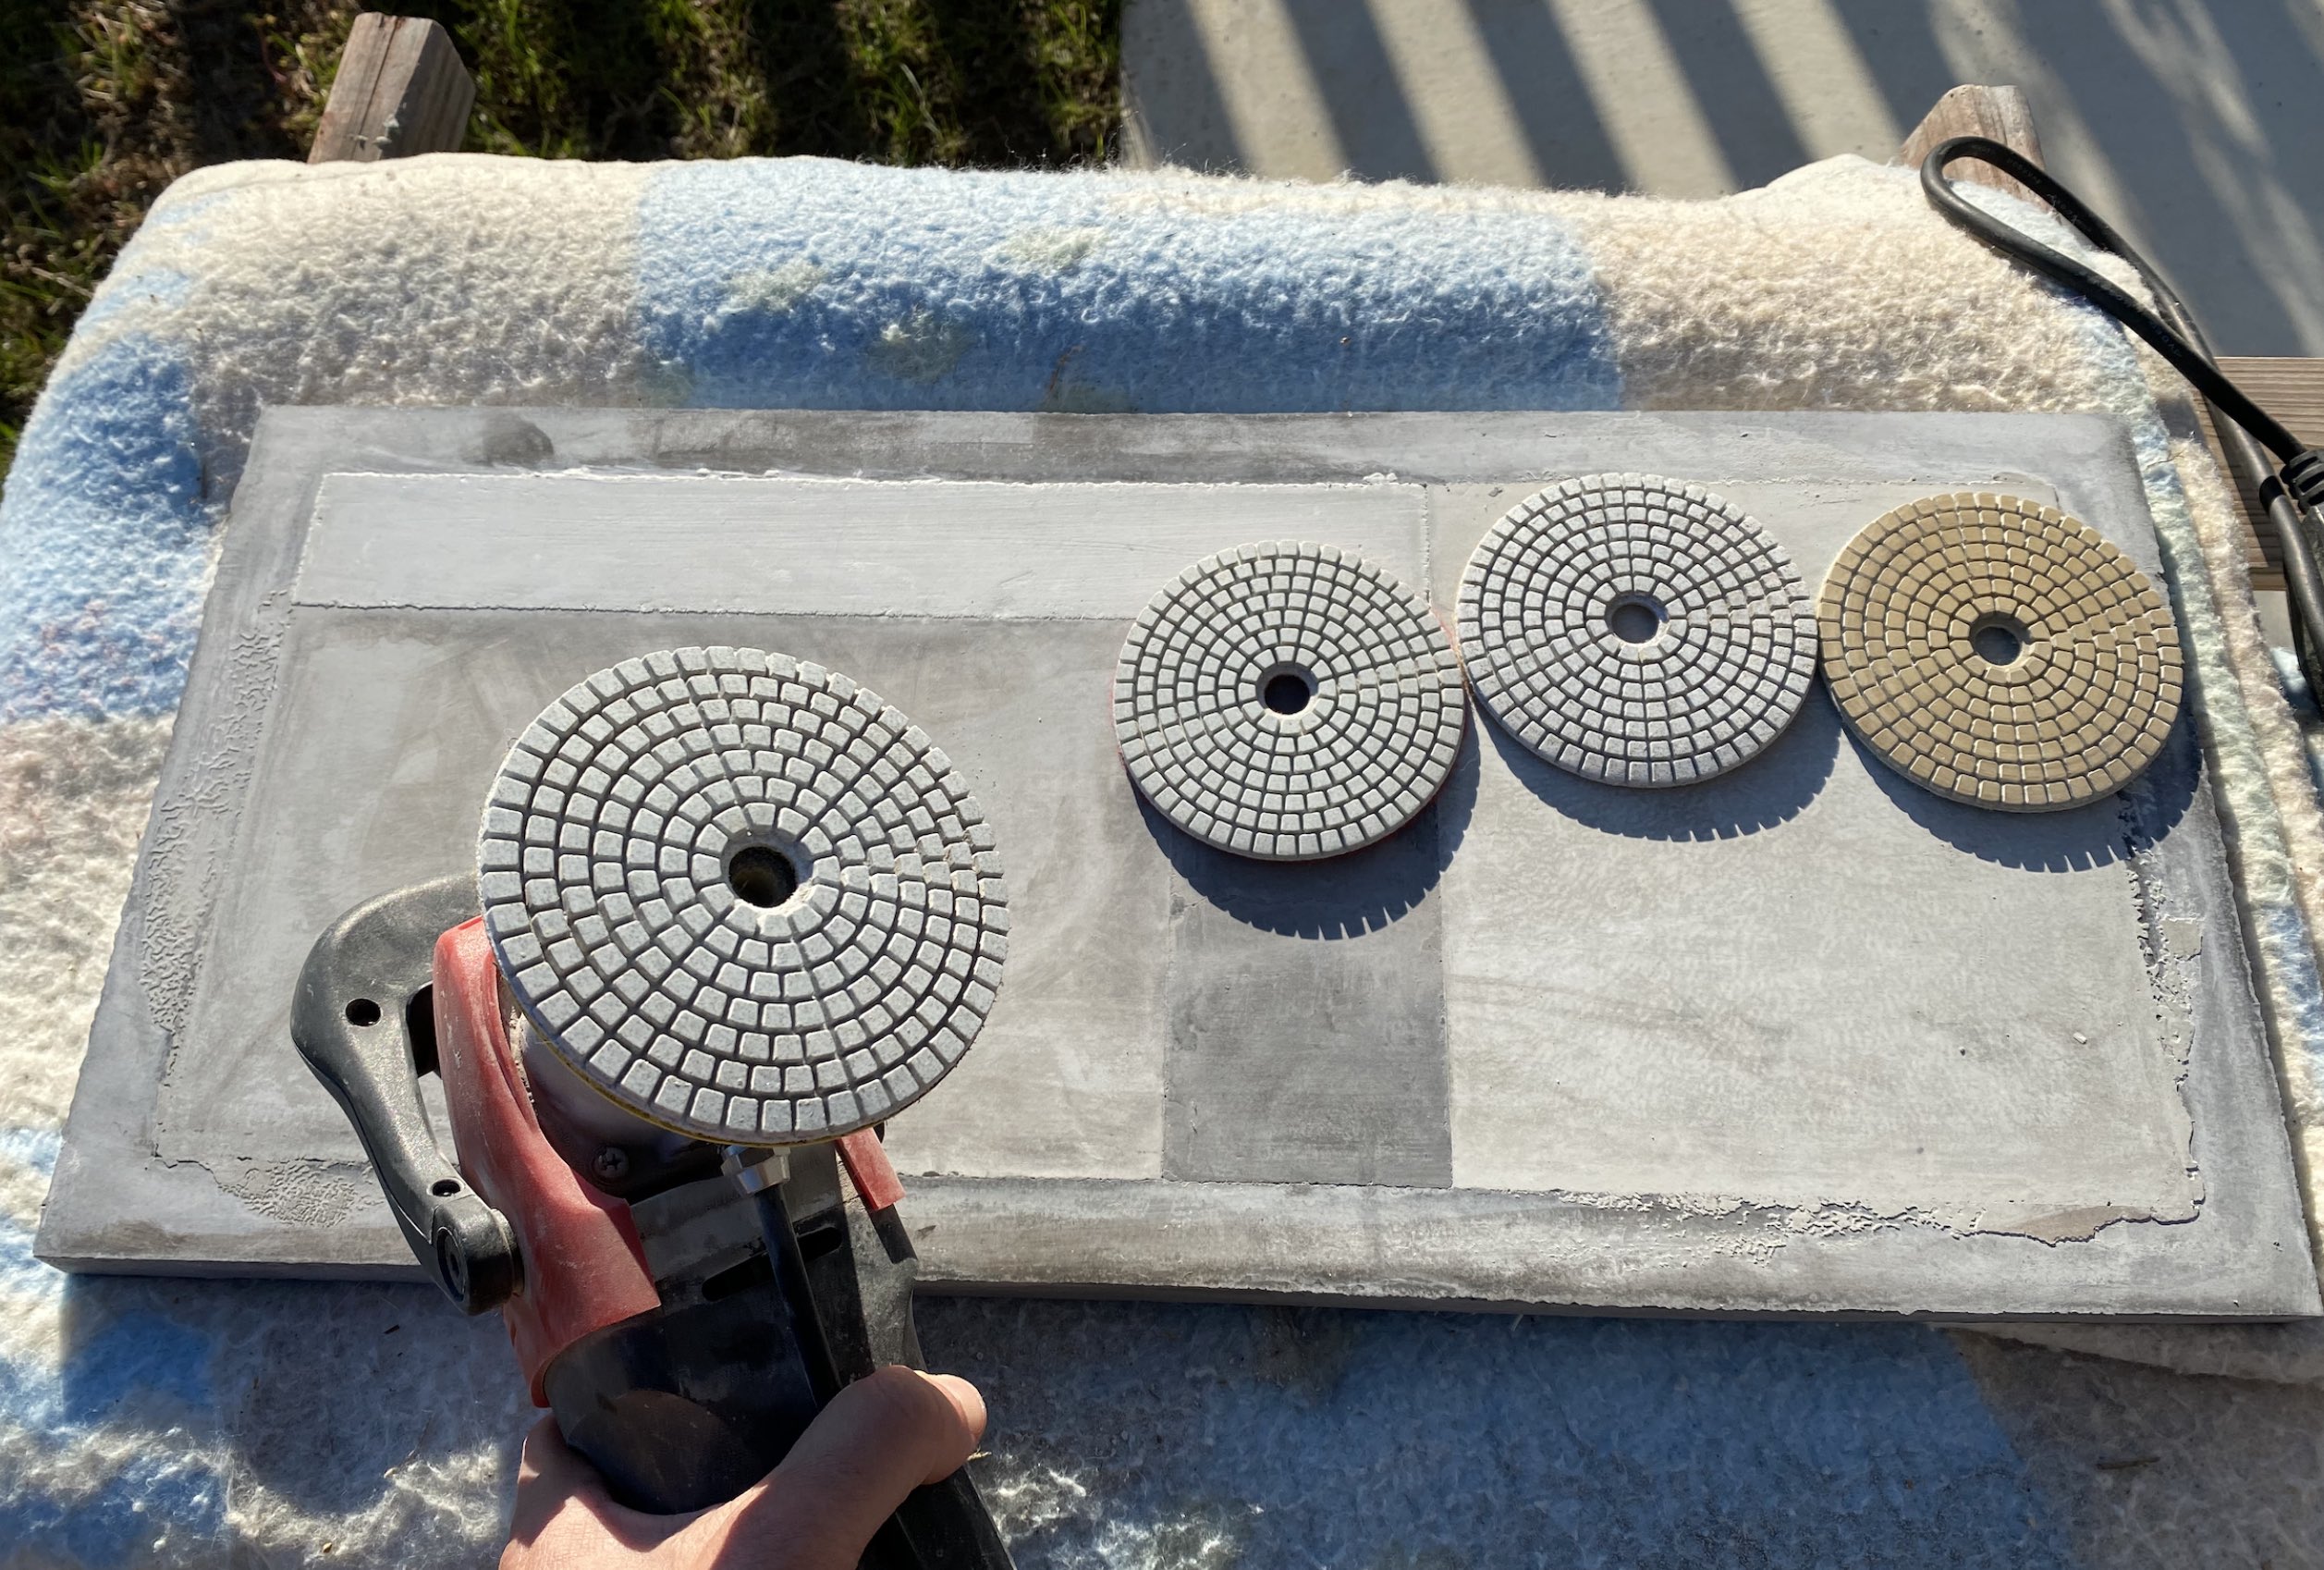
Now let’s polish this thing already.
The painting is now finally starting to look really pretty.
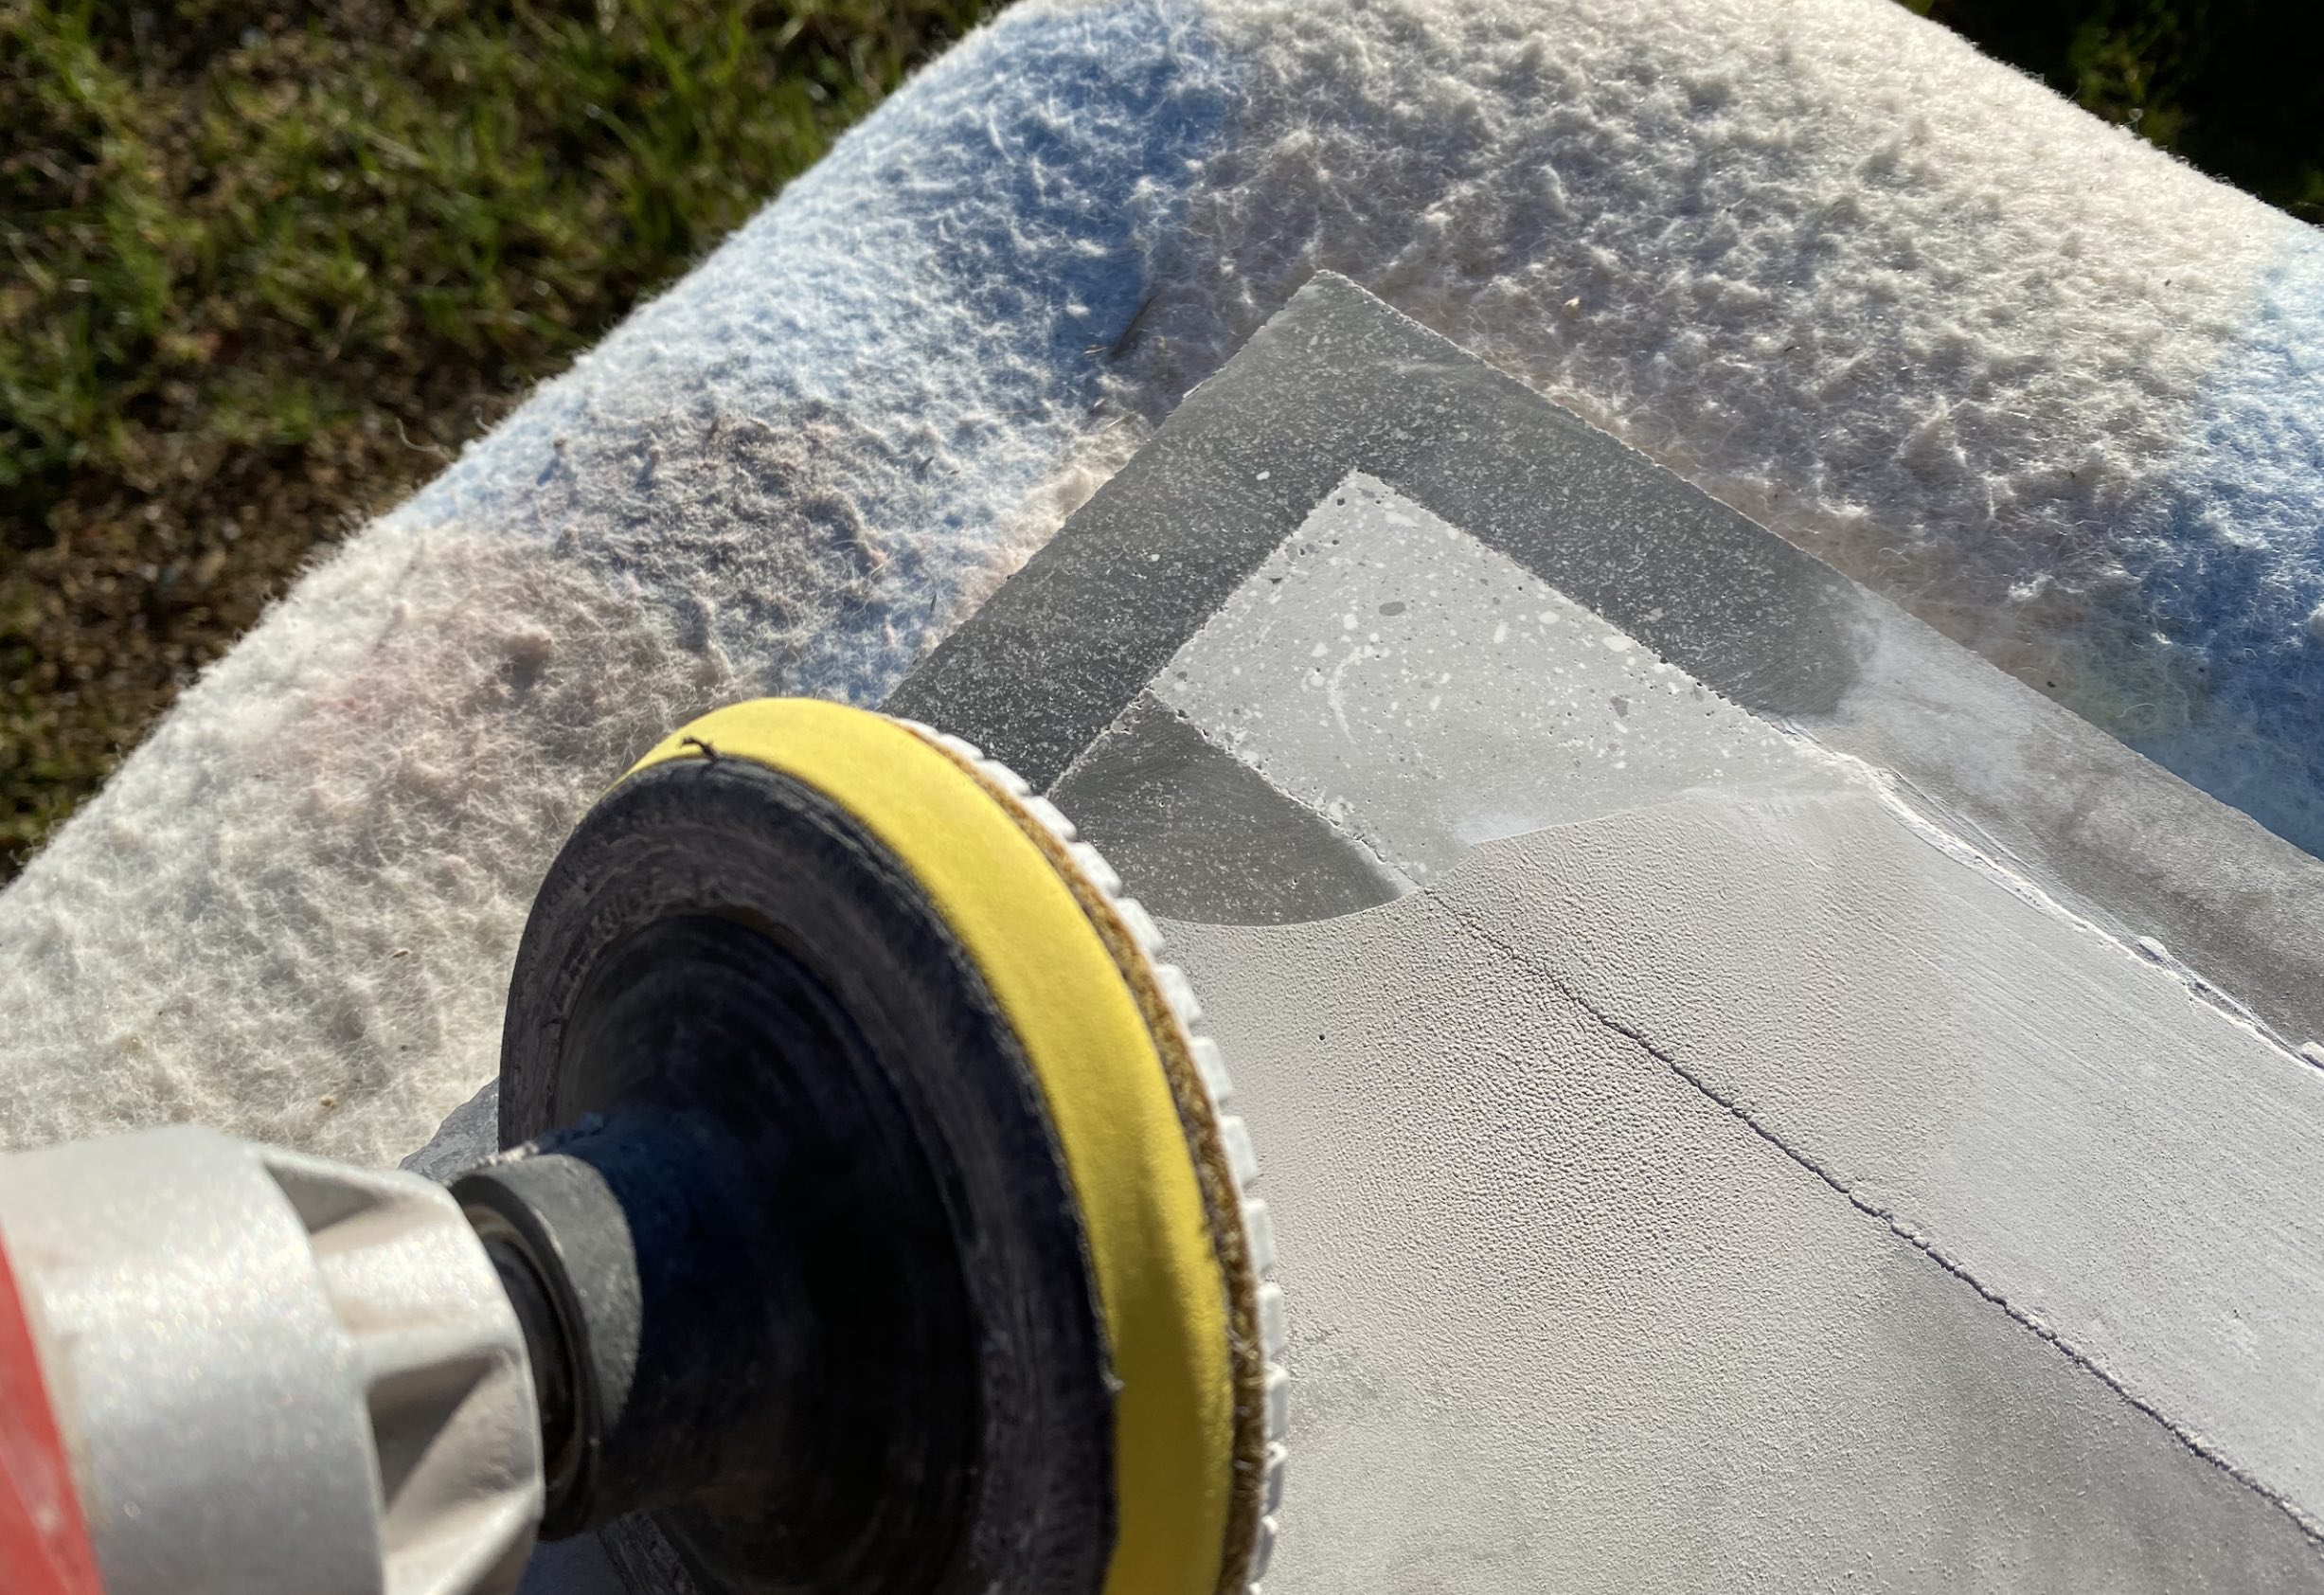
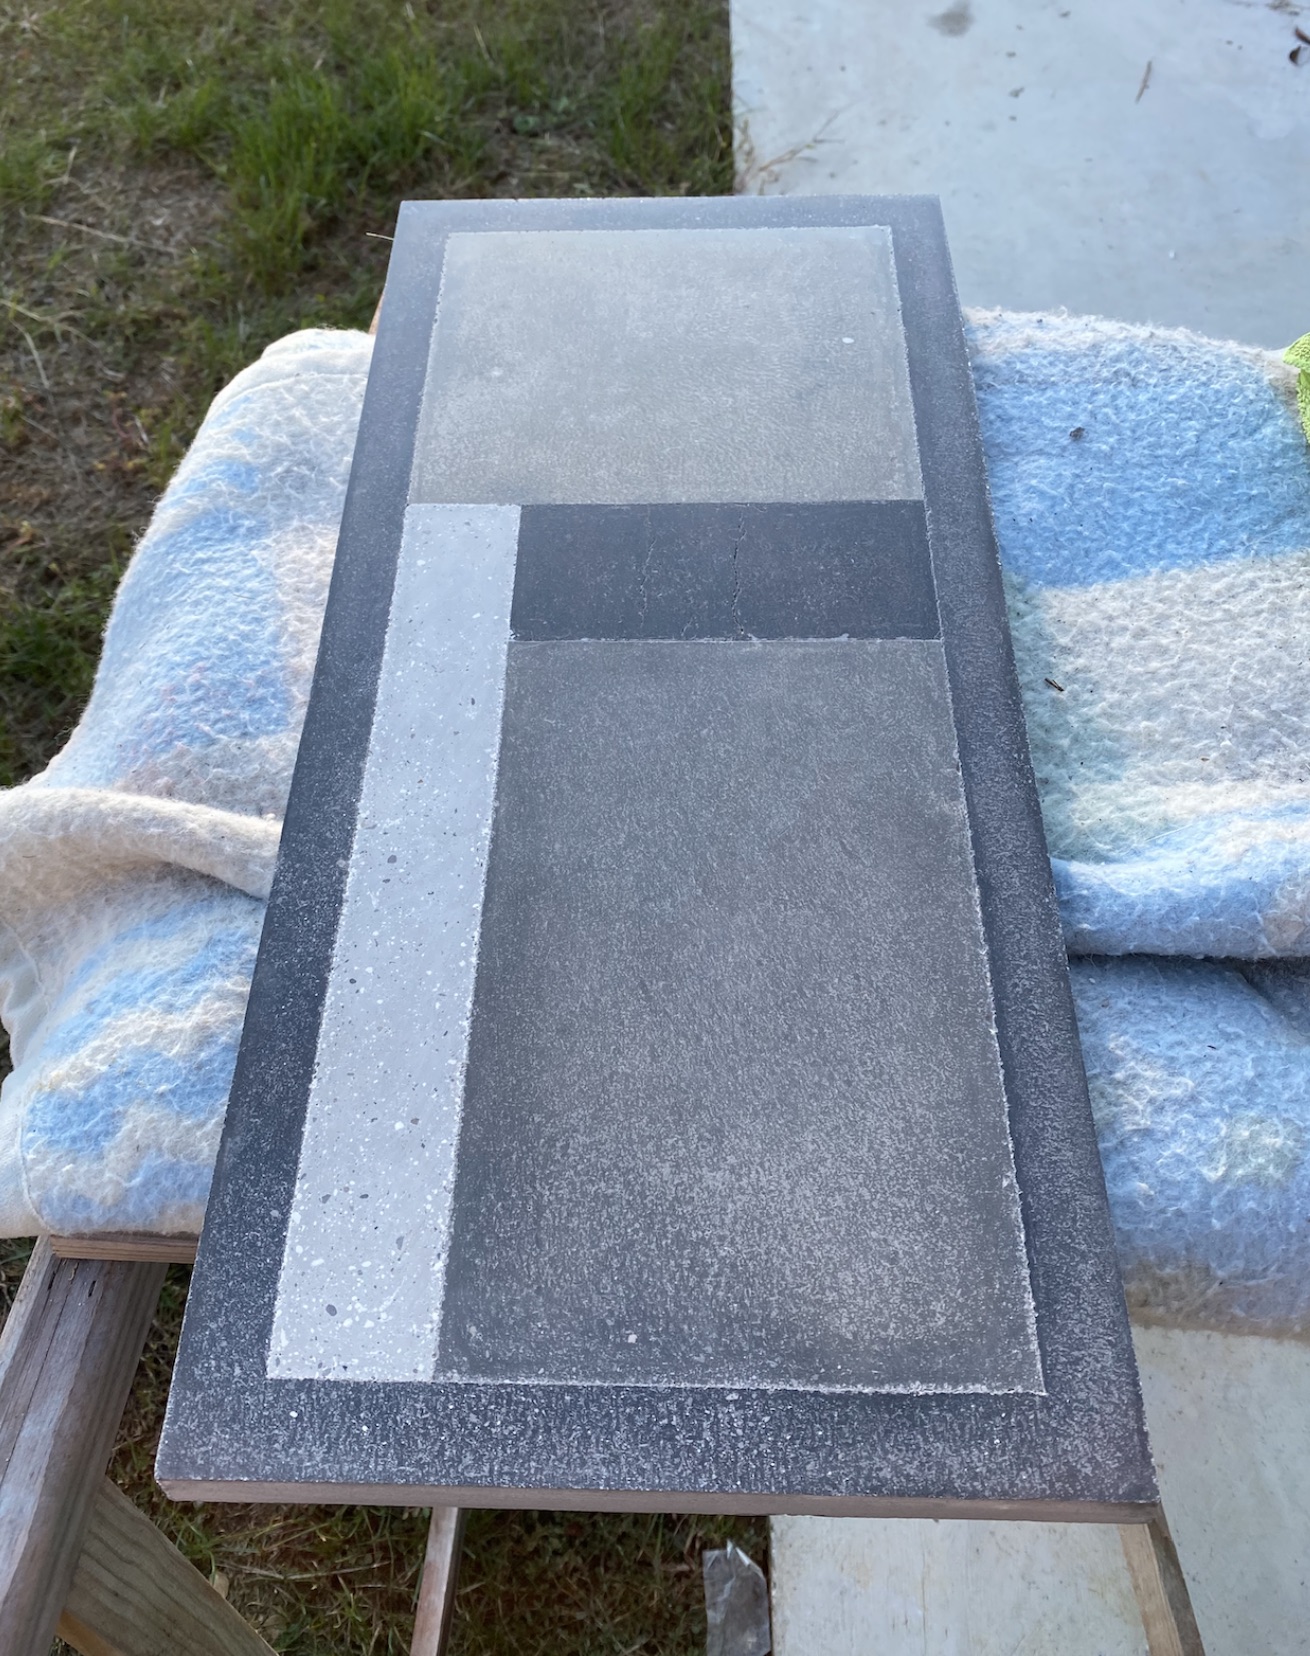
Here’s how it looks after polishing with a diamond pad with a low grit:
After treating the painting with 4 different diamond pads (going up by the grit number), the polishing process is done.
The surface is now delightfully shiny, and has an oddly satisfying smoothness to it.
At this point the painting contains some dust in the pores of the concrete. To remove dust and other particles caught on the surface, I wash it under shower, and rinse with micro fibre cloth afterwards, then let it dry.

Coating
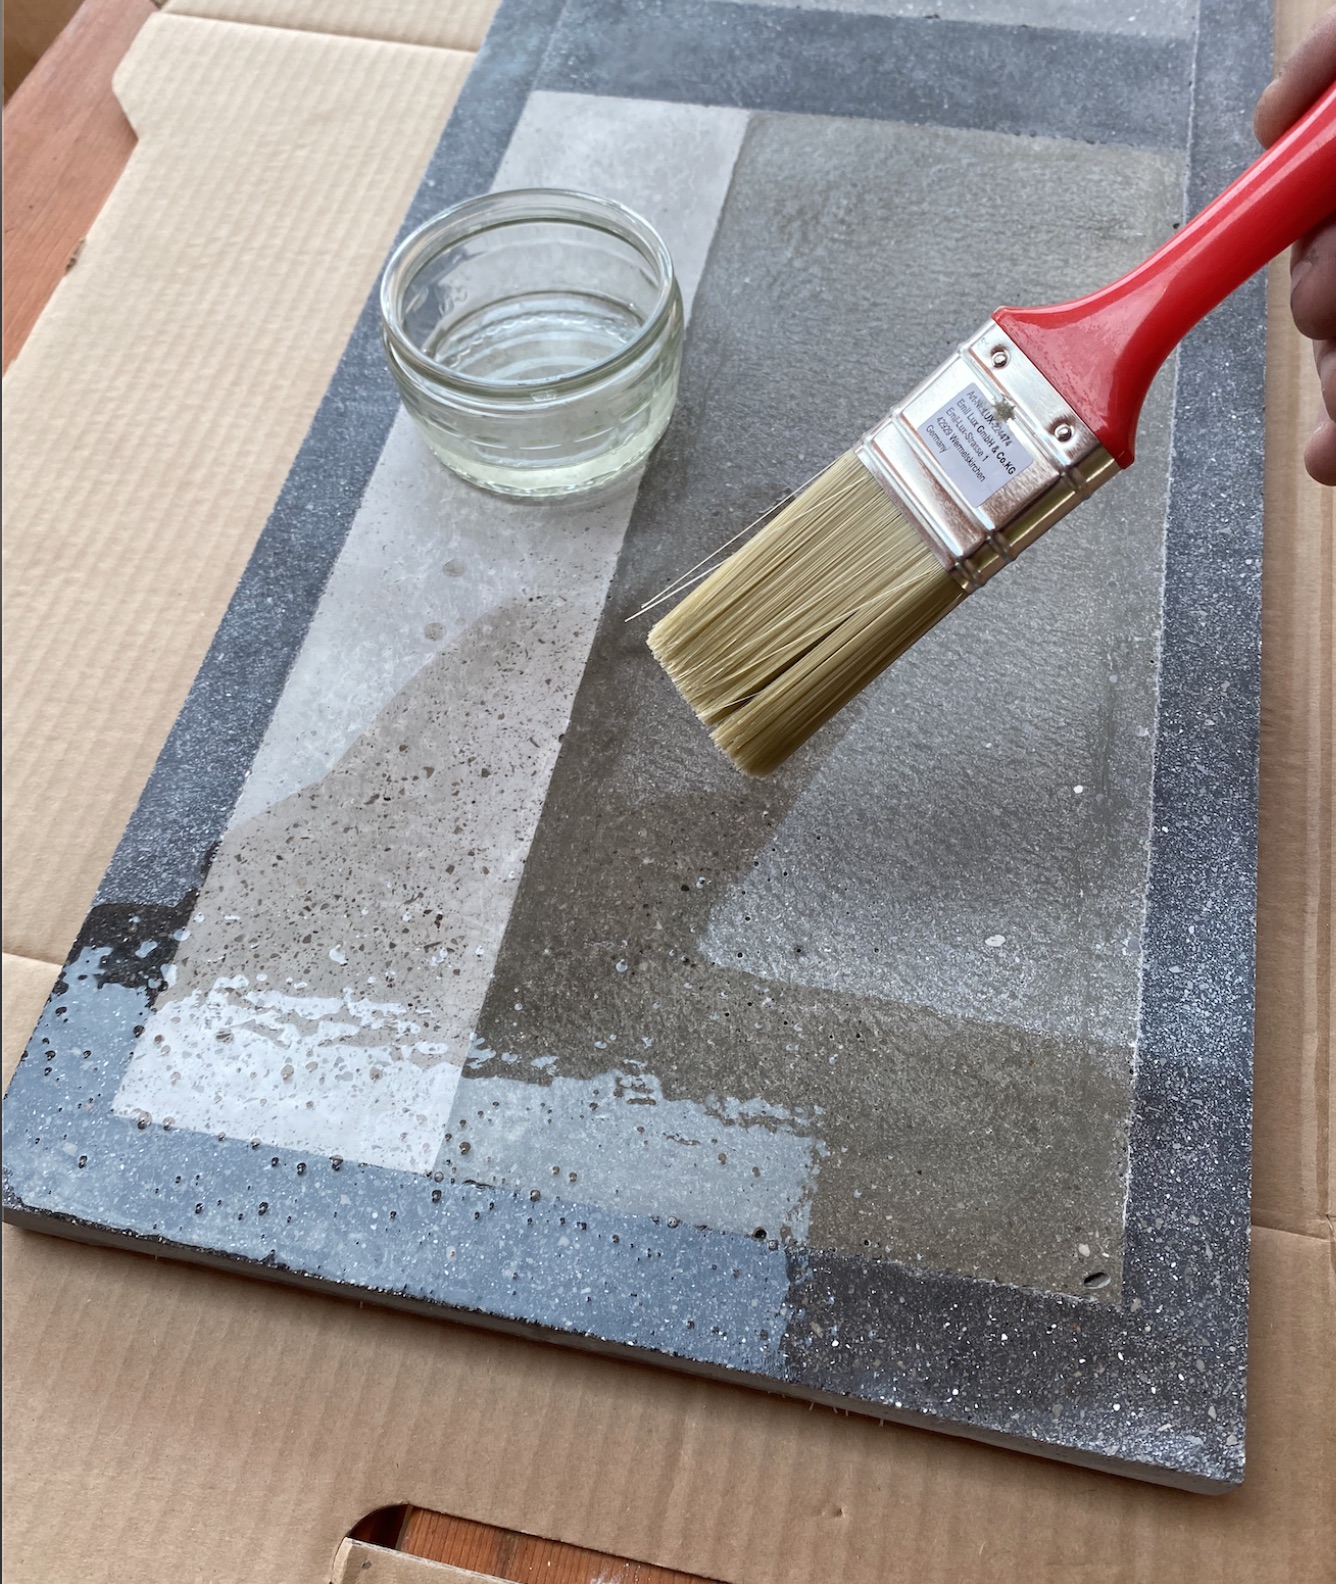
To emphasize colors, achieve better contrast, even out the hues, and make the surface more dust resistant, I use a mix of a coating agent made from acrylic resins, and ethyl acetate which is used to dillute the coating agent.
In the past I experimented a lot with different coatings, but this mix works best for beautiful polished concrete finish which sits perfectly in the middle in the spectrum from matte to shiny.
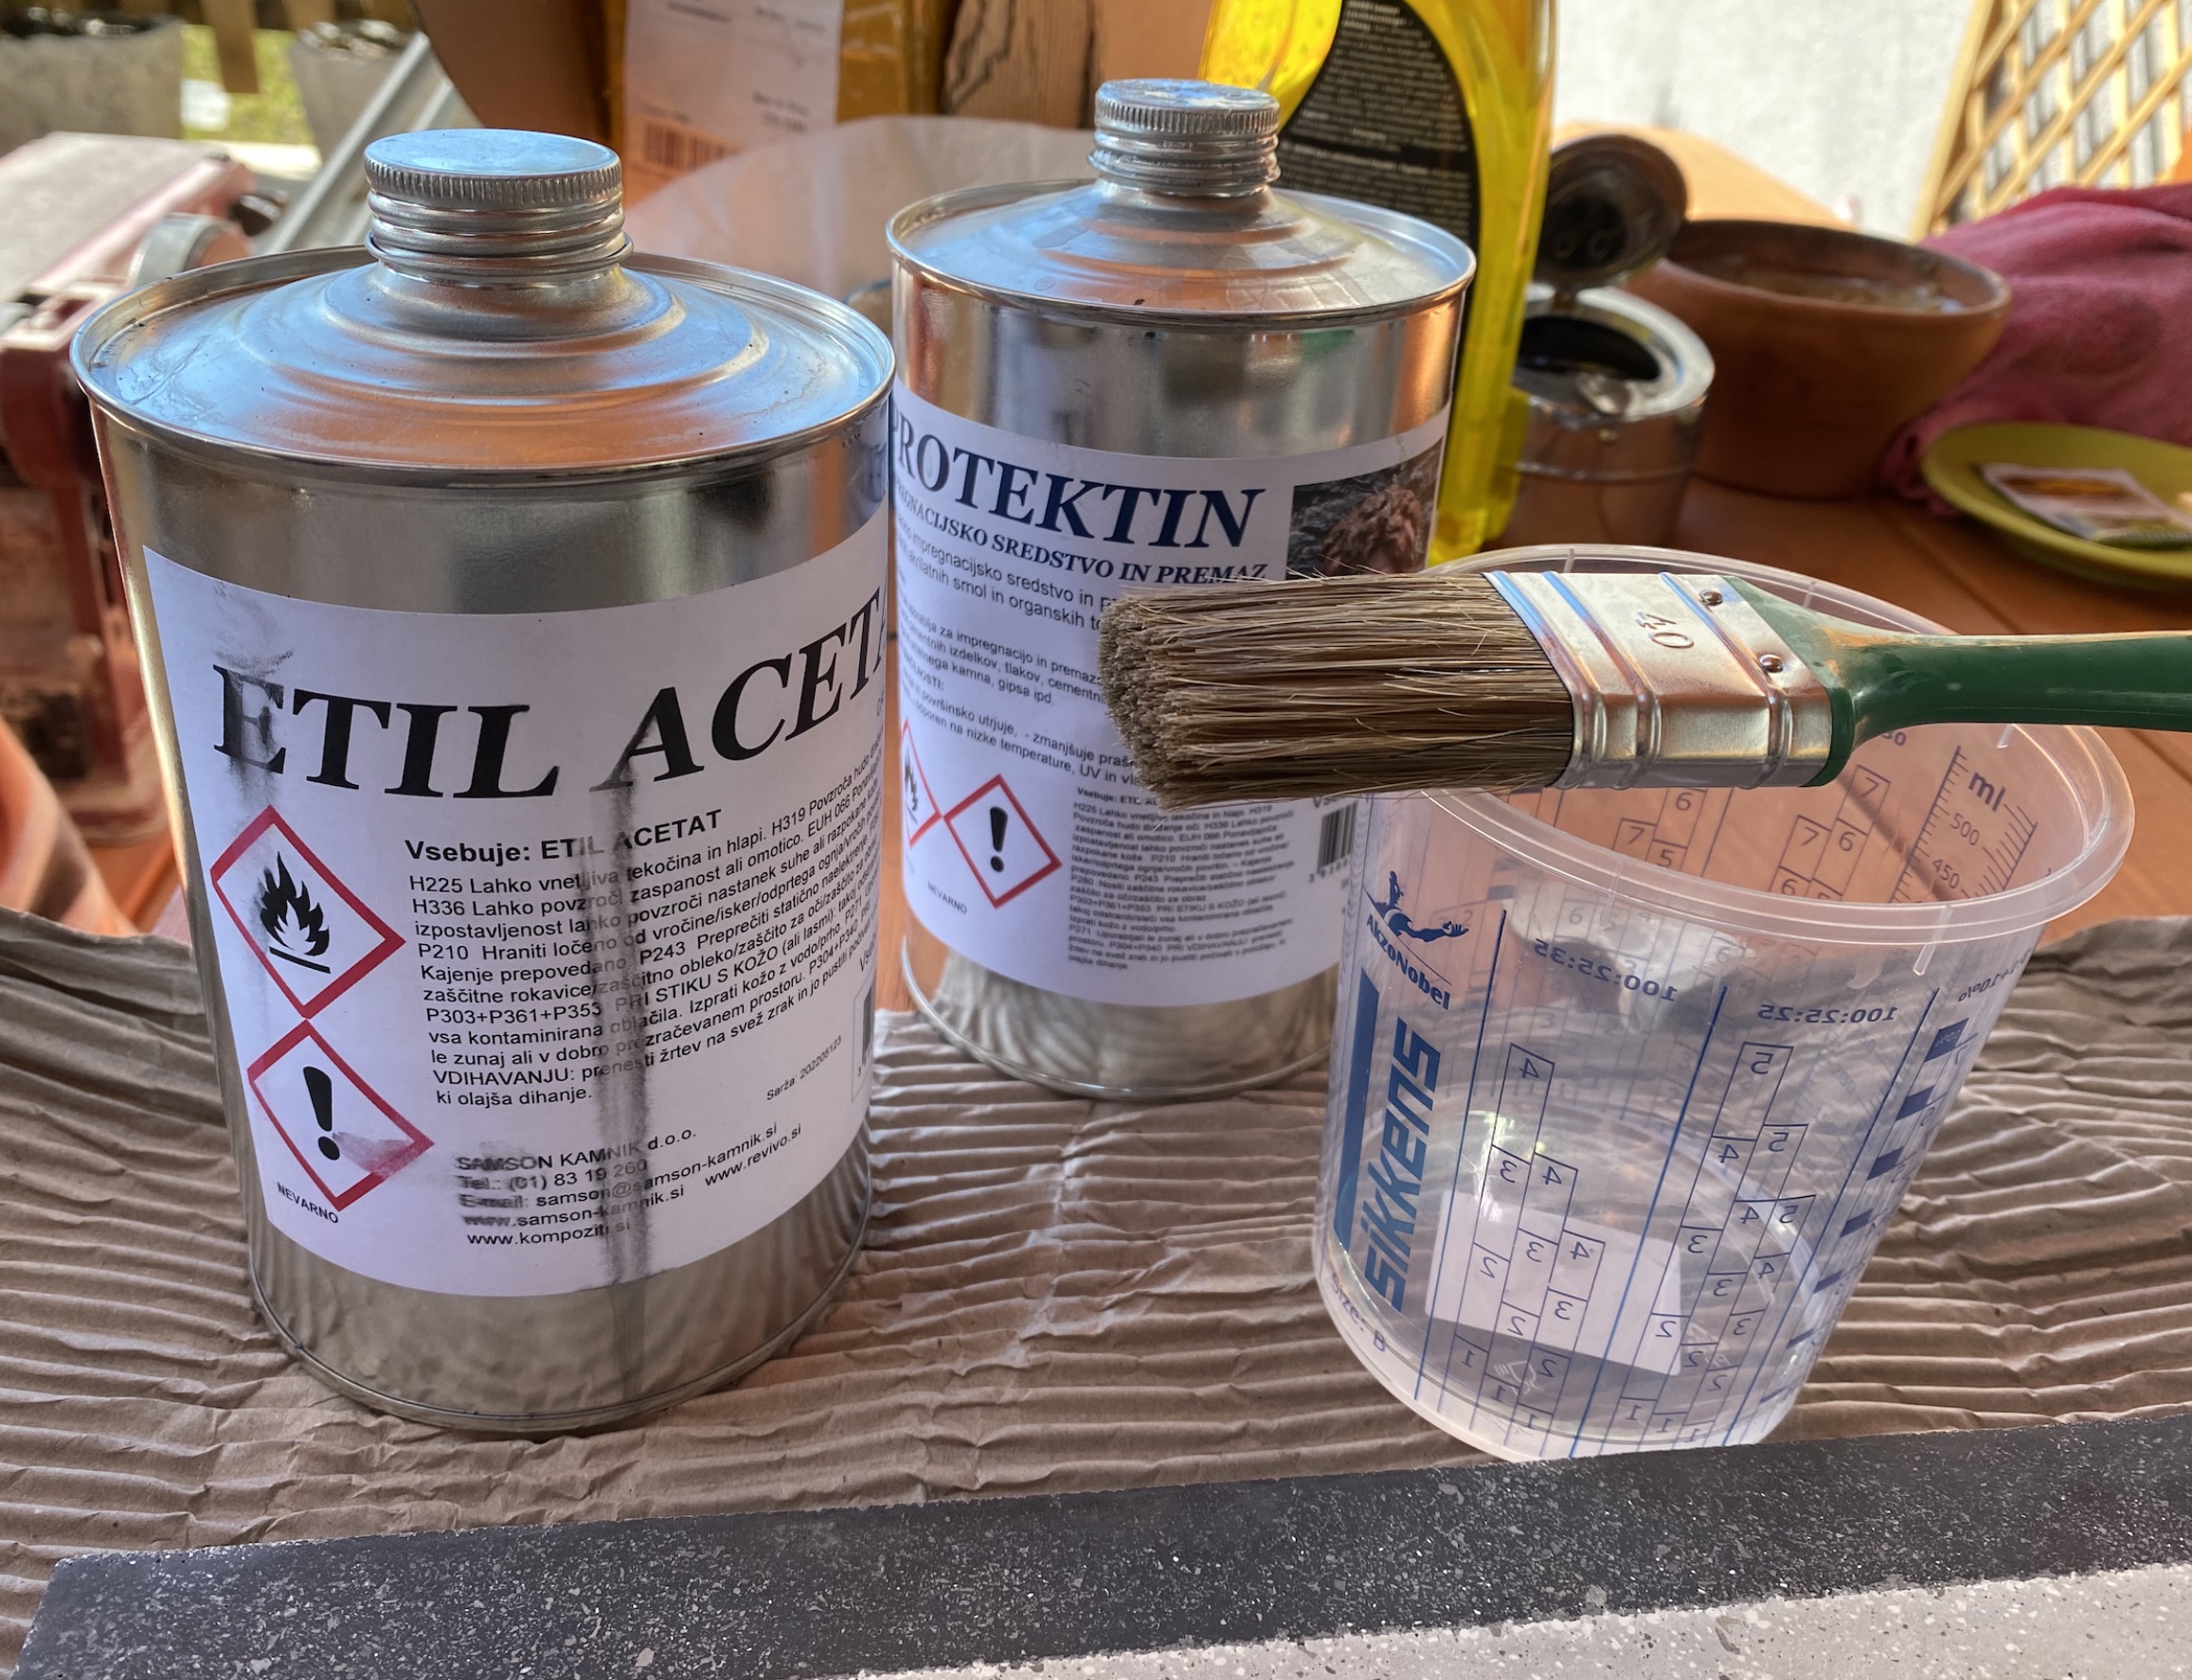
The painting receives 2 layers of coating which dries in a couple minutes. The art piece is now ready to be hanged and enjoyed.